By Marianela.Jan 19, 2023

Today the management of logs it has become in a challenge for applications that has to handle millions of records. Having logs and analyze them is an important tool when is necessary to solve the occurrences of the errors. We can investigate the origin of the problems searching on logs, because in the logs we will always have a trace of the events that happened in the system. Analyze them can help us to find the solution to many darks issues that sometimes happens in a production enviroment.
Datadog has become is one the most used tools for managing and analice logs , metrics and many more variables on a system. Today we are going to use Datadog for handle the logs produced by a PHP application on a window machine.
Sing in Datadog and install the Datadog Agent
In order to acces to datadog and try the free trial we will access https://www.datadoghq.com/product/log-management/ and press the Try Free button
Enter your personal data email, name and phone number
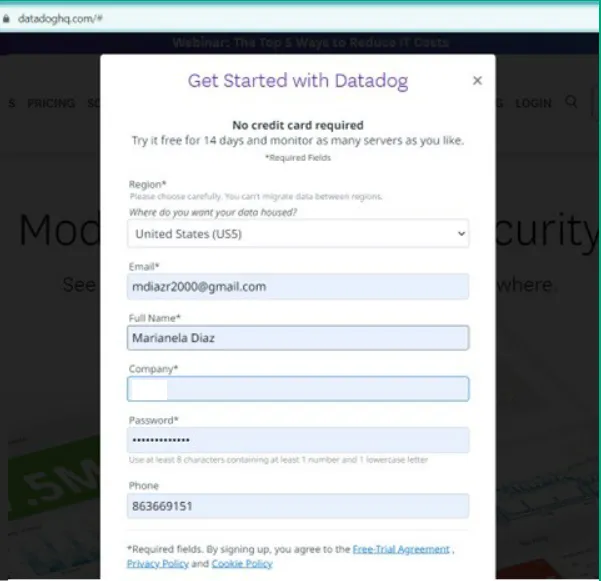
You will be redirected to a browser
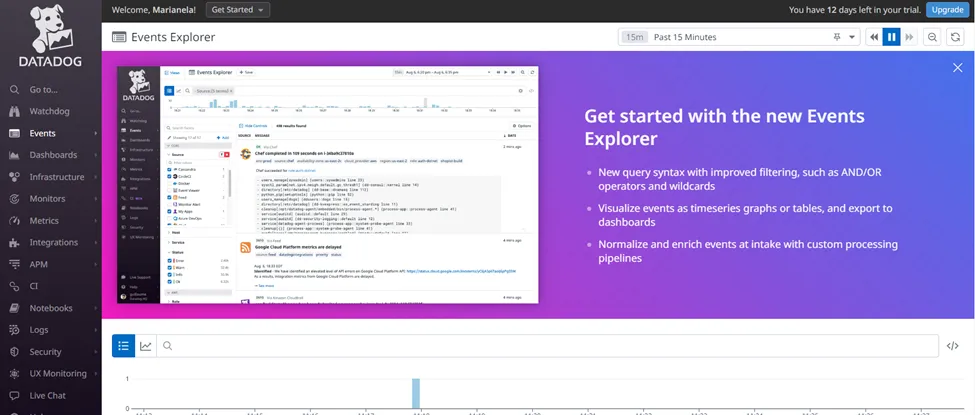
It is necessary now to download the agent. We will use window but we can install, on docker, over EC2 and in many other environments. The main purpose of this agent is be a link between the source of logs and the Datadog server. While the agent is running our locals logs will be send it to the Datadog server and in there we can access, make query and build views using its data.
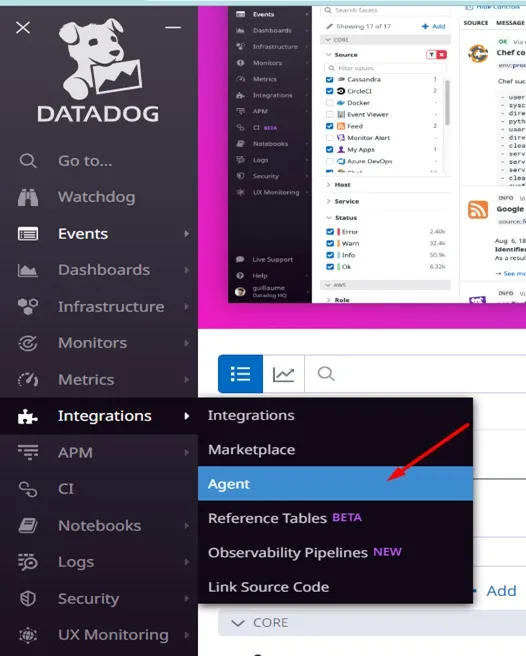
In order to download the agent in our datadog web we will going to on the left menu to the option Integrations-> Agent
In this case we will use the version agent for window
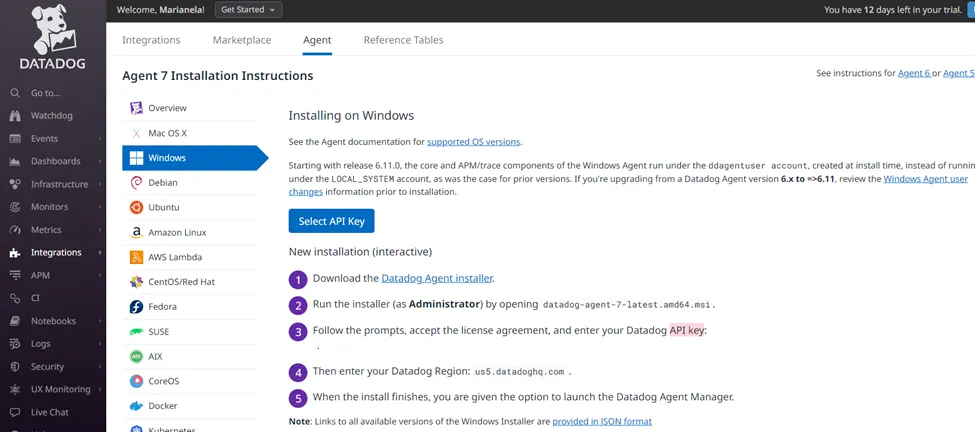
Using this url you can download the version Agent for window https://s3.amazonaws.com/ddagent-windows-stable/datadog-agent-7-latest.amd64.msi
When we have finished of install the user agent, our URL assigned will receive the report of an agent and it shows the next picture
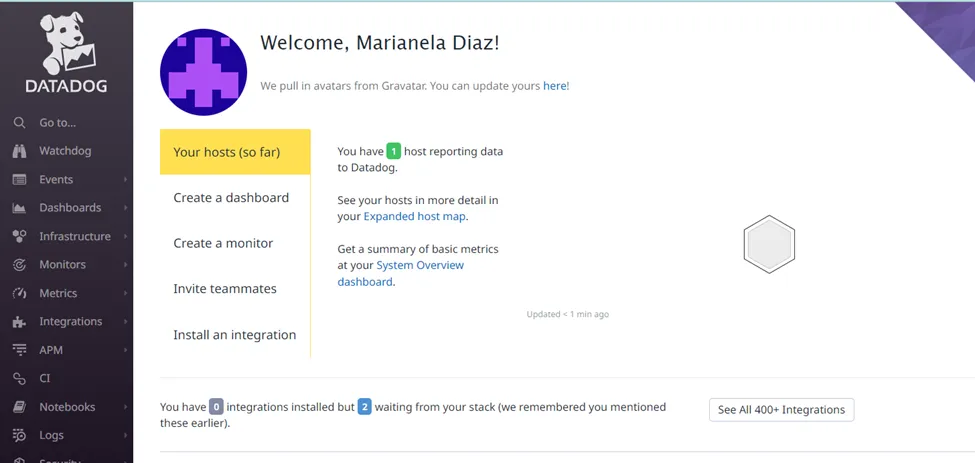
Sending our logs from our local machine to Datadog server using DatadogAgent
For doing this we have to open our local agent and set logs_enabled property to true
Right click on agent Datadog client and press configure, it will open a window on your default browser. Go to settings it will load the datadog.yml configuration. This is the main file when we can change and set global parameters to the Agent. Having opened the datadog.yml file on the agent application, scroll down an locate the key logs_enabled, and set it to true.
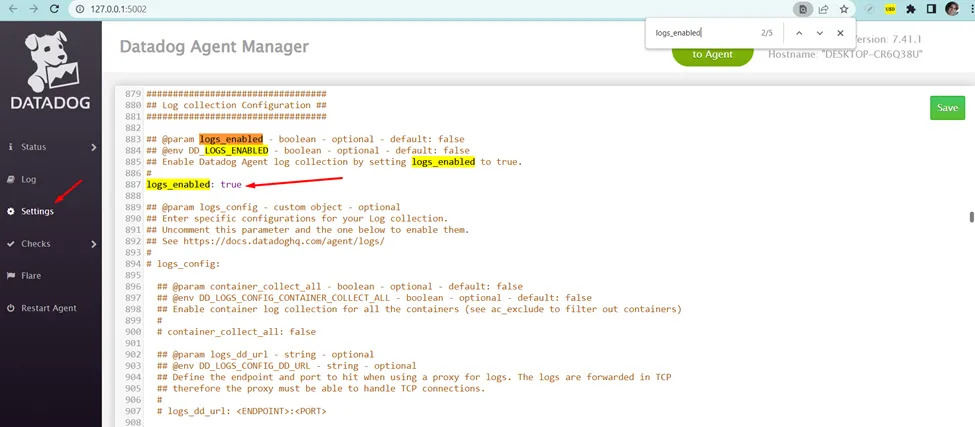
Restart the agent
Check that the agent has the logs enabled
Go again to the agent Datadog browser and press status and check that the Logs Agent is ready
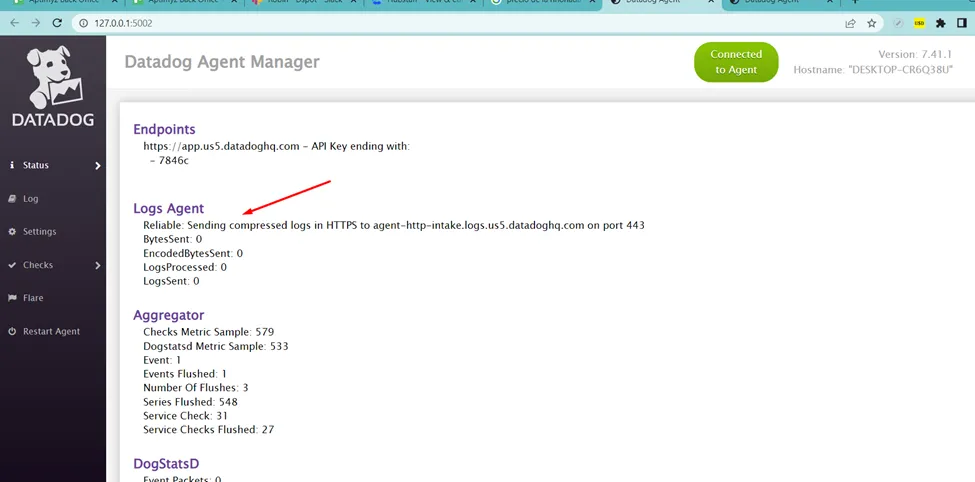
PHP manage log
In our app we have to do the necessary things to save our logs into a file. The agent will take that file and send the logs to the Datadog server. In this example the logs file will be saved inside our app in a file named audit.log
Configure Datadog agent to add a custom log location
Close the agent
Goes to C:\ProgramData\Datadog\conf.d and add the required permissions on window to access the folder conf.d
In order to set up a custom log collection to tail your log files and send new logs to Datadog we have to do the following steps:
- Create a
php.d/folder in the folderconf.d/. - Create a
conf.yamlfile inphp.d/with the following content:
As an example in our case the log files will be located on D:\\Project\\PHPApplication\\tmp\\logs\\audit.log
#Log section
logs:
# — type : file (mandatory) type of log input source (tcp / udp / file)
# port / path : (mandatory) Set port if type is tcp or udp. Set path if type is file
# service : (mandatory) name of the service owning the log
# source : (mandatory) attribute that defines which integration is sending the log
# sourcecategory : (optional) Multiple value attribute. Can be used to refine the source attribute
# tags: (optional) add tags to each log collected
– type: file
path: “D:\\Project\\PHPApplication\\tmp\\logs\\audit.log”
service: “PHPApp”
source: “php”
sourcecategory: “sourcecode”
#For multiline logs, if they start with a timestamp with format yyyy-mm-dd uncomment the below processing rule
#log_processing_rules:
# — type: multi_line
# pattern: \d{4}\-(0?[1–9]|1[012])\-(0?[1–9]|[12][0–9]|3[01])
# name: new_log_start_with_dateL
Restart your Agent to take into account this new configuration. Going to check and looking for the key php.d and checks that is shown
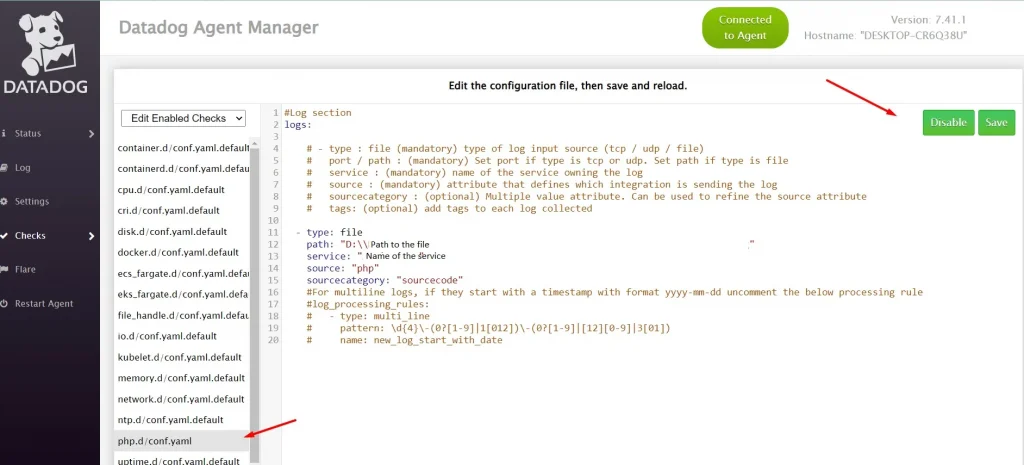
Now is time to go to our log files and give it access to read and write to user dduseragent. This user was created by the agent when it was installed and it will access to our log and do the job to send the logs to our Datadog Server
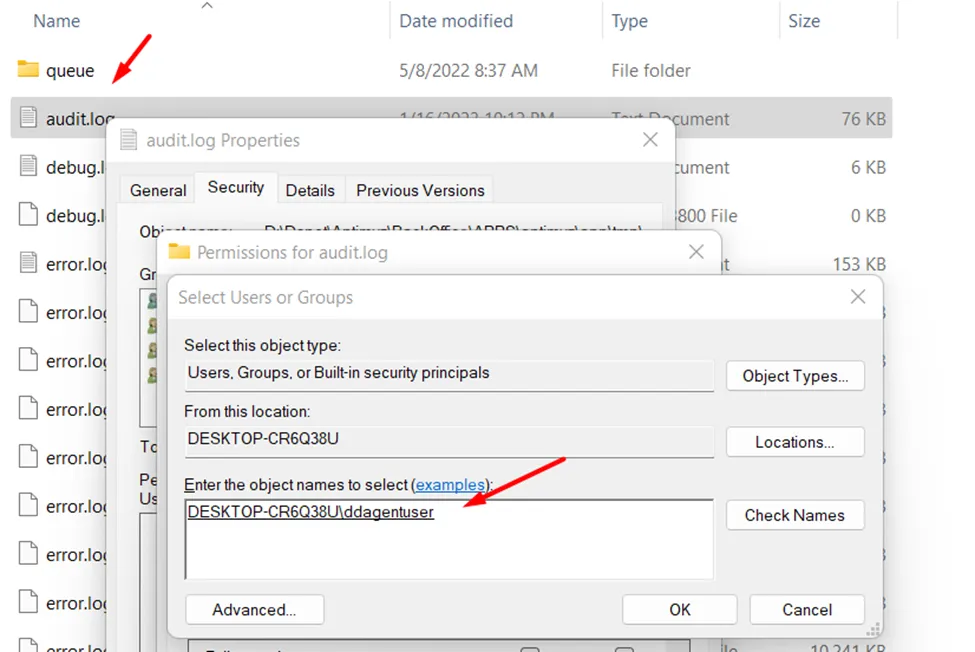
Now that our agent has access to the log file we can go and try to modify the audit.log adding a new entry by using our PHP application.
In the moment when the file changes, the agent takes the logs and send them to the Datadog server.
You can check the send of the data going to our local agent interface pressing on status and locate the Logs Agent, you can see in this case, it has read a number of LogsProcessed: 12
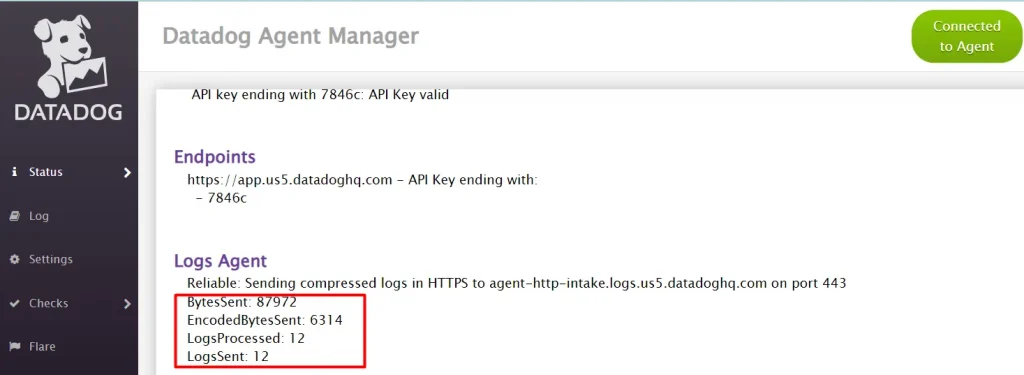
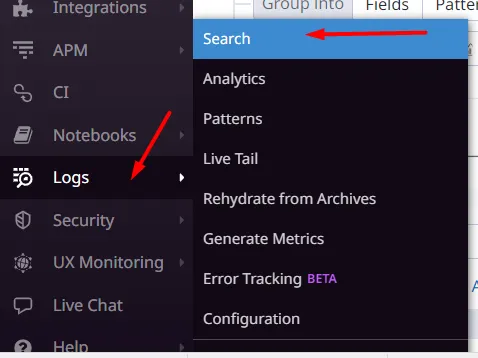
In our Datadog server URL we will try to locate those 12 logs. We will go to Logs -> Search option using the left menu
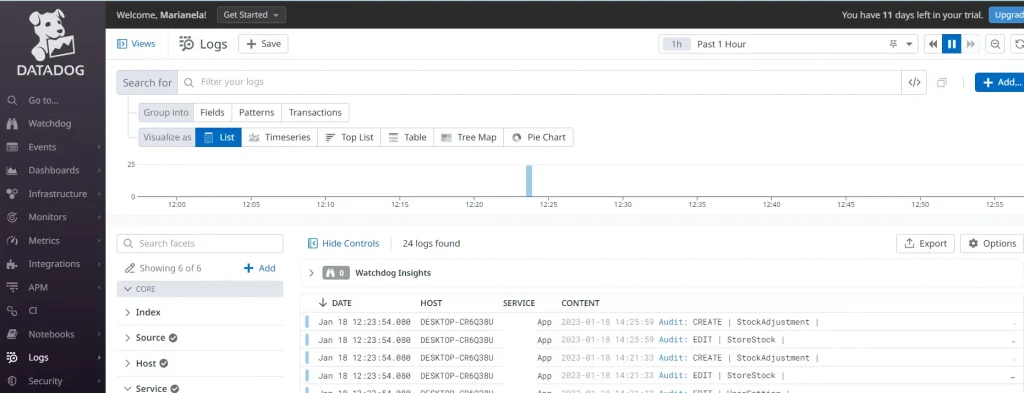
And we can see in the Logs explorer our logs have been sent
I hope that you have enjoy as I this travel to start to use this wonderful tool Datadog and see you in the next articles 😉
The original article published on Medium.
