By Raj Kumar.May 04, 2023
💡 Building a CI/CD Pipeline Project with Git, Docker, SonarQube, Jenkins, and Nexus.
In this Project, we need to create 3 instances
Instance Name = Project -1 → Git, Docker, Maven, Jenkins
Instance Name = Project -2 → SonarQube
Instance Name = Project -3 → Docker, Nexus
STEP 1: Create t2.medium instance on Ubuntu 20.04 LTS (project-1)
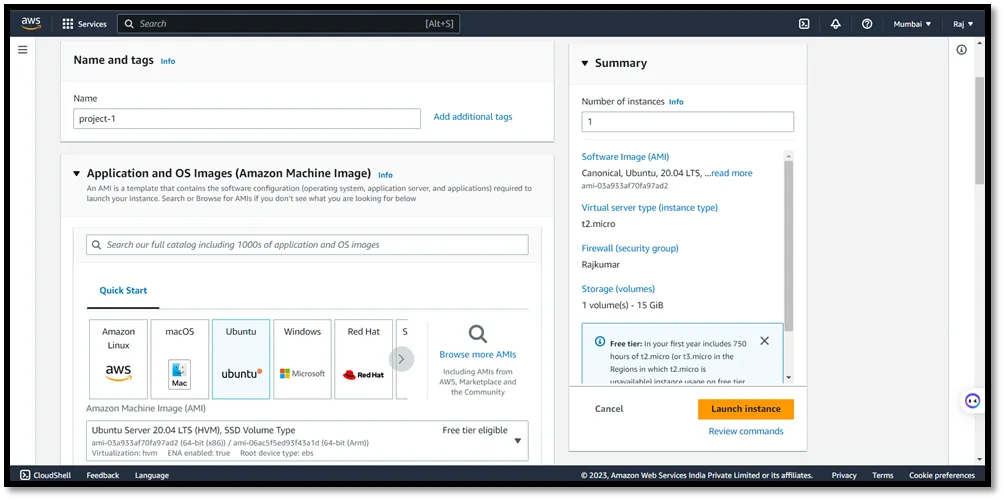
STEP 2: Connect with terminal and login as Ubuntu user and switch to root user using sudo su command
STEP 3: Packages to Install — Git, Docker, Maven, Java-11, Jenkins
apt update
apt install git docker.io –y
systemctl start Docker
cd /opt
wget <http://mirrors.estointernet.in/apache/maven/maven-3/3.8.5/binaries/apache-maven-3.8.5-bin.tar.gz>
tar -xvxf apache-maven-3.8.5-bin.tar.gz
apt search openjdk
apt install openjdk-11-jdk-headless
#To install jenkins
curl -fsSL <https://pkg.jenkins.io/debian-stable/jenkins.io-2023.key> | sudo tee   /usr/share/keyrings/jenkins-keyring.asc > /dev/null
echo deb [signed-by=/usr/share/keyrings/jenkins-keyring.asc]   <https://pkg.jenkins.io/debian-stable> binary/ | sudo tee   /etc/apt/sources.list.d/jenkins.list > /dev/null
sudo apt-get update
sudo apt-get install jenkins
jenkins –version
STEP 4: Hit instance IP along with port number 8080 in web
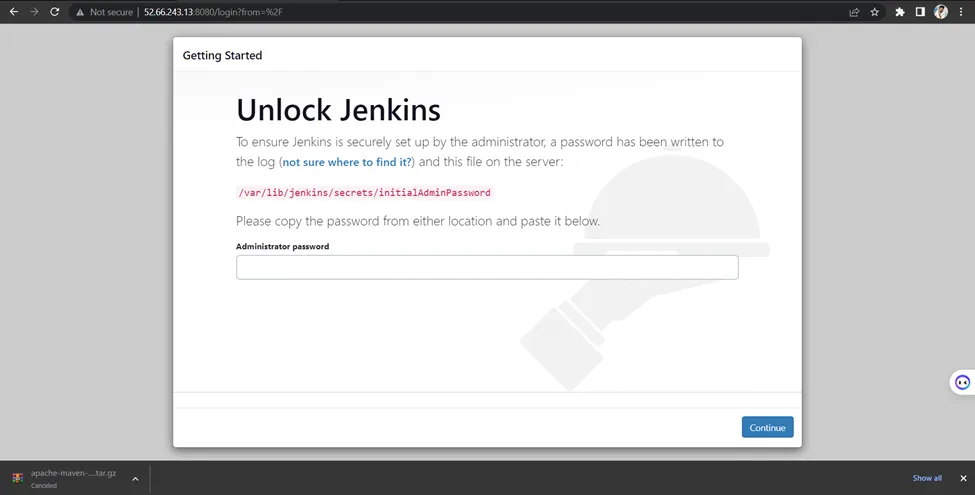

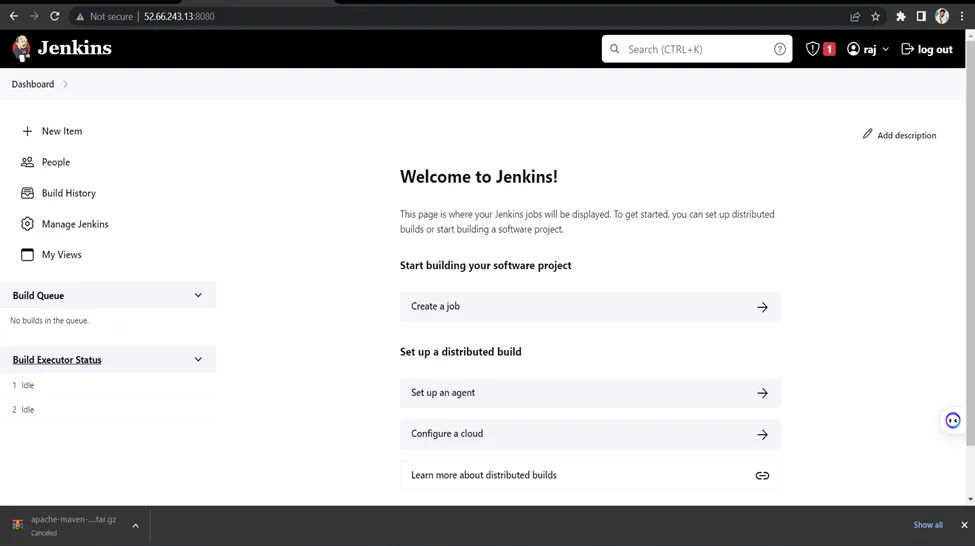
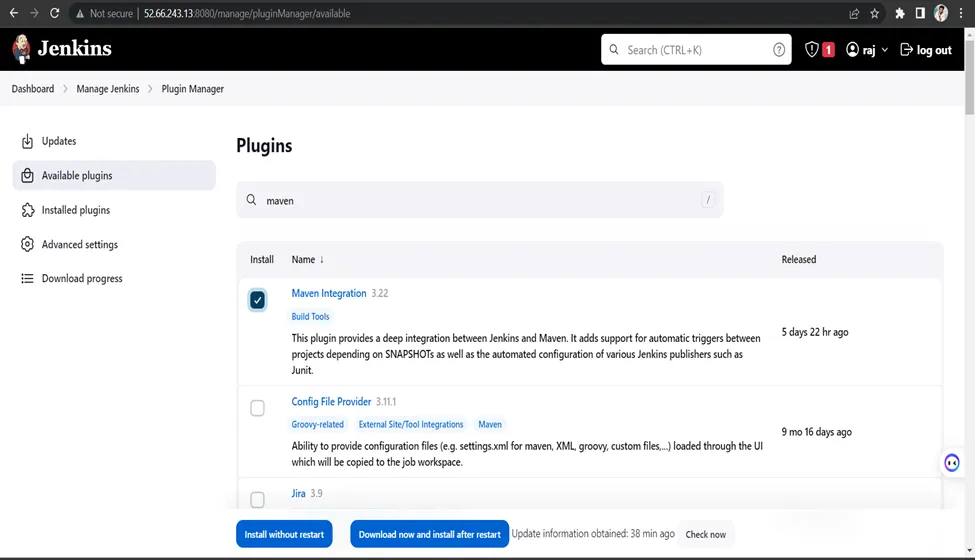
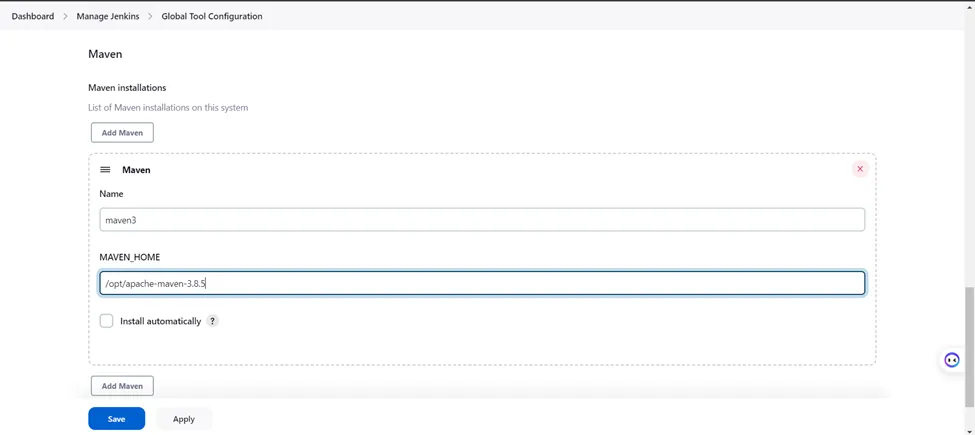
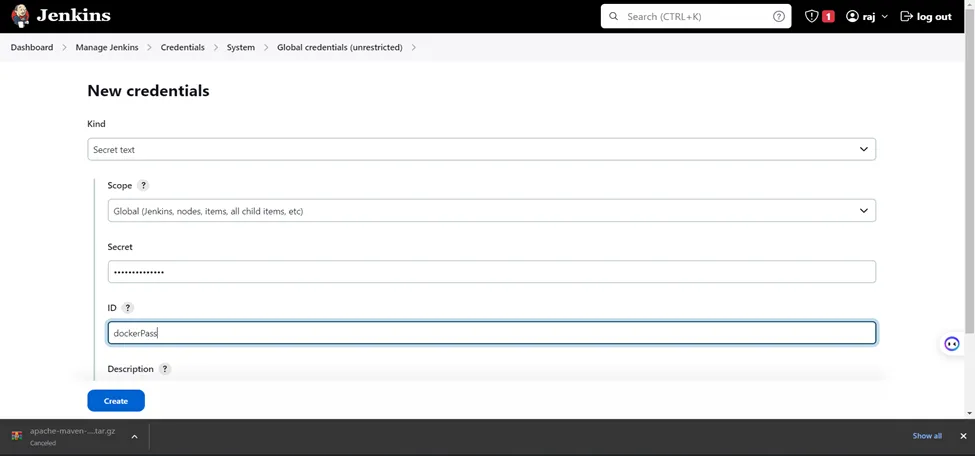
Step 5: Create Instance in t2.medium (2 CPU, 4Gib Memory) for SonarQube installation (Project -2)
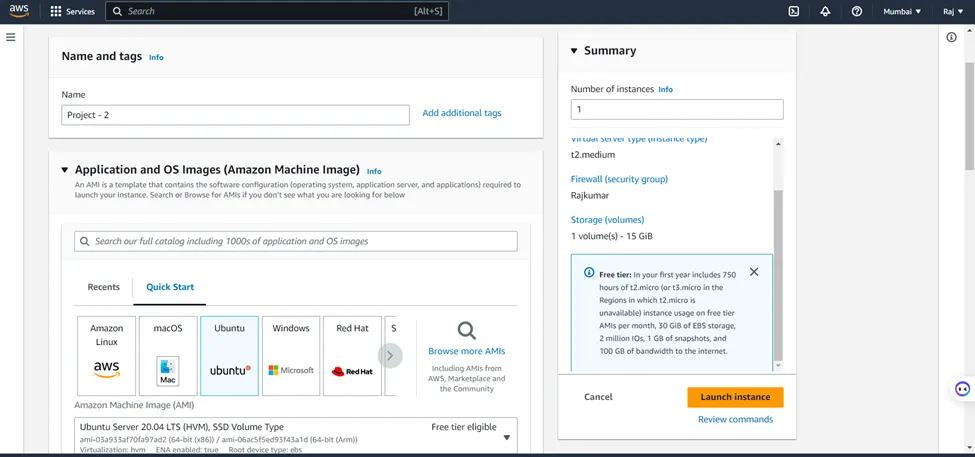
STEP 6: Install Java which is pre-requisite for SonarQube
apt update
apt search openjdk
apt install openjdk-11-jdk-headless
java –version
STEP 7: Create Subnet groups with all availability zones
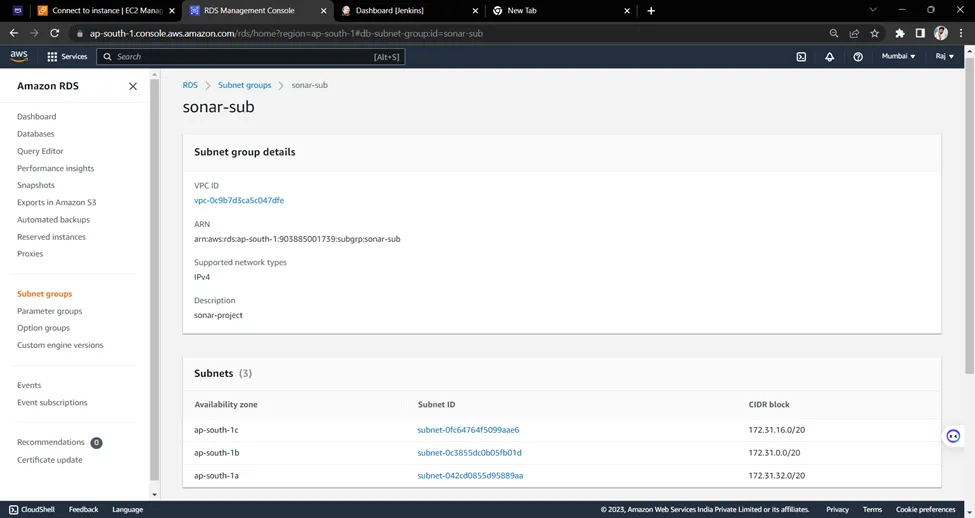
STEP 8: Create RDS
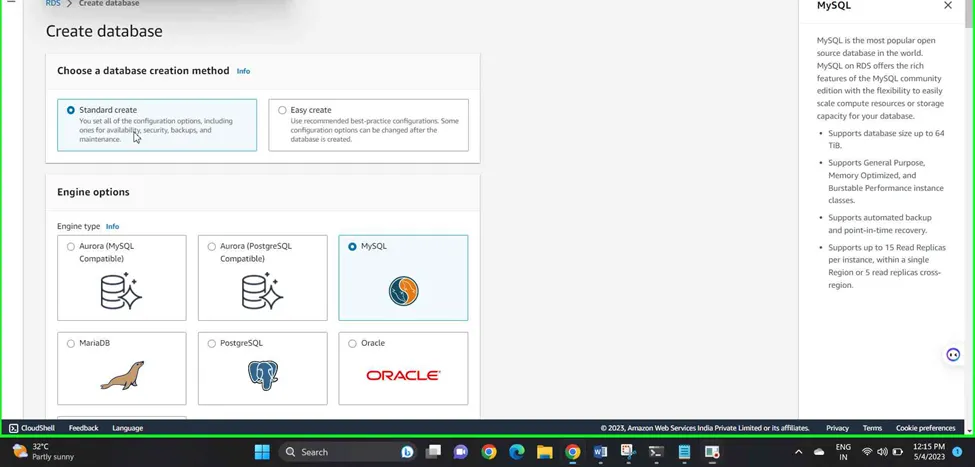
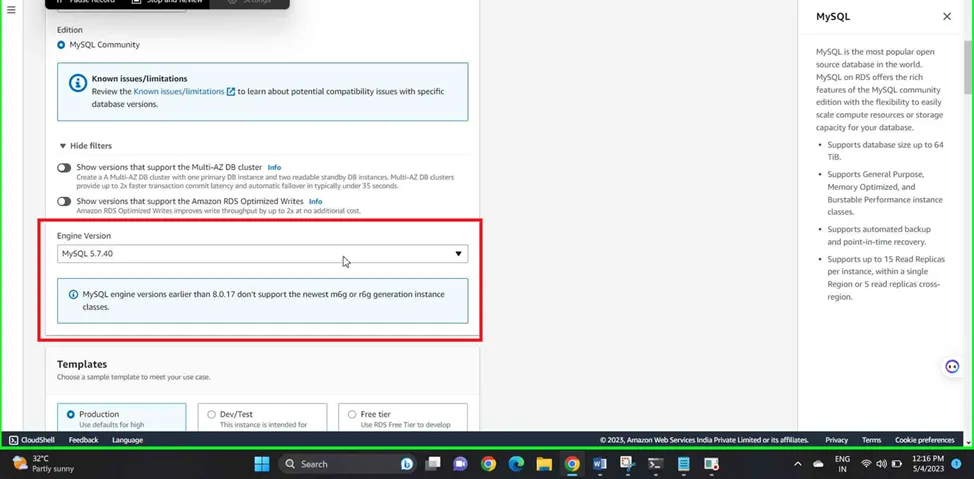
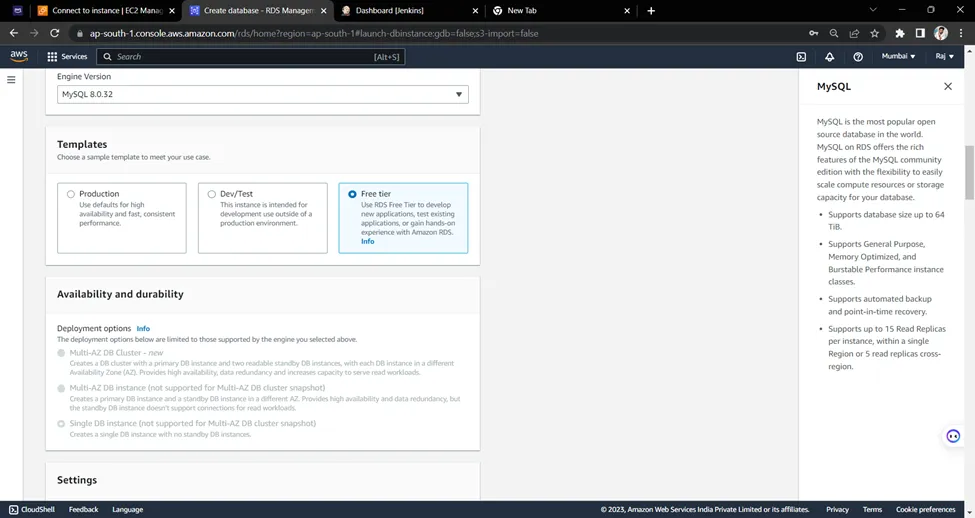
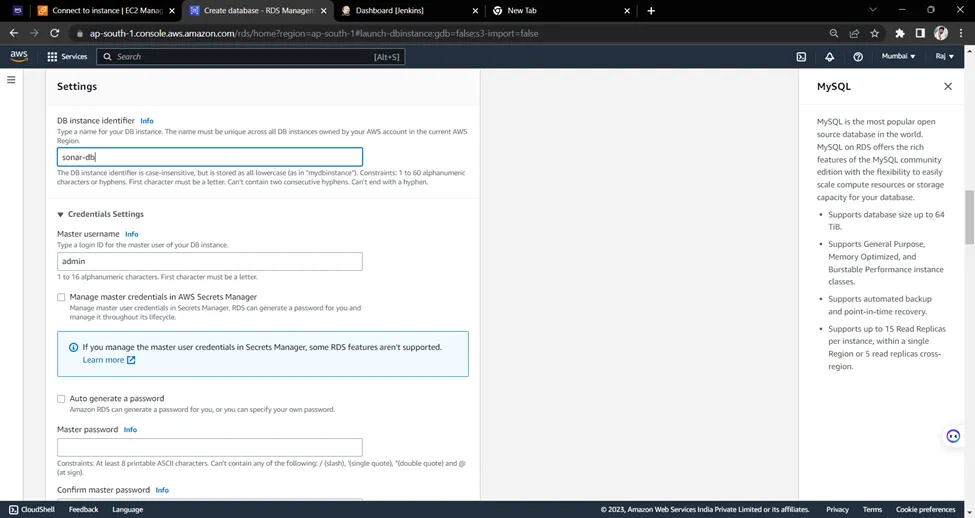
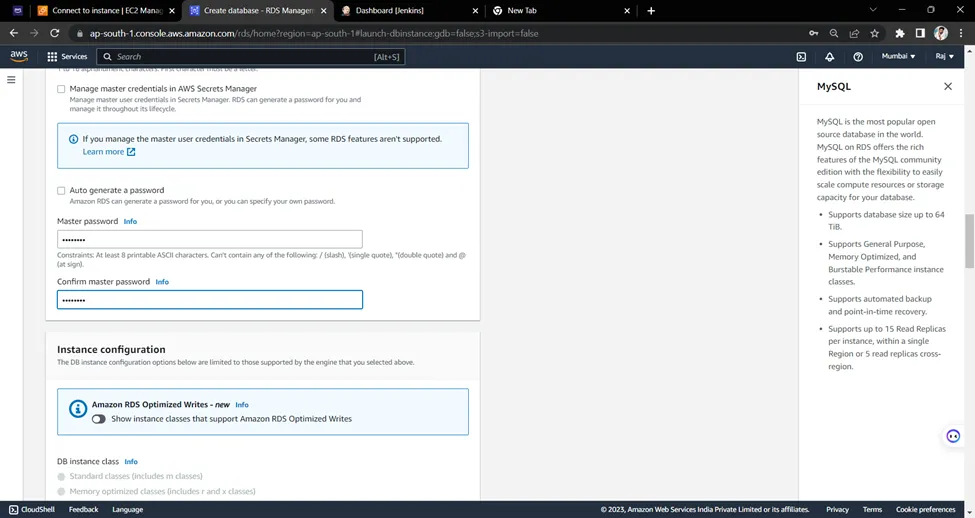
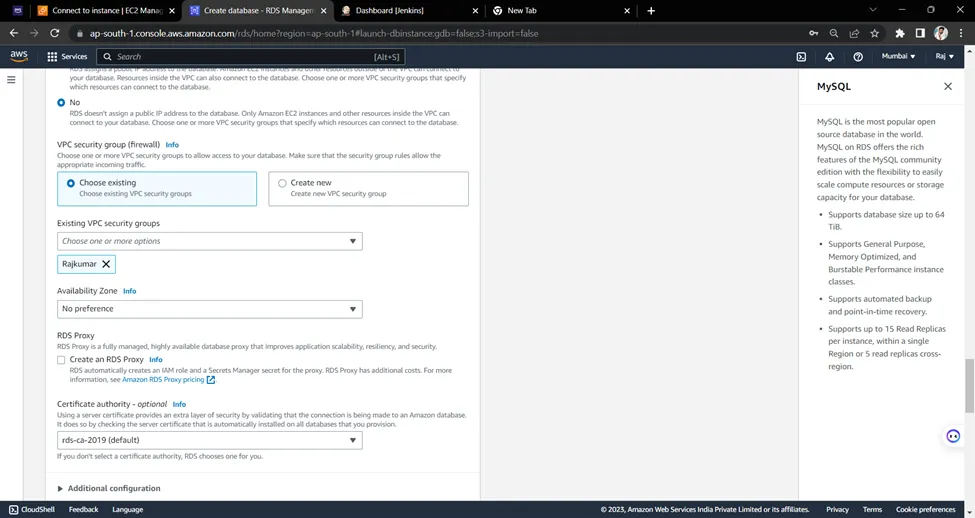
apt update
apt install mysql-server
mysql -h sonar-db.cfmucs0uutge.ap-south-1.rds.amazonaws.com -P 3306 -u admin –p
CREATE DATABASE sonar CHARACTER SET utf8 COLLATE utf8_general_ci;
CREATE USER sonar@localhost IDENTIFIED BY 'sonar';
CREATE USER sonar@'%' IDENTIFIED BY 'sonar';
GRANT ALL ON sonar.* TO sonar@localhost;
GRANT ALL ON sonar.* TO sonar@'%';
quit
STEP 9: Sonar Installation
cd /opt
wget  <https://binaries.sonarsource.com/Distribution/sonarqube/sonarqube-6.7.6.zip>
apt install unzip
unzip sonarqube-6.7.6.zip
STEP 10: Edit sonar config files
cd /opt/sonarqube-6.7.6/conf
vi sonar.properties
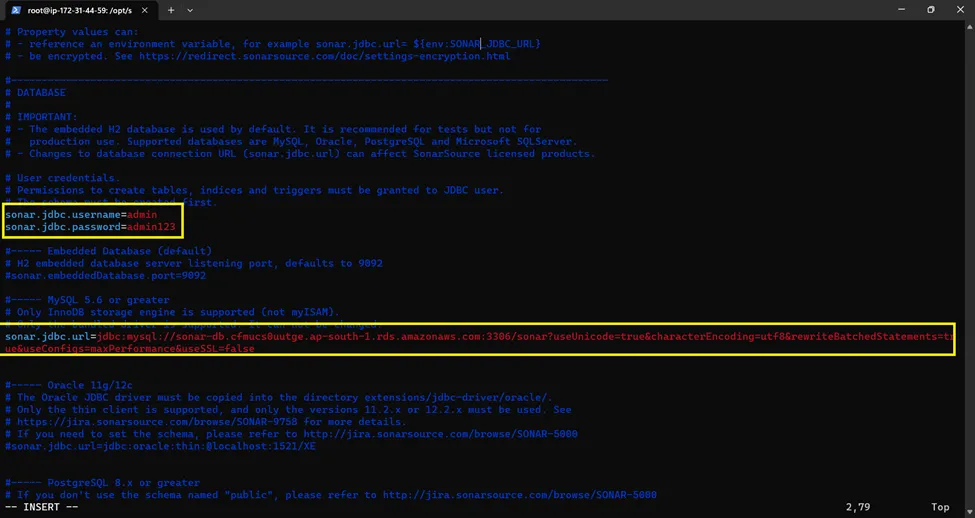
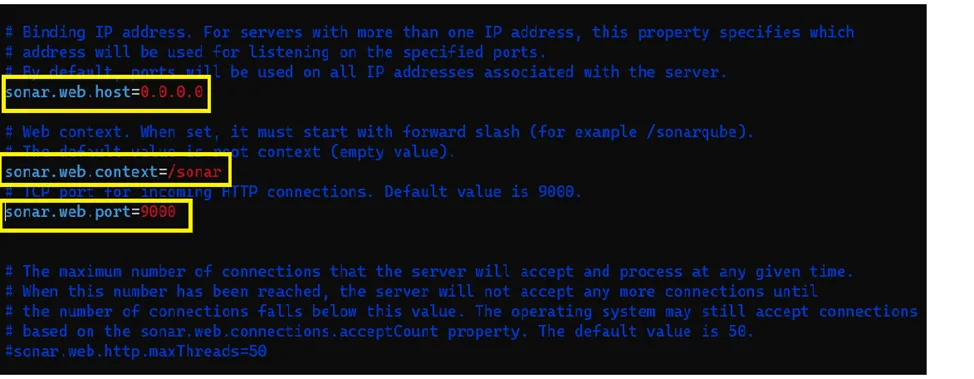
sudo update-alternatives --config java

vi wrapper.conf


chown -R ubuntu:ubuntu /opt/sonarqube-6.7.6

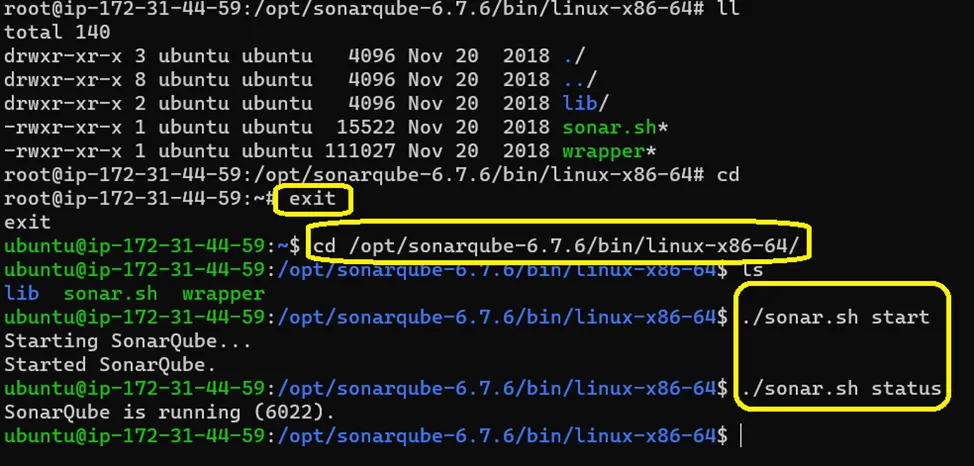


STEP 11: Install plugins for sonar
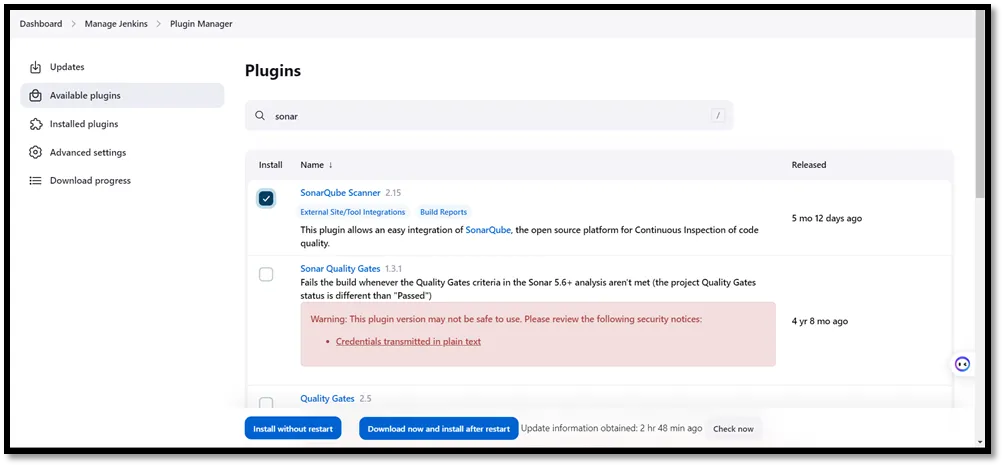
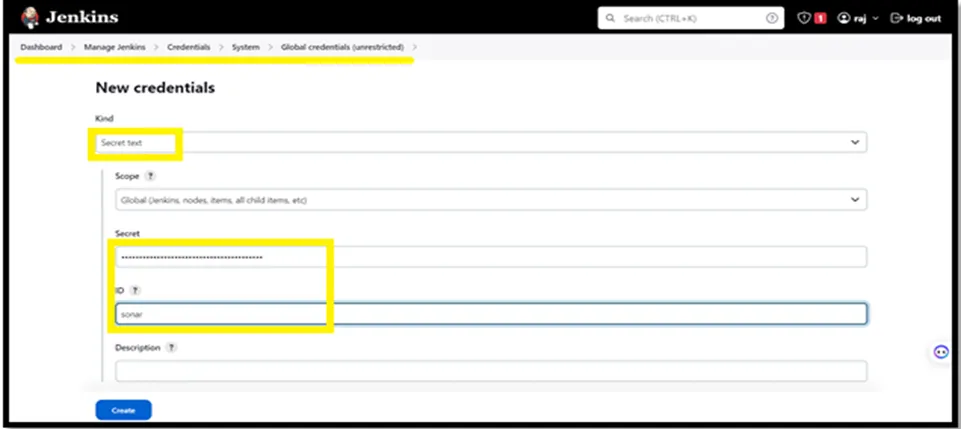
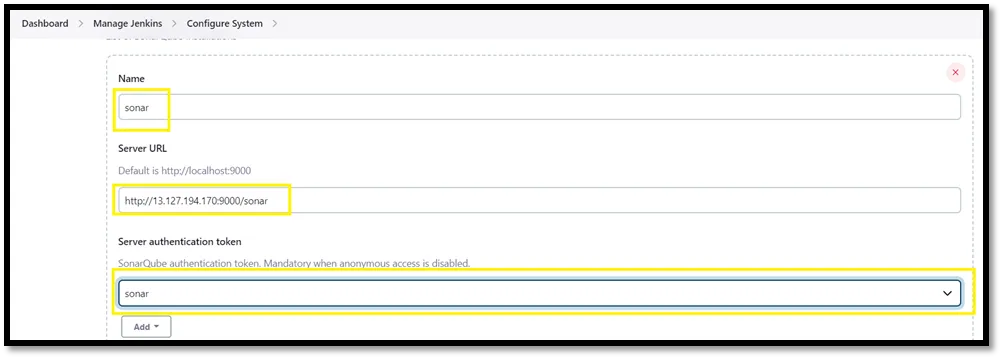
STEP 12: Create a new instance for Nexus (Project -3)
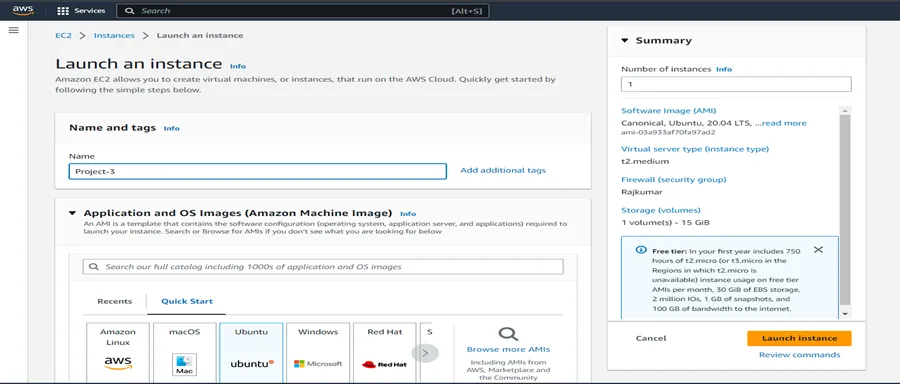
apt update
apt search openjdk
apt install openjdk-8-jdk
apt install docker.io
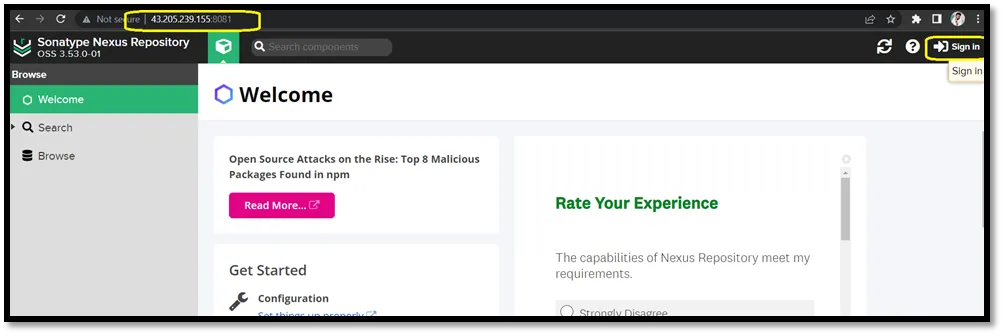
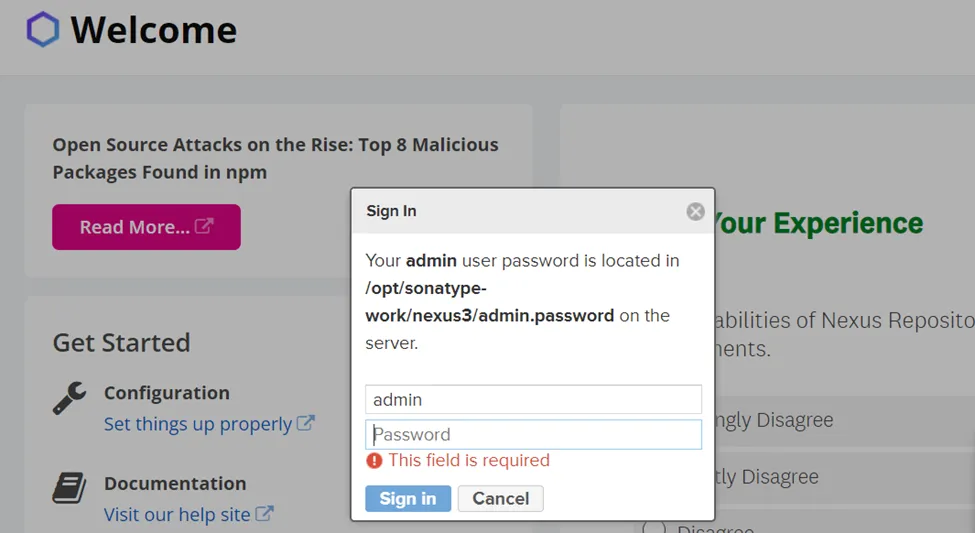
STEP 13: Install NEXUS
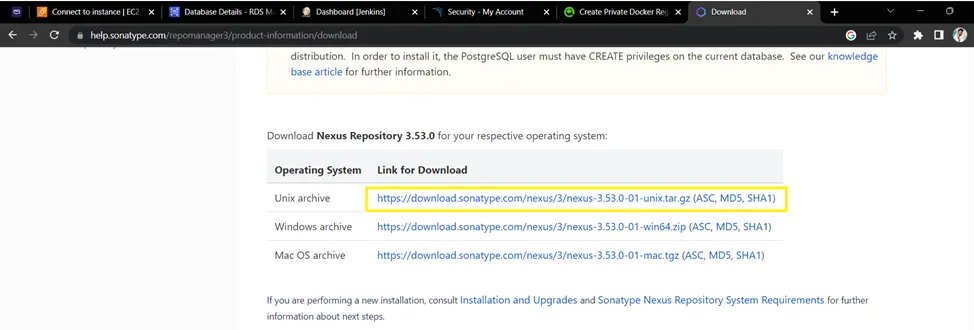
cd /opt
wget <https://download.sonatype.com/nexus/3/nexus-3.53.0-01-unix.tar.gz>
tar -xvf nexus-3.53.0-01-unix.tar.gz


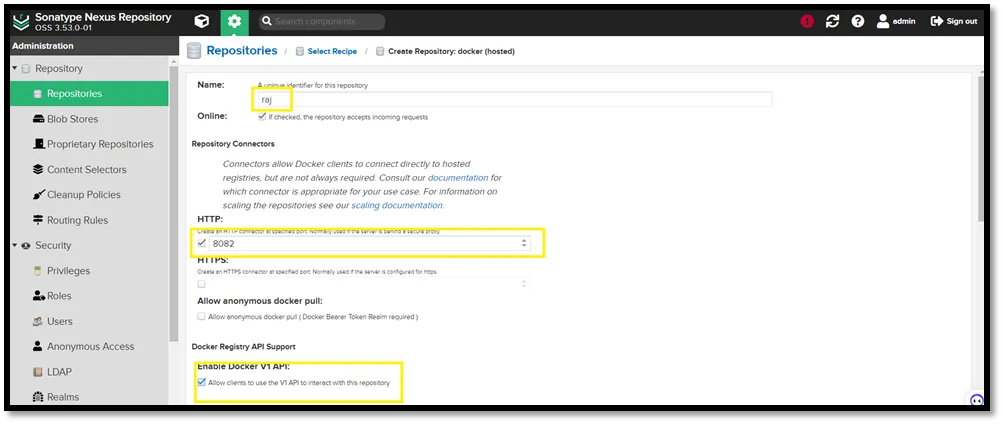
STEP 14: Select project-1 instance (where Jenkins and docker installed )
vi /etc/docker/daemon.json
{
        "insecure-registries" : ["nexus_instance_IP:docker_repo_port"]
}
service docker restart
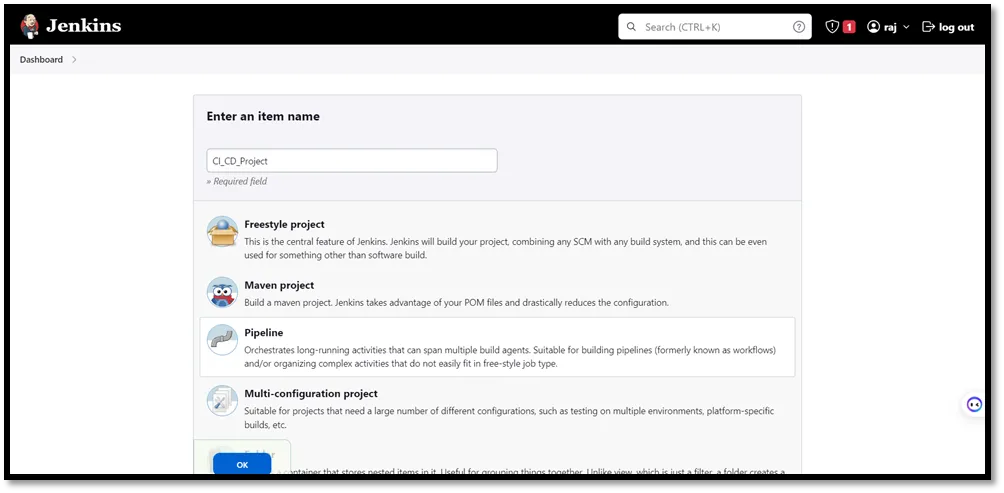
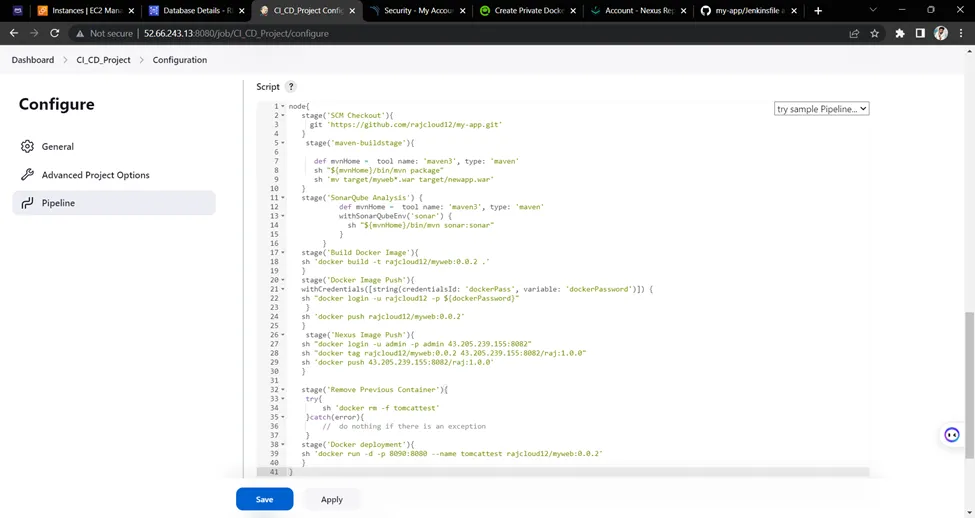
node{
   stage('SCM Checkout'){
     git '<https://github.com/rajcloud12/my-app.git>'
   }
    stage('maven-buildstage'){
      def mvnHome =  tool name: 'maven3', type: 'maven'
      sh "${mvnHome}/bin/mvn package"
	  sh 'mv target/myweb*.war target/newapp.war'
   }
   stage('SonarQube Analysis') {
	        def mvnHome =  tool name: 'maven3', type: 'maven'
	        withSonarQubeEnv('sonar') {
	          sh "${mvnHome}/bin/mvn sonar:sonar"
	        }
	    }
   stage('Build Docker Image'){
   sh 'docker build -t rajcloud12/myweb:0.0.2 .'
   }
   stage('Docker Image Push'){
   withCredentials([string(credentialsId: 'dockerPass', variable: 'dockerPassword')]) {
   sh "docker login -u rajcloud12 -p ${dockerPassword}"
    }
   sh 'docker push rajcloud12/myweb:0.0.2'
   }
    stage('Nexus Image Push'){
   sh "docker login -u admin -p admin123 43.205.239.155:8082"
   sh "docker tag rajcloud12/myweb:0.0.2 43.205.239.155:8082/raj:1.0.0"
   sh 'docker push 43.205.239.155:8082/raj:1.0.0'
   }   stage('Remove Previous Container'){
	try{
		sh 'docker rm -f tomcattest'
	}catch(error){
		//  do nothing if there is an exception
	}
   stage('Docker deployment'){
   sh 'docker run -d -p 8090:8080 --name tomcattest rajcloud12/myweb:0.0.2'
   }
}
}
(Before pasting the code change the GitHub repo, docker login ID)
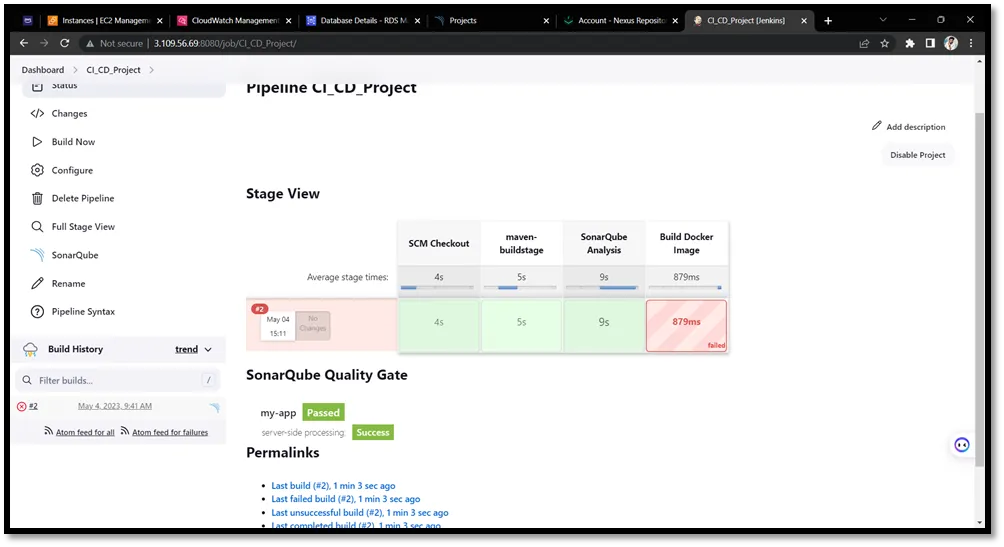
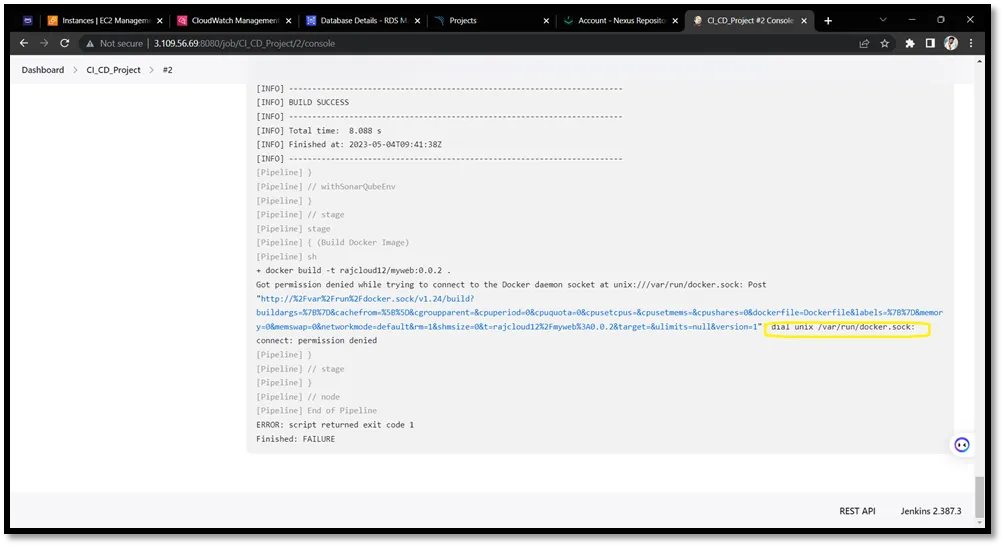
chmod 777 /var/run/docker.sock
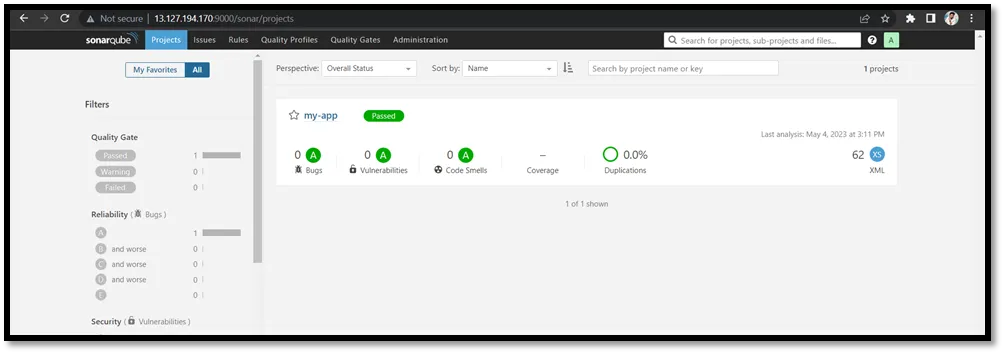
OUTPUT: SonarQube
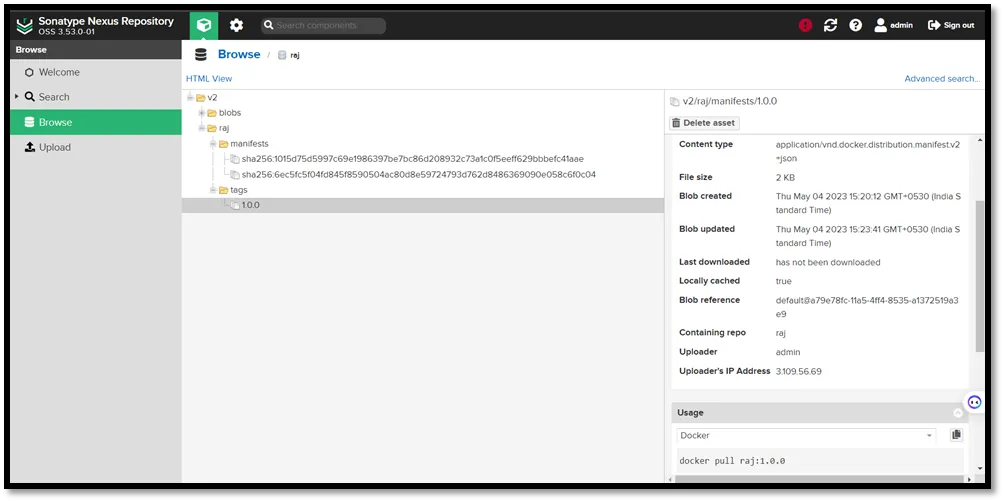
OUTPUT: Nexus
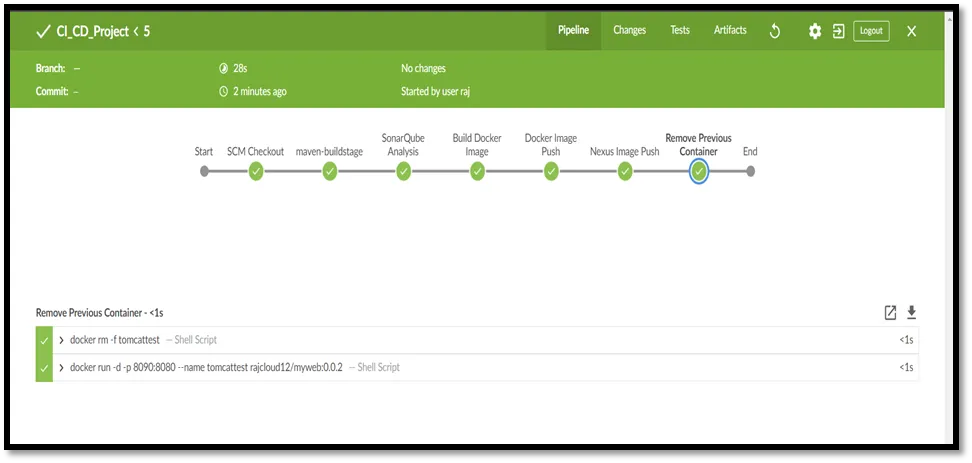
OUTPUT: JENKINS- CI/CD Pipeline (using Blueocean)
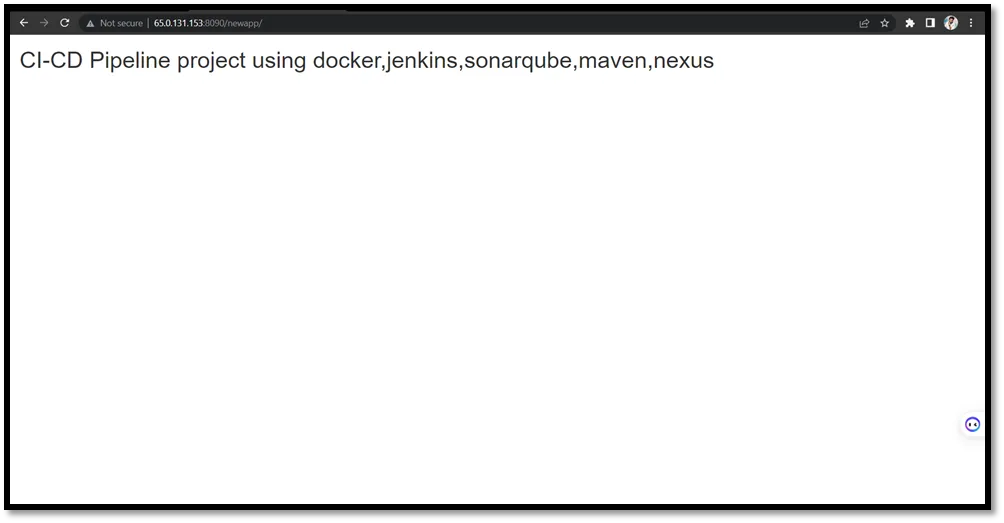
OUTPUT: Final Application Output
I’m actively searching for new opportunities and eager to broaden my professional network.
Linkedin : https://www.linkedin.com/in/raj-kumar-devops/
Website : https://bento.me/rajdevops
For more Projects : https://medium.com/@rajdevops
The original article published on Medium.
