By Sarthak Kesarwani.Dec 23, 2022
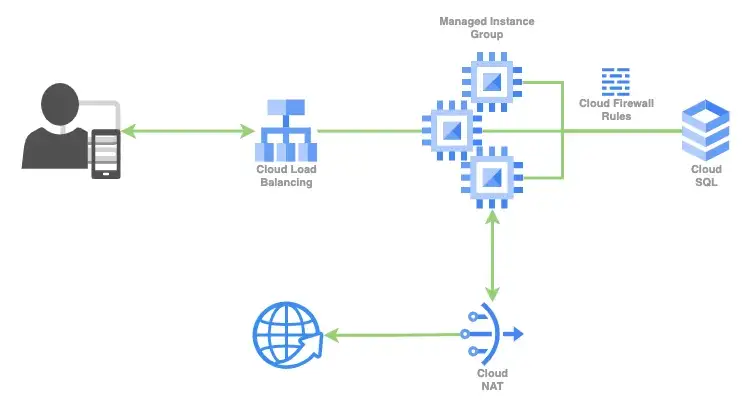
If you’re learning any cloud platform, it is very essential that you get some hands-on experience while learning about the technology. In this blog, I’m going to help you deploy a sample Flask application on GCP with the integration of different Google Cloud Services like GCE, Cloud SQL, load balancing, and Cloud NAT.
Before moving forward lets see which are the steps we are going to follow:-
- VM Setup
- Nat configuration
- Code integration
- Loadbalancer Setup
- Cloud SQL Integration
- VPC Network settings
- Testing
Lets start the learning …..
STEP 1: VM SETUP
For the demo, we are going to host our application in a VM instance, which is similar to running your developed application on your local machine.
Let’s start by creating a VM instance using the Compute Engine service in Google Cloud.
google cloud console — > In search bar type "GCE" and click on VM instances — > click on Create Instance
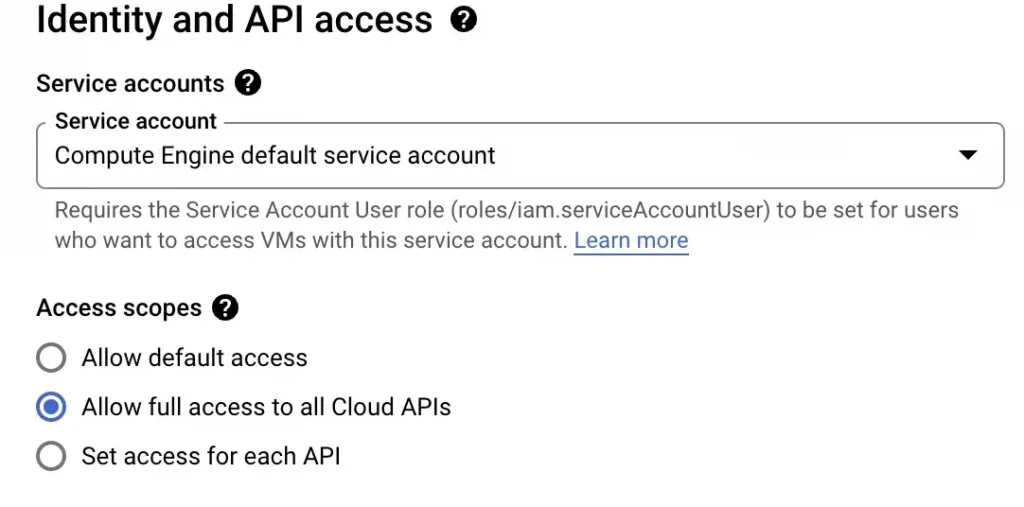
1. Give a proper name to your instance and Allow full access to all cloud APIs and then left everything as default.
2 . Under the firewall setting section enable the Allow http checkbox.
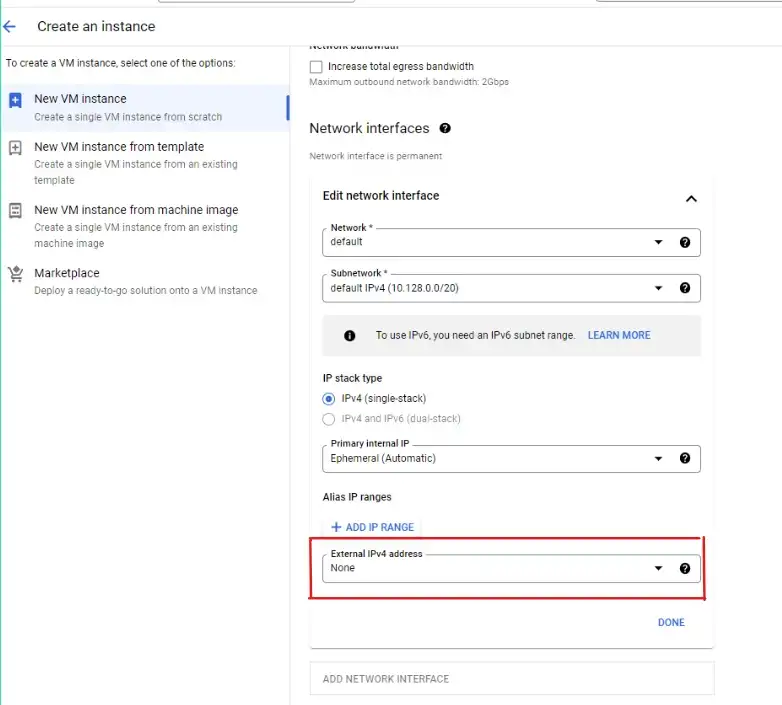
3. Under Advanced options select Network Interfaces now disable the External IPv4 address.
4. Click on Create .
STEP 2: NAT CONFIGURATION
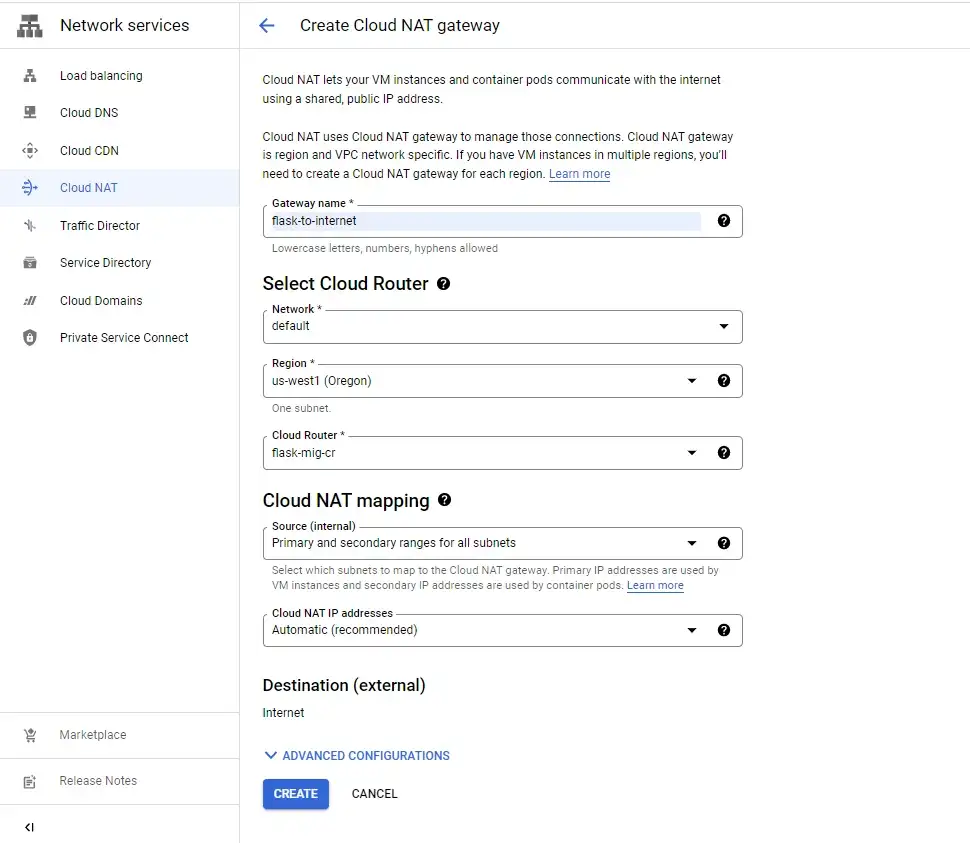
Since we have disabled the external ip in our VM, it can’t able to connect to the internet for different purposes like package installation etc. so here we need to configure NAT so that our VM can access internet.
1. Go to search bar at the top and search Netwok services and click on it.
2. Click on Cloud NAT option on the left of the screen.
3. Enter a Gateway name and then select the network in which our VM is present and select a region us-west1(Oregon) as in our case.
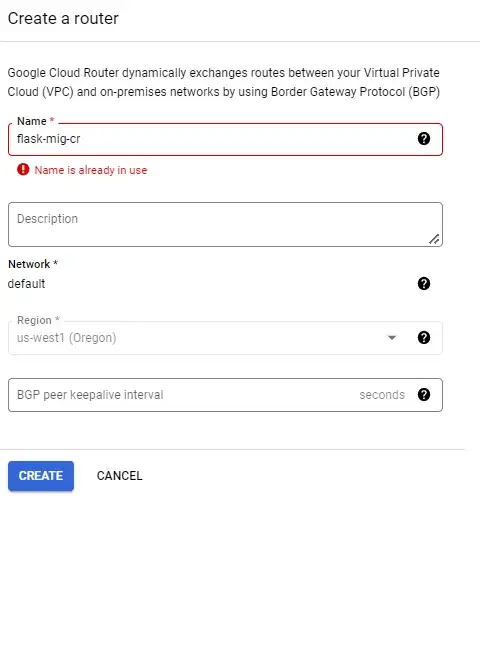
4. Create a router and give it a name flask-mig-cr, cilck create and then again click create to configure the NAT with the default network.
STEP 3: Code Integration
In this step, we will see how we can integrate the application code inside our VM, just like when you develop your application locally. You need to install and configure your environment first, such as programming language dependencies and compatibility, before you can work on it.
1. Transfer all the files from google cloud shell to the virtual machine using the gcloud compute scp command as shown in the image below.
2. Alternatively, you can just ssh onto the VM use git clone command.
gcloud compute scp --recurse /path/of/folder/at/cloud/shell vmuser@hostname:/path/to/folder###SSH into your VM and to the installation ##if you don't want to use scp command just git clone the repo inside the VM sudo apt update -y sudo apt install python3-pip python3-dev build-essential libssl-dev libffi-dev python3-setuptools -y pip install flask -y pip install wheel -y pip install gunicorn flask -y sudo apt-get install python3-mysqldb -y
To download the code follow this github URL
STEP 4: LoadBalancer Setup
In this step we are going to learn about end to end load balancer setup for VM based workloads (application).
Unmanaged Instance Group (UMIG) setup
As we know, we’re going to setup loadbalancer in this step but here we are’t able to directly attach VM to the loadbalancer so we need to create a UMIG(Unmanaged Instance Group) or MIG(Managed Instance Group) for linking our application to the Loadbalancer.
For simplicity I am using UMIG you can use MIG also but the process will be slightly different than this.
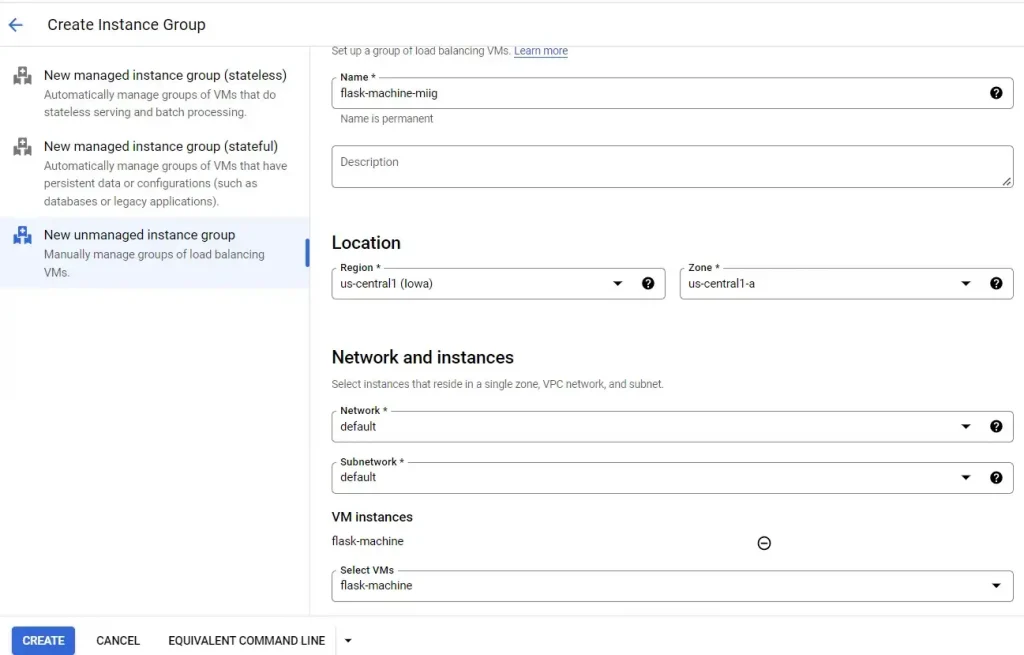
- Click on Instance Group on the left of GCE dashboard.
- Click on Create Instance Group.
- Click on New unmanged instance group which will be using our previously created VM. In this case we can easily stop our VM without any problem to save cost when we don’t need it. We will choose this option for the demo.
- Under Select VMs option choose the previously created VM flask-machine .
- Click on Create.
Let’s set up the load balancer for our application. We will use HTTP(S) Load Balancing to distribute traffic on the VMs of the unmanaged instance group (in our case, it’s just a single VM).
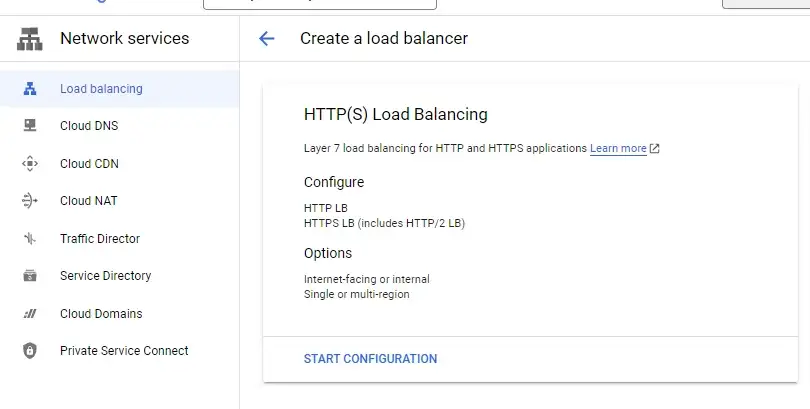
1. Go to top at searchbar and type Network Services and click on the it.
2. Click on Load balancing on the left and select Start Configuration.
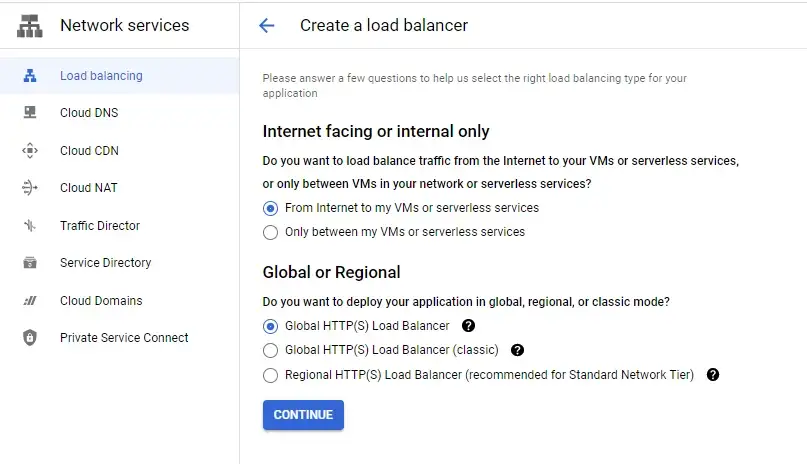
3. Select the option as shown in the above image.
4. Click on Continue.
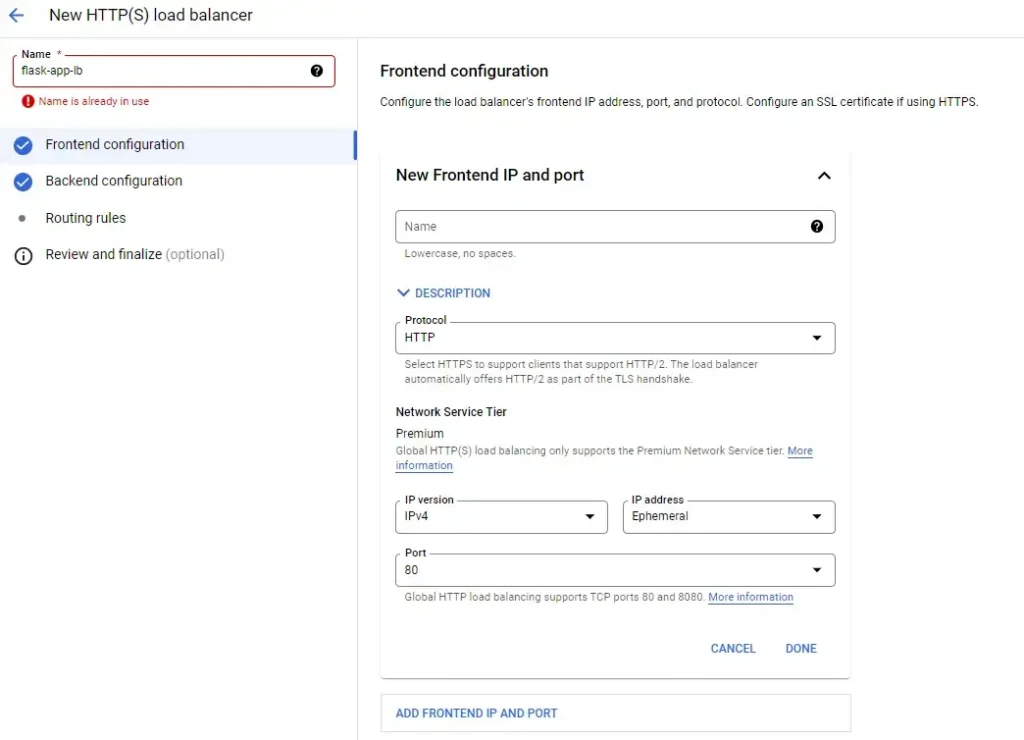
5. Select all the options as given in the above image for the Frontend configuration.
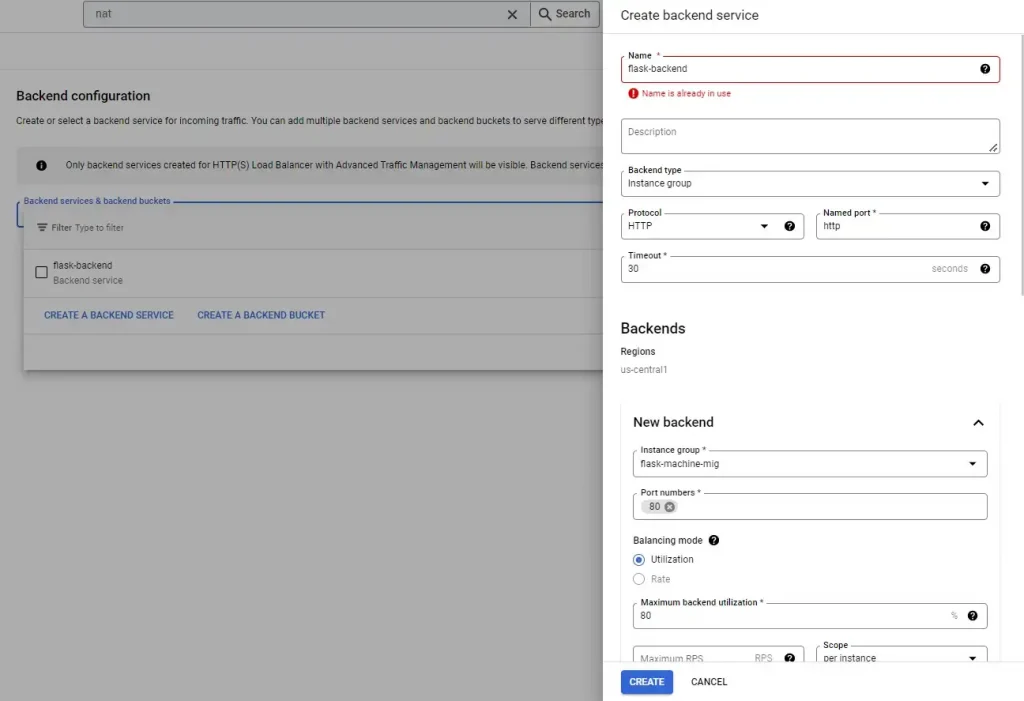
6. Go to Backend Configuration and create one backend service make sure to use the unmanaged instance group that you created earlier in Instance Group option and also uncheck the enable CDN option as CDN is not needed.
7. Follow the image below.
8. Click review and finalize and create the load balancer.
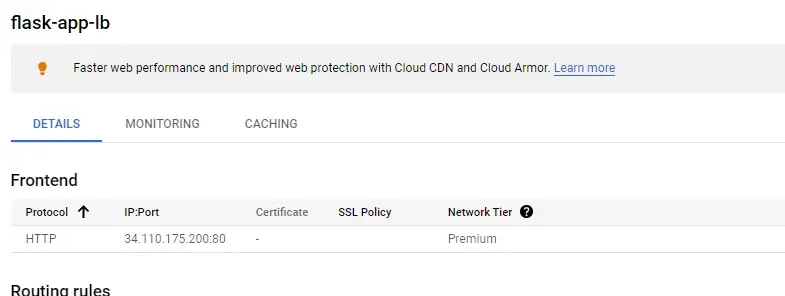
9. Now inspect the load balancer and get the ip address which will be used to access the application later. In our case the IP is 34.110.175.200
If you made it through the journey congrats as you have successfully intregrated the application with the services. Now lets move onto integrating the Cloud SQL instance with our flask application.
STEP 5: Cloud SQL Integration
For most of the application, we need some kind of a database to store the data. In our case we are storing a structured data thus we need a relational database. In Google Cloud we have a fully-managed database service known as Cloud SQL where we can store our data.
1. Go to the search bar at the top and enter Cloud SQL and select the Cloud SQL service.
2. Click on Create Instance.
3. Select the MySQL as your database engine
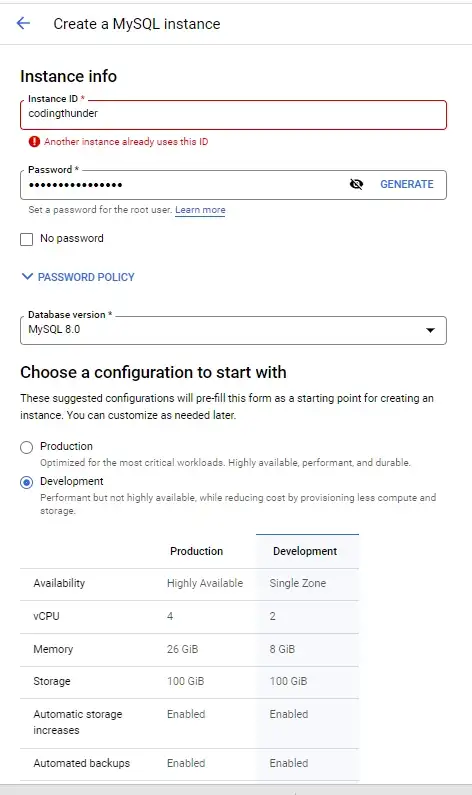
4. Enter the Instance ID of your cloud SQL instance and generate a password.
5. Select the latest database version and also choose Development mode for low cost as it is the need of this project.
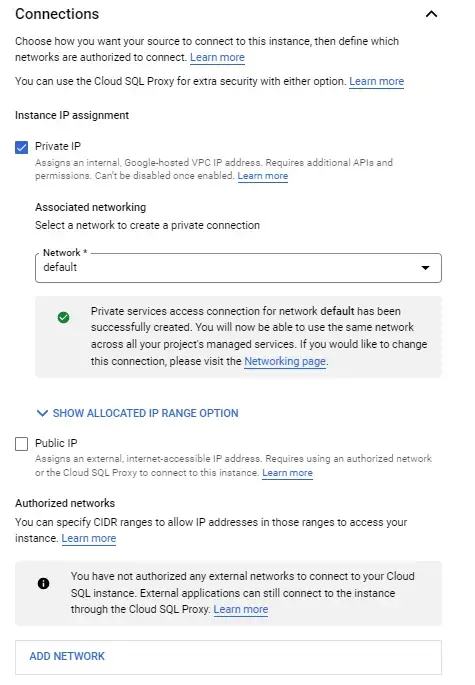
6. Go to connection and choose private ip which is a more secure way of accessing the database as it will not have a public ip address and connection from outside are not possible.
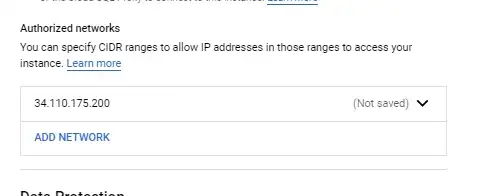
7. Click on ADD NETWORK as we want to specify which IP address can access the database .
8. Enter the frontend-IP (application IP) of load balancer as we will post the data using our application.
9. Click on Create Instance .
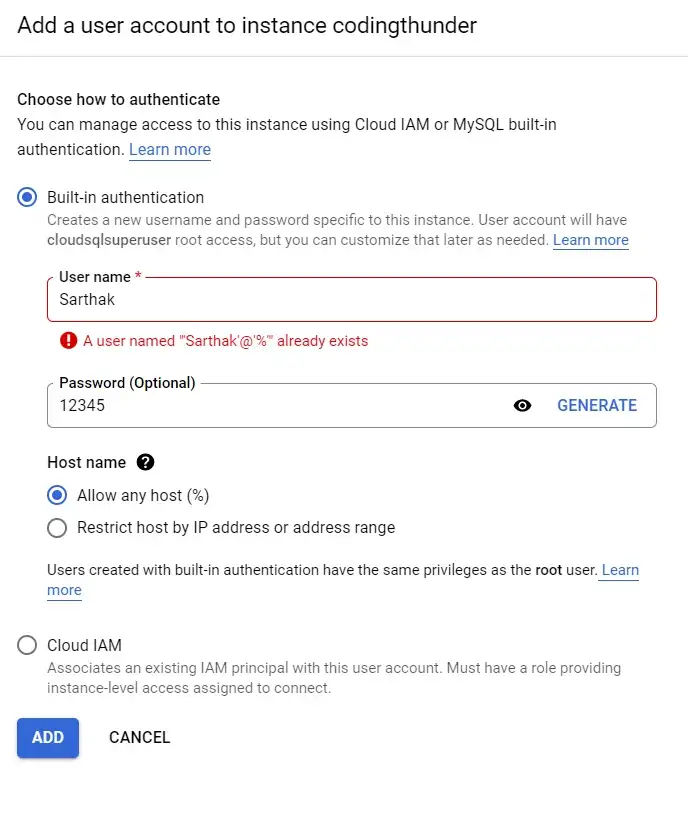
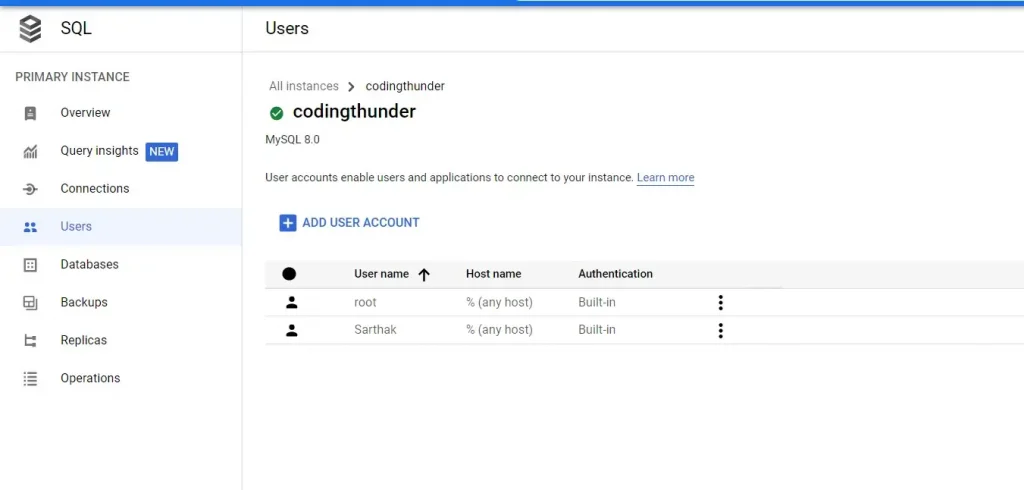
10. Now go to users and create a new user as shown below.
11. Click on Add .
After creating the instance we have to make sure our ports for connection of SQL instance are open.
Step 6: VPC Network Setting
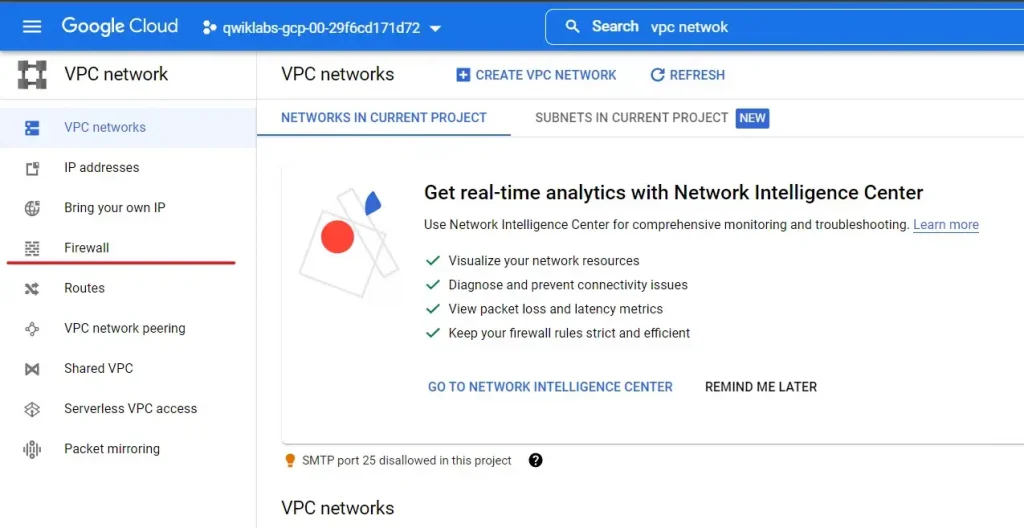
1. On search bar type VPC Network and go to the VPC network page.
2. Click on firewall on the left .
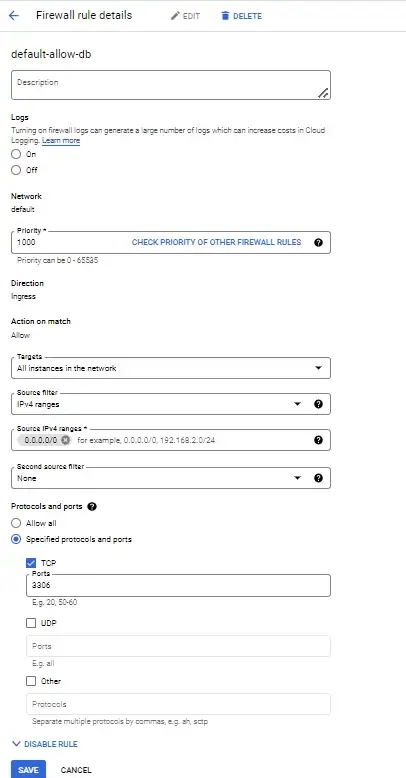
3. Click on Create Firewall Rule.
4. Enter the name default-allow-db as we will be using Cloud SQL later to connect at this port 3306.
5. Targets: All instances in the network only for the simplicity in the real world it is better to use specified target tags for better security.
6. Select rest of the options as in the image above.
7. Click on SAVE .
Step 7: Testing
1. Start the Server using command python3 __init__.py
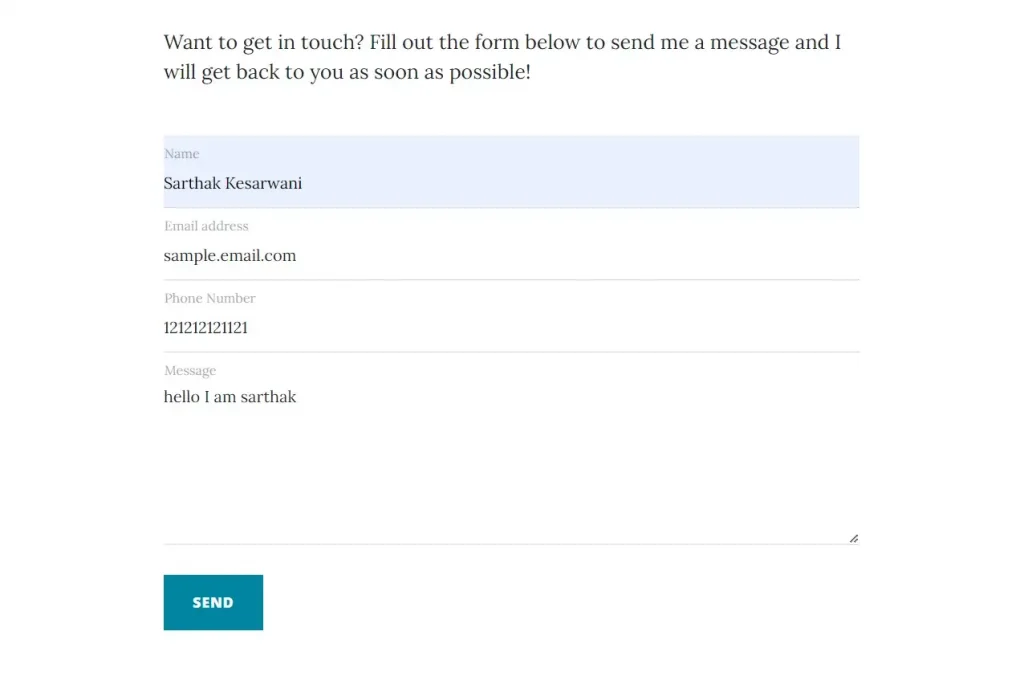
2. Go to the /contacts page of your website and fill the form with the details
3. Login to your database go to cloud shell and use this command :
mysql --host=IP_address of CloudSQL instance -u 'username' -p
4. Enter the password for the user press return.
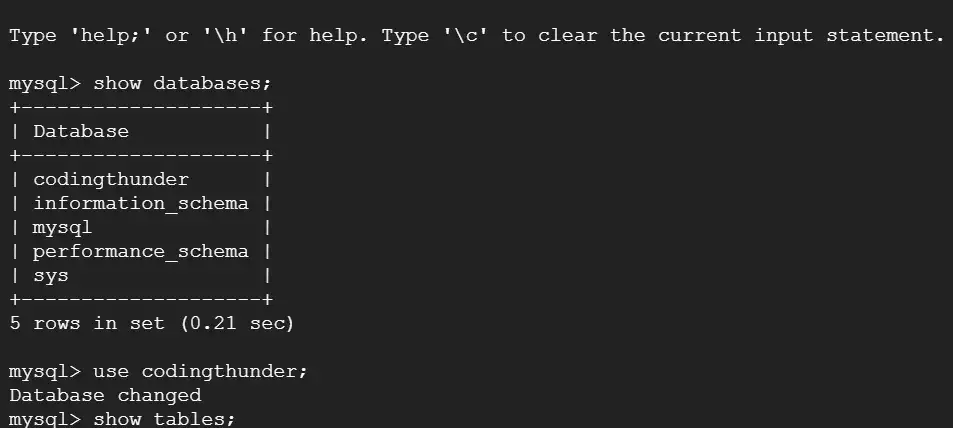
5. Once inside mysql shell >
show databases;
use database_name;  #Replace database_name with codingthunder as in my case
show tables;
select * from contacts;
Note:- After Inserting the first row of data , go onto __init__.py file and comment out the create_table() function call line as we already have created the tables and they are not needed.
Thank you for reading. If you enjoyed this article and would like to see more like it, please consider giving it a follow. If you have any questions or need help with anything, feel free to drop me an email or connect with me on LinkedIn.
I’d like to give a shoutout to CodewithHarry and Guysinthecloud for the Flask application code. If you’re interested in learning more about how the code works, check out CodewithHarry’s playlist. I’ve only included the minimum amount of code required to demonstrate the working in this project.
Thank You,
Sarthak Kesarwani
The original article published on Medium.


