By Dolly Sharma.Dec 28, 2022

If you have mission-critical workloads running on an AWS, you may be looking for a way to migrate to GCP while keeping the same database engine with minimal to near zero downtime. This blog provides the solution for migrating your AWS RDS to GCP cloud SQL using GCP Data Migration Service.
GCP DMS: GCP Database Migration Service (AWS DMS) is a managed migration and replication service that helps move your database and analytics workloads to GCP quickly, securely, and with minimal downtime and zero data loss. GCP DMS supports migration of various database and analytics engines, such as MySQL and PostgreSQL, with SQL Server and Oracle migrations in preview.
This blog post is going to cover all about migrating databases from Amazon RDS MySQL instance to Google Cloud SQL migration instance using Data Migration Services by establishing VPN connectivity.
Prerequisites
Before you get started, you must complete the following prerequisites:
- AWS & GCP console access
Terminology:
Below are definitions of terms used throughout this guide.
Cloud SQL:
A fully-managed relational database service that makes it easy to set up and administer your PostgreSQL, MySQL, & SQL Server databases in the cloud.
Cloud DMS: Easily lift and shift your AWS RDS databases into Cloud SQL with minimal downtime.
Migrate your entire database, data and metadata included without any additional changes to the source.
DMS is a free service allowing you to pay only on usage of your brand new GCP database.
IP allowlist: Public IP connectivity is most appropriate when the source database is external to Google Cloud and has an externally accessible IPv4 address and TCP port. If the source database is hosted in another VPC in Google Cloud, then the easiest way to connect the source database with the Cloud SQL instance is by using VPC Peering.
Amazon RDS: Amazon Relational Database Service is a distributed relational database service by Amazon Web Services. It is a web service running “in the cloud” designed to simplify the setup, operation, and scaling of a relational database for use in applications.
Follow the below steps for AWS site-to-site VPN :
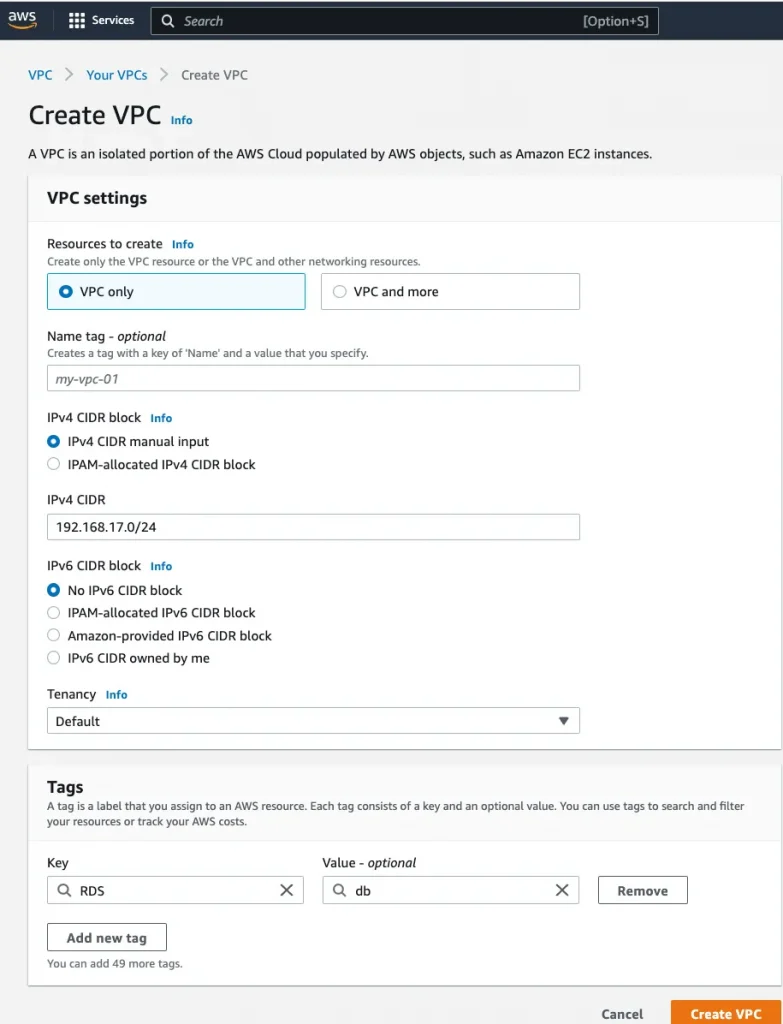
Step 1: Create a VPC
Name: source-vpc, Region: us-east-1, VPC CIDR: 192.168.17.0/24,
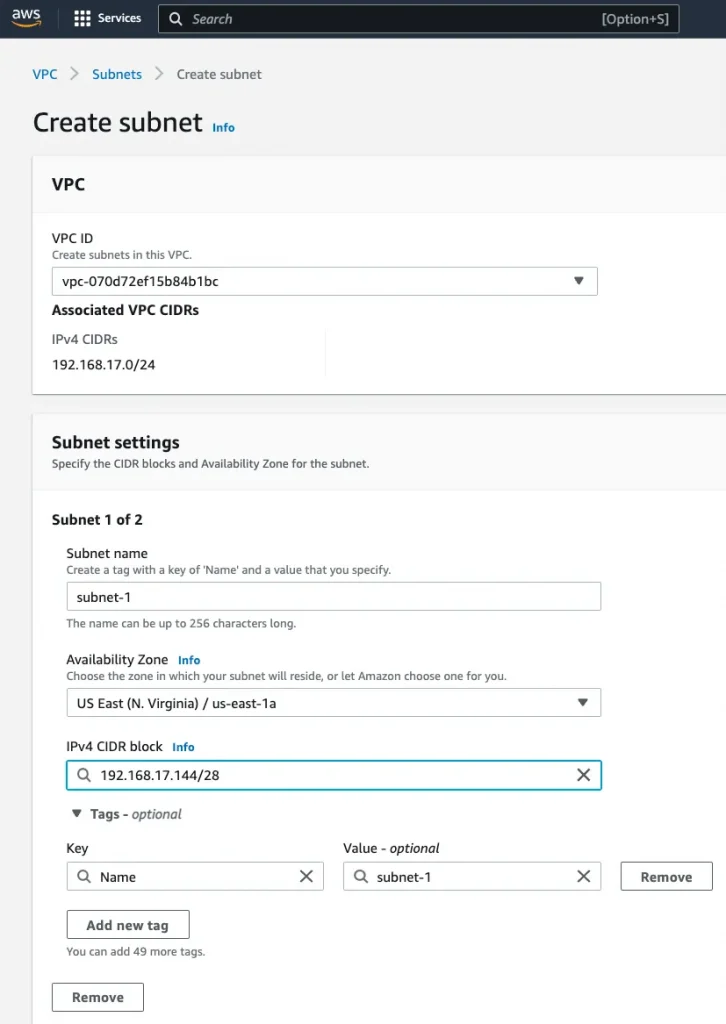
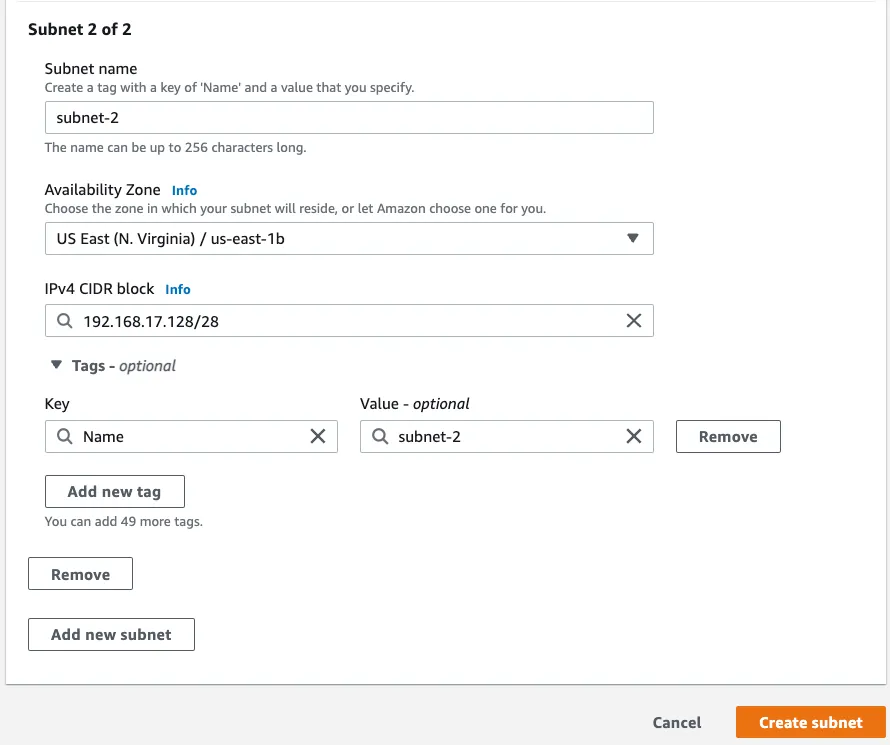
Step 2: Create two subnets in different availability zone in the above VPC for RDS:
Subnet-1: 192.168.17.127/28, subnet-2: 192.168.17.144/28
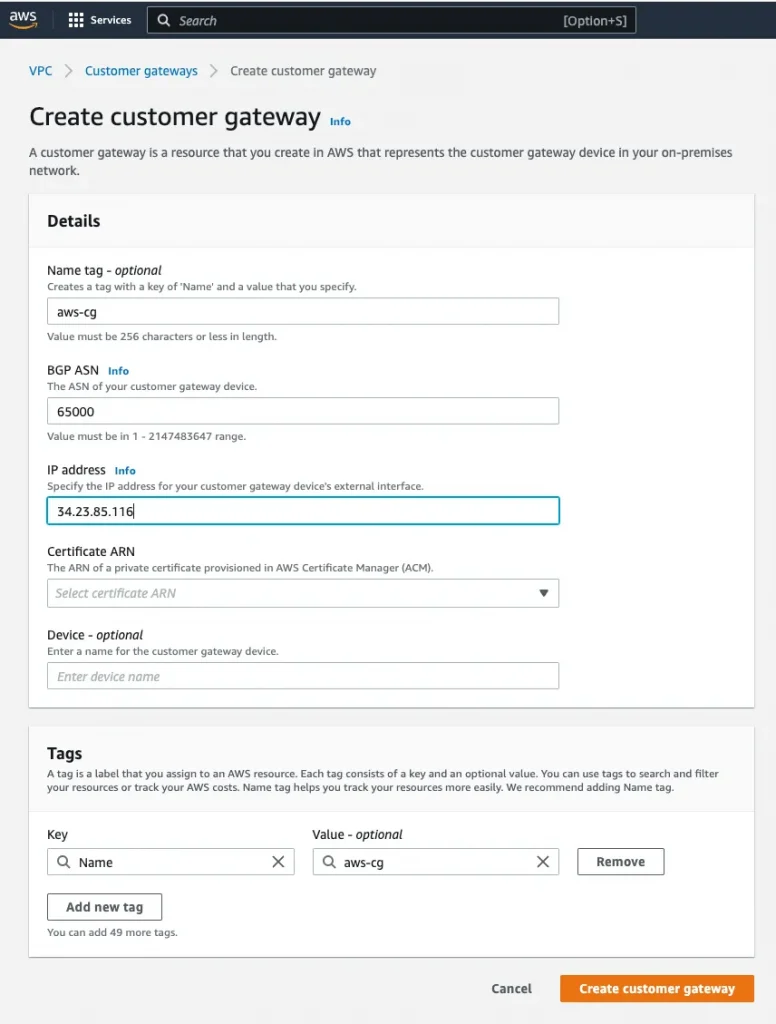
Step 3: Create a customer gateway with GCP classic VPN gateway IP(34.23.85.116)
Name: aws-cg, IP address: 34.23.85.116( GCP reserved static public ip)
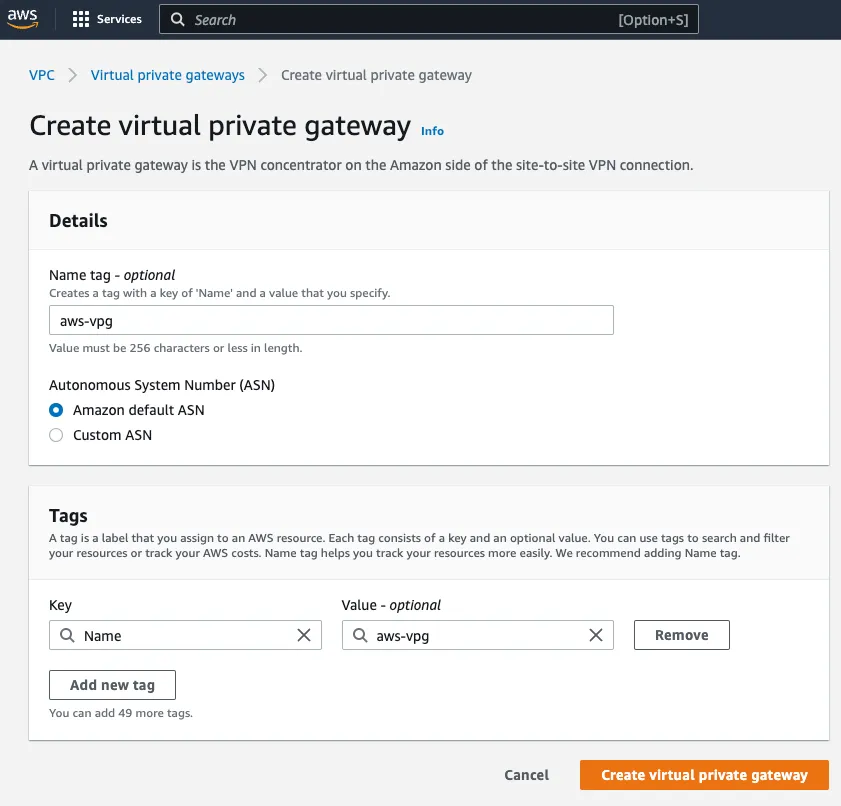
Step 4: Create a Virtual private target gateway:
Name: aws-vpg
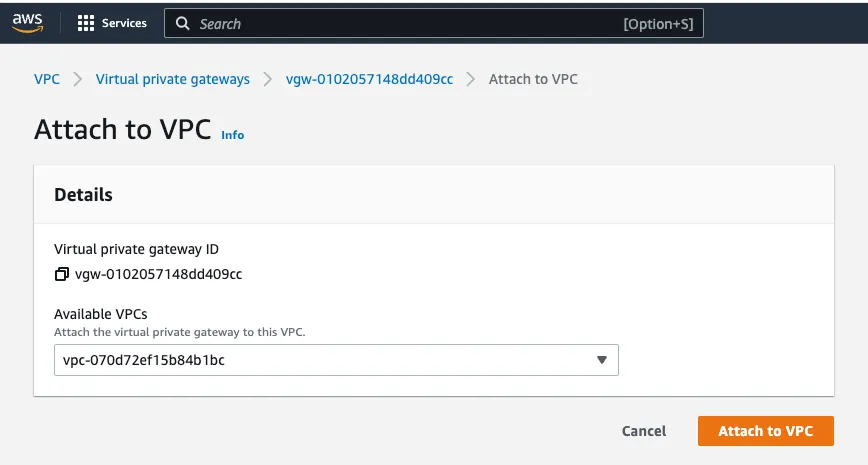
Step 5: Attach Virtual Private Gateway to VPC
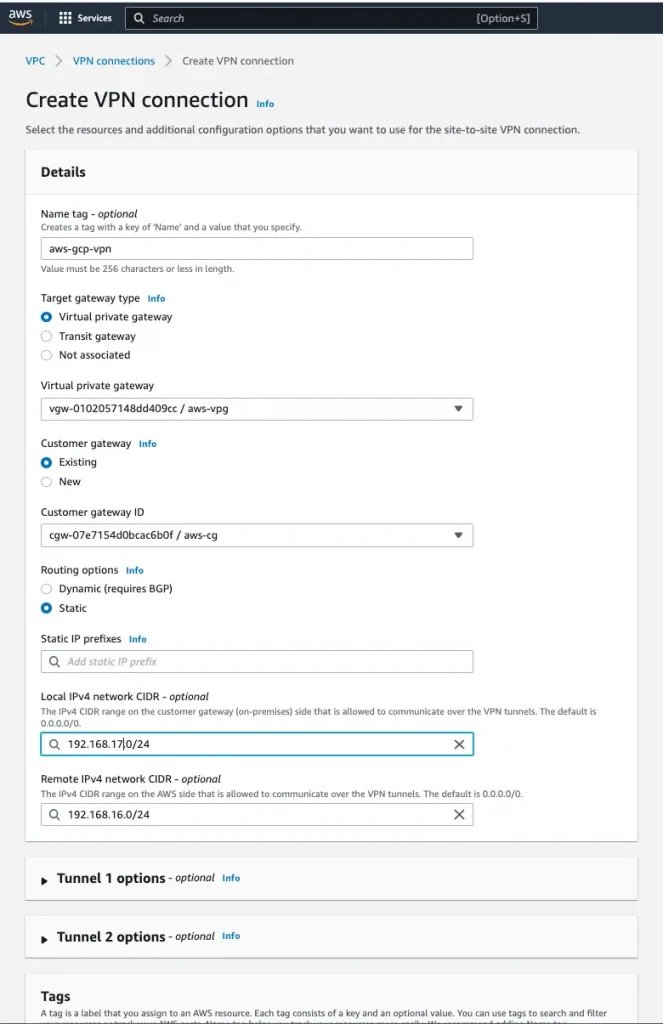
Step 6: Create a Site-to-Site VPN connection
Name: aws-gcp-vpn, Virtual Private Gateway: aws-vpg, Customer Gateway: aws-cg, Routing Options: Static
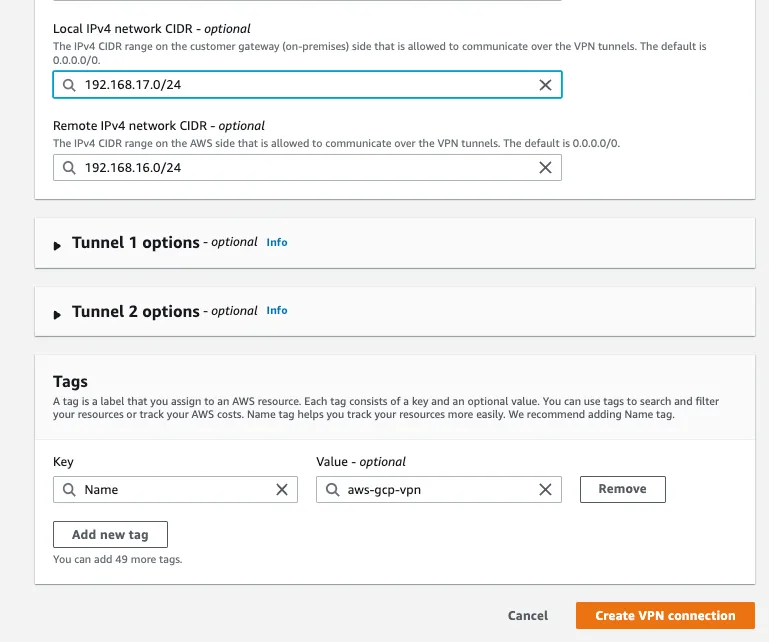
Local IPv4 network CIDR: 192.168.17.0/24(AWS VPC IP)
Remote IPv4 network CIDR:192.168.16.0/24 (GCP VPC IP)
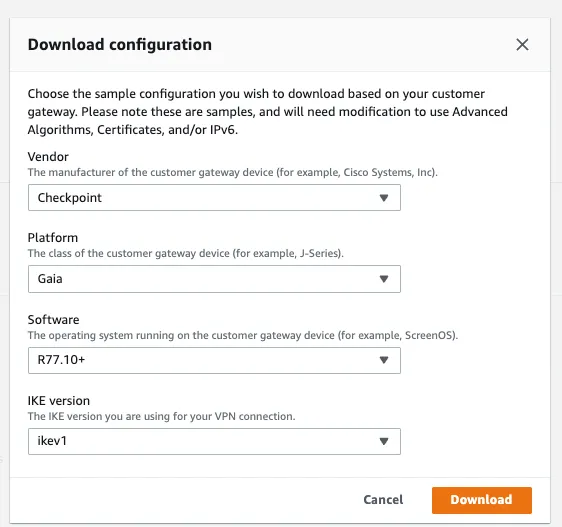
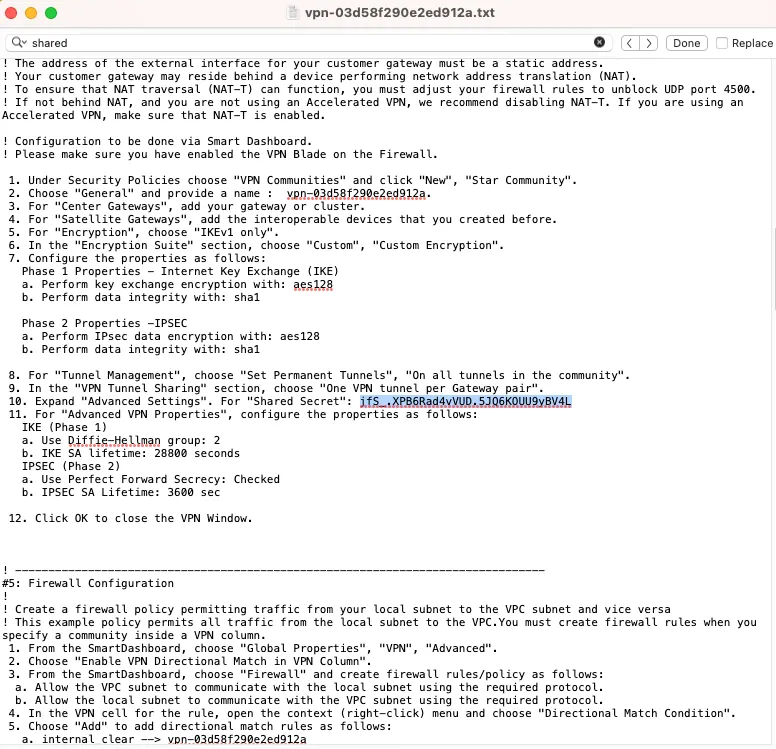
Step 7: Download the configuration file (Copy Pre-shared key that we will needed for GCP VPN tunnel setup)
Pre-shared Key: jfS_.XPB6Rad4vVUD.5JQ6KOUU9yBV4L
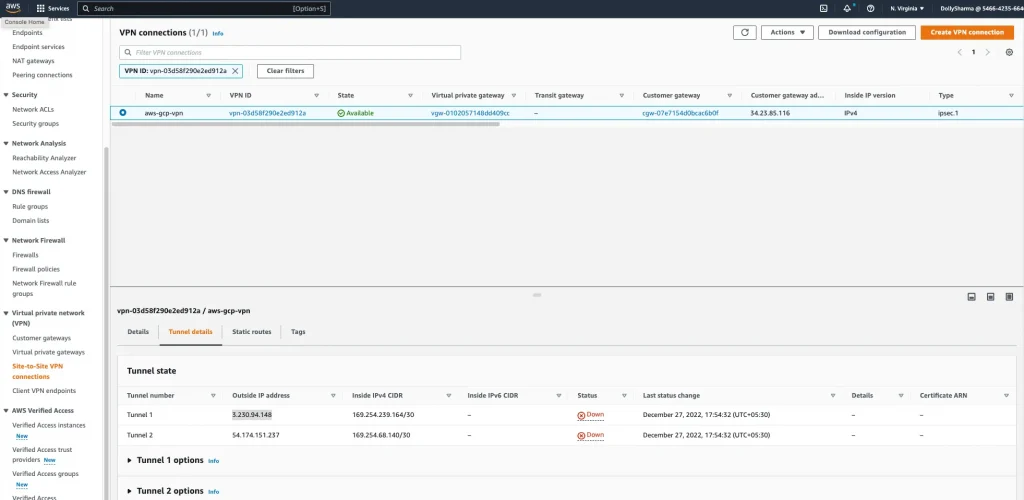
Step 8: Tunnel status is currently down because we haven’t done tunnel setup at target side
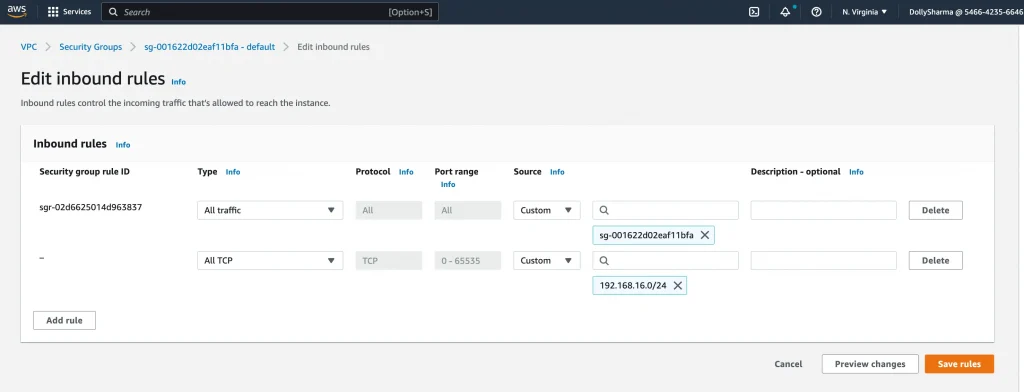
Step 9: Add inbound security rules to allow all protocols and ports from the Cloud VPN (192.168.16.0/24).
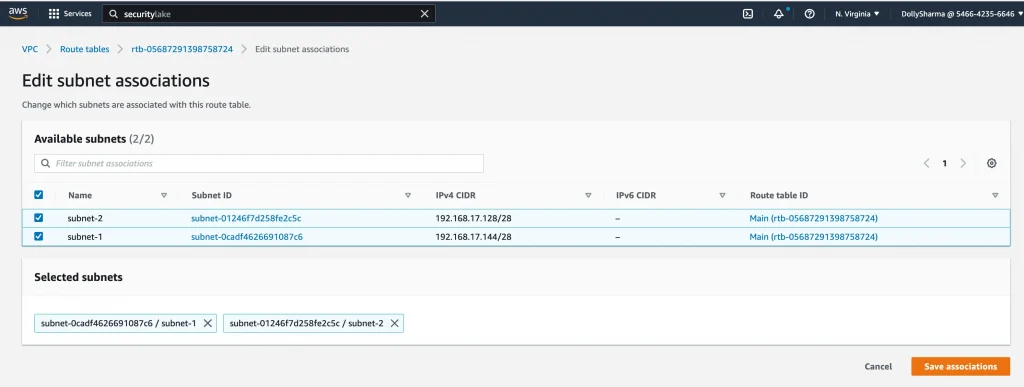
Associate both subnets to VPC main route table:
VPC → route table → Edit subnet associations
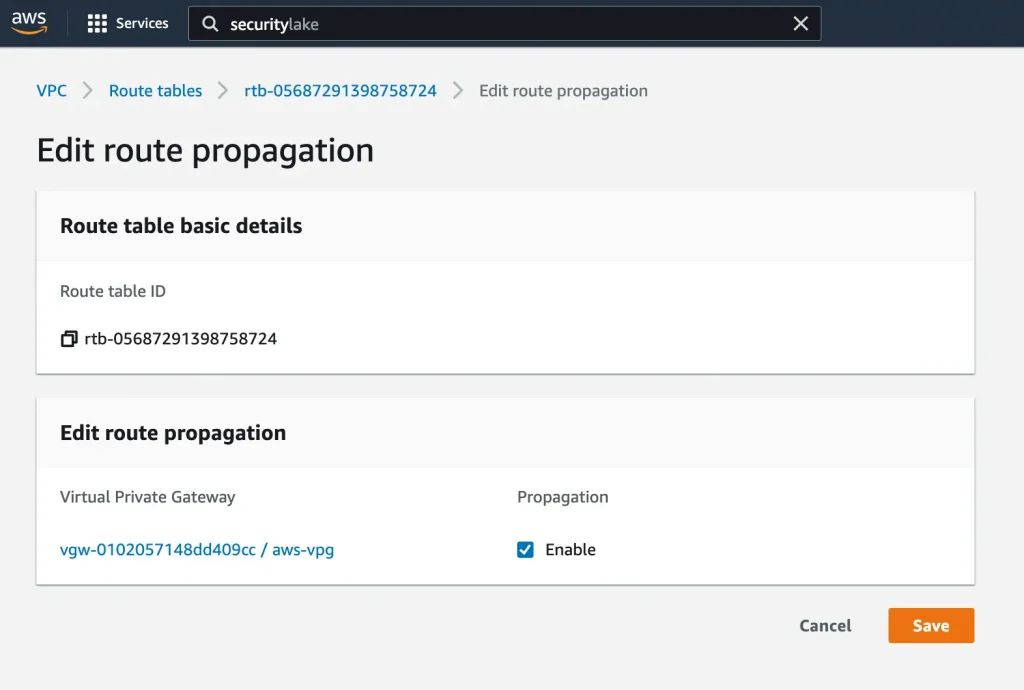
Update Route propagation:
VPC → route table → Edit route propagation
Update the routes for the GCP CIDR range:
VPC → Route table → edit routes
Step 10: Configure the customer gateway device(GCP VPN)
Follow the below steps for GCP Classic VPN:
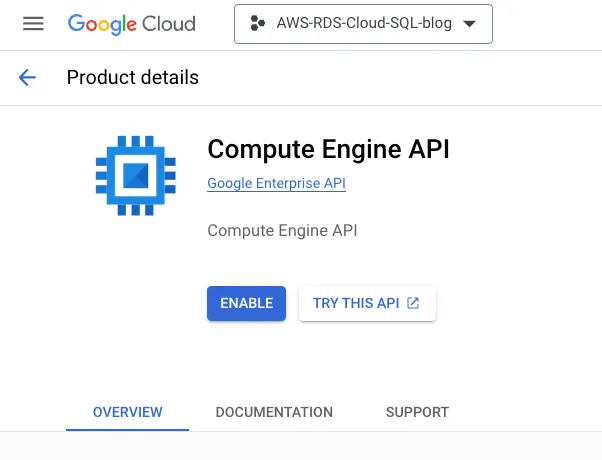
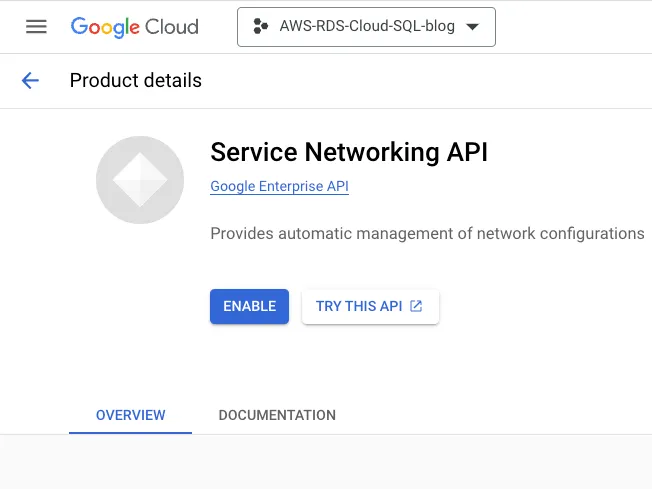
Step 1: Enable the below API in GCP console:
Compute Engine API
Service Networking API
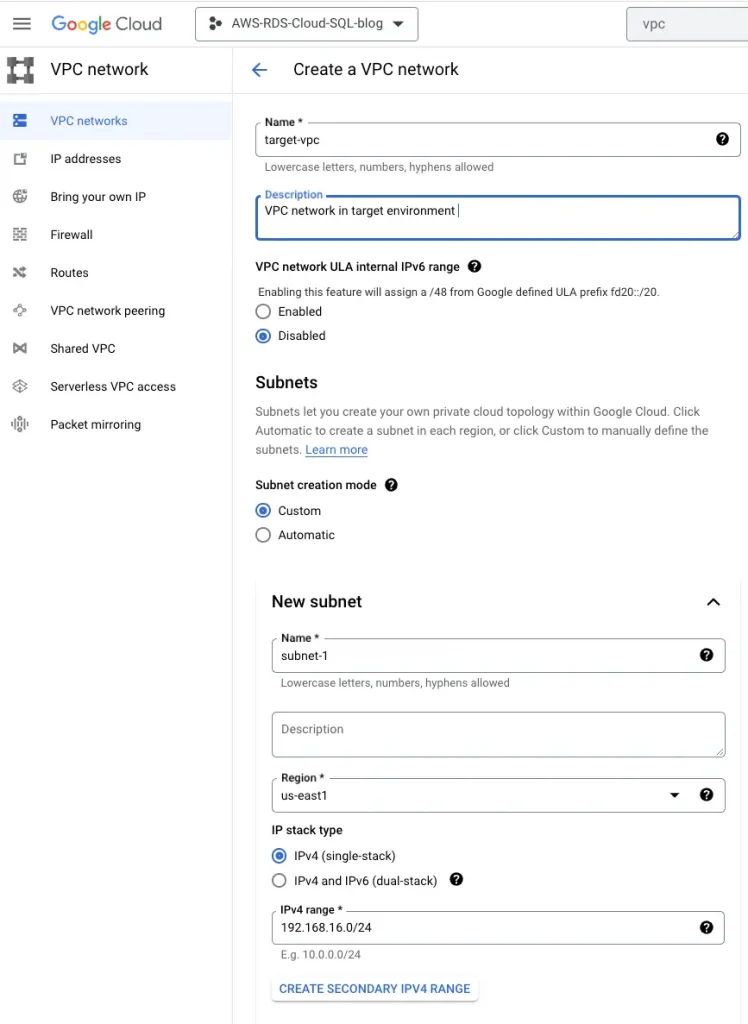
Step 2: Create a target VPC
Name: target-vpc, VPC CIDR: 192.168.16.0/24, Region: us-east1
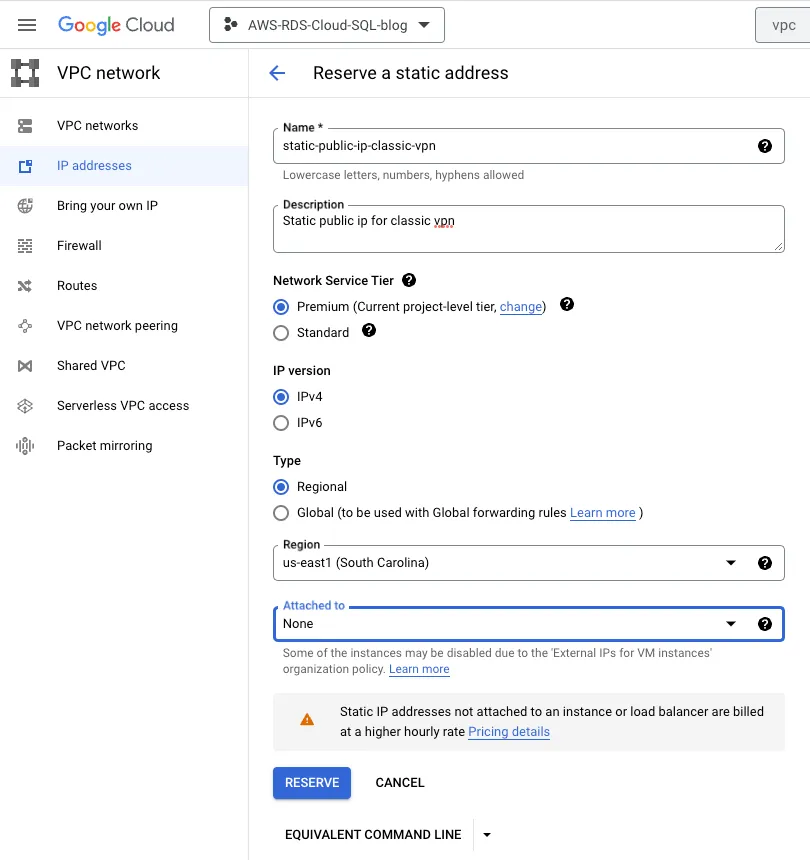
Step 3: Reserve a public IP for classic VPN gateway
Name: static-public-ip-classic-vpn
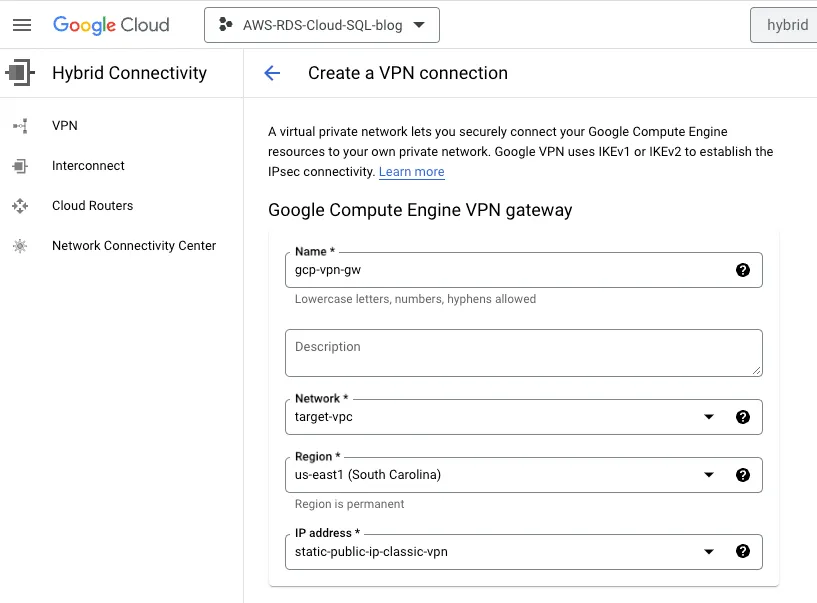
Step 4: Create a classic VPN gateway
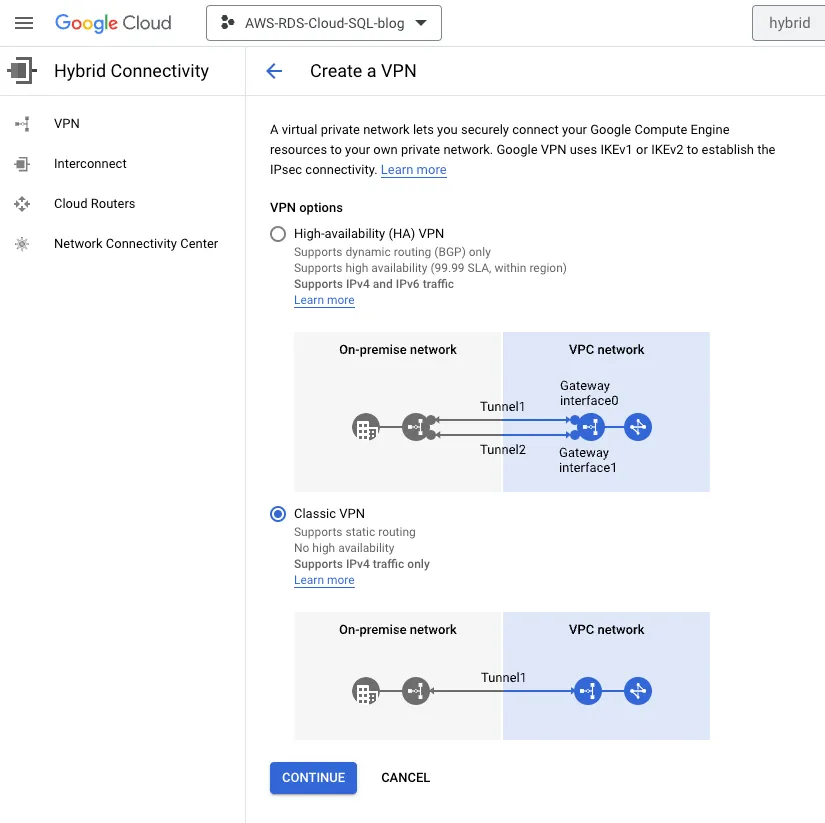
Name: gcp-vpn-gw, Network: target-vpc, Region: us-east1, IP address: Reserved public ip
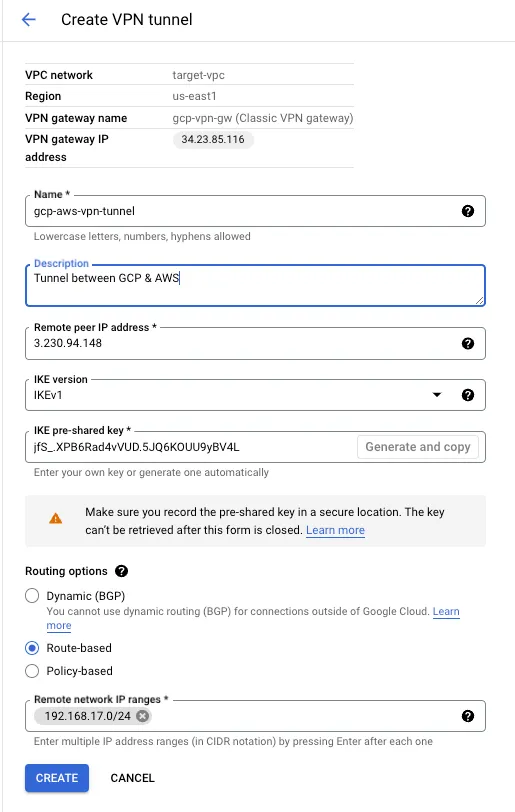
Step 5: Setup tunnel
Name: gcp-aws-vpn-tunnel, Remote peer ip address:3.230.94.148 , IKE version:IKEv1,
IKE pre-shared key: jfS_.XPB6Rad4vVUD.5JQ6KOUU9yBV4L ,
Routing options: Route-based, Remote network IP ranges: 192.168.17.0/24
Step 6:
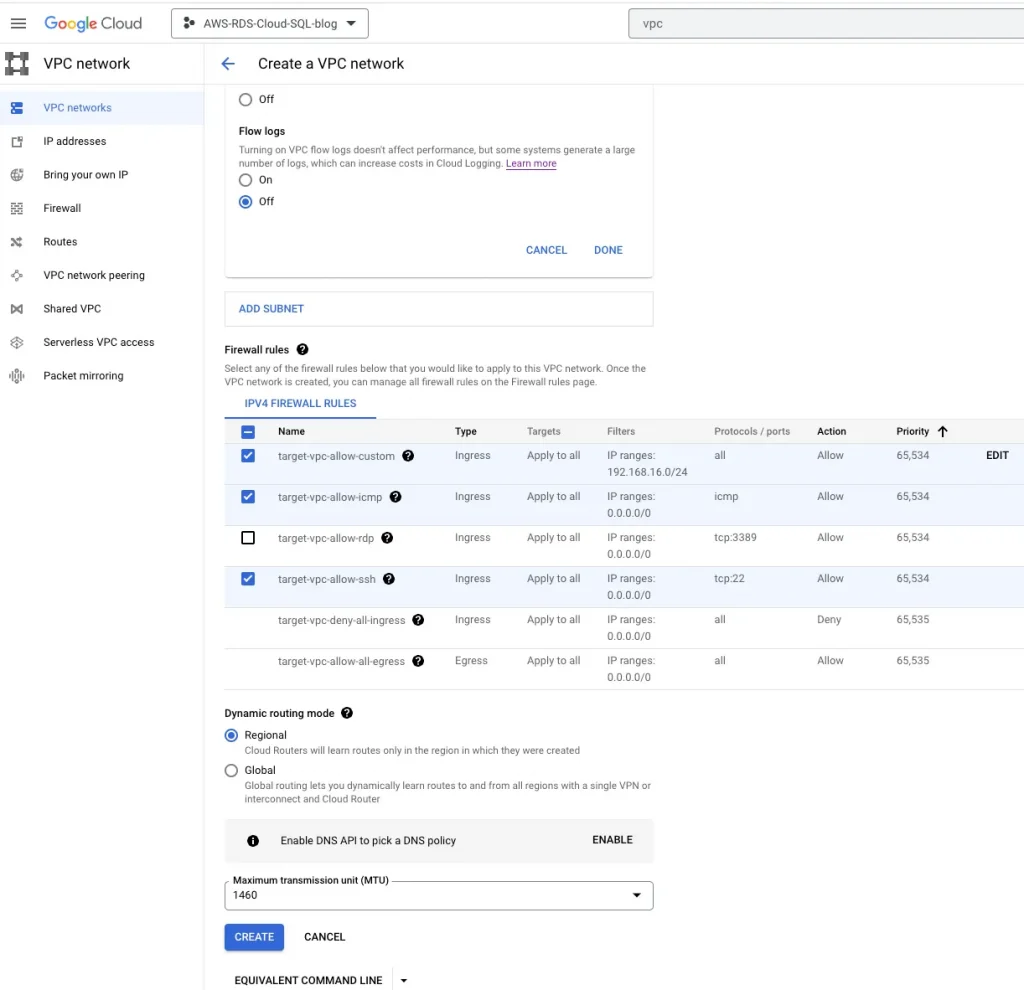
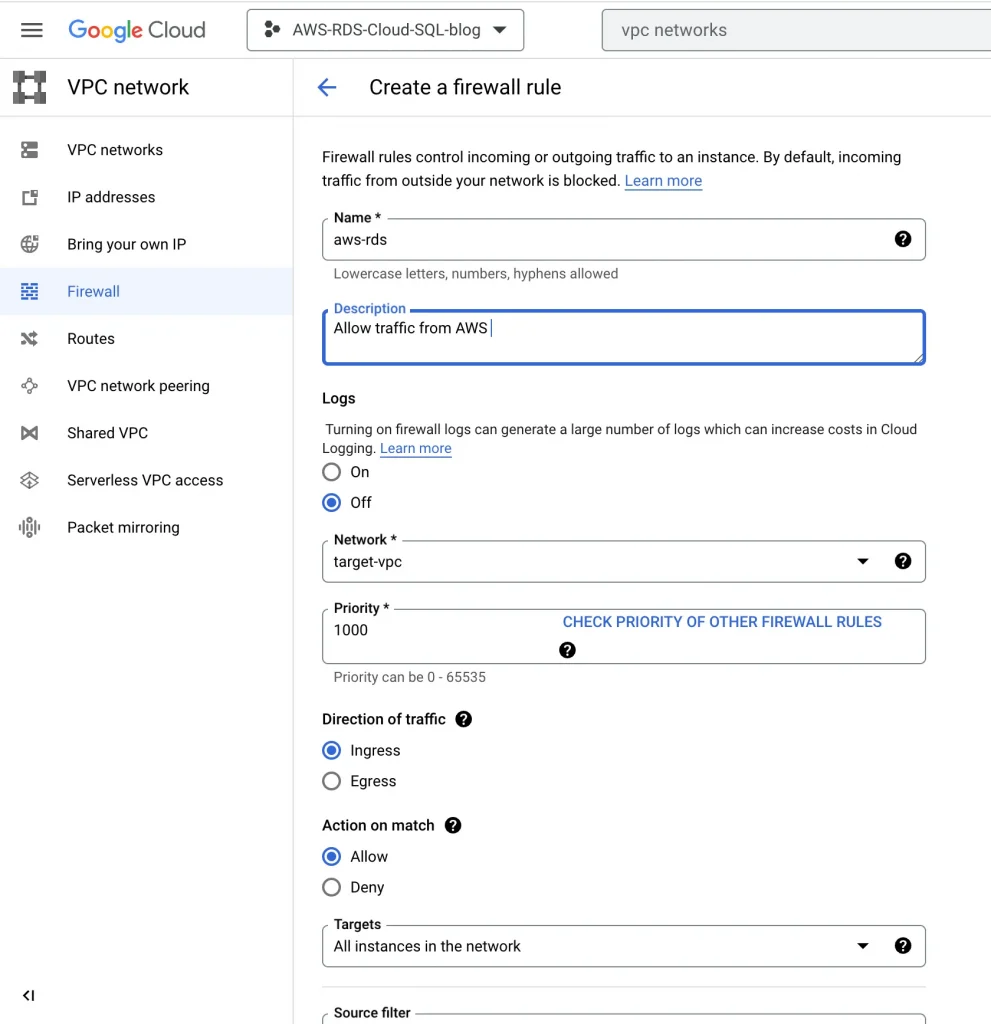
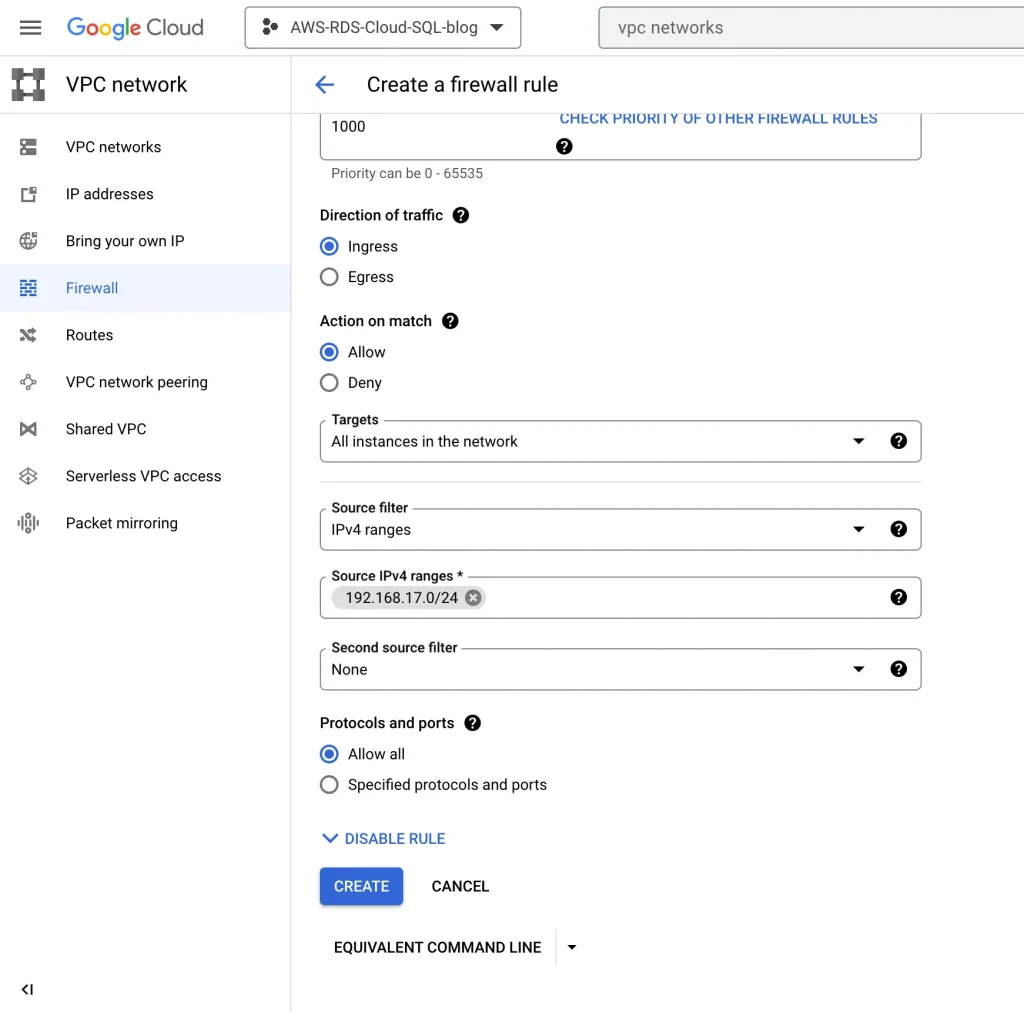
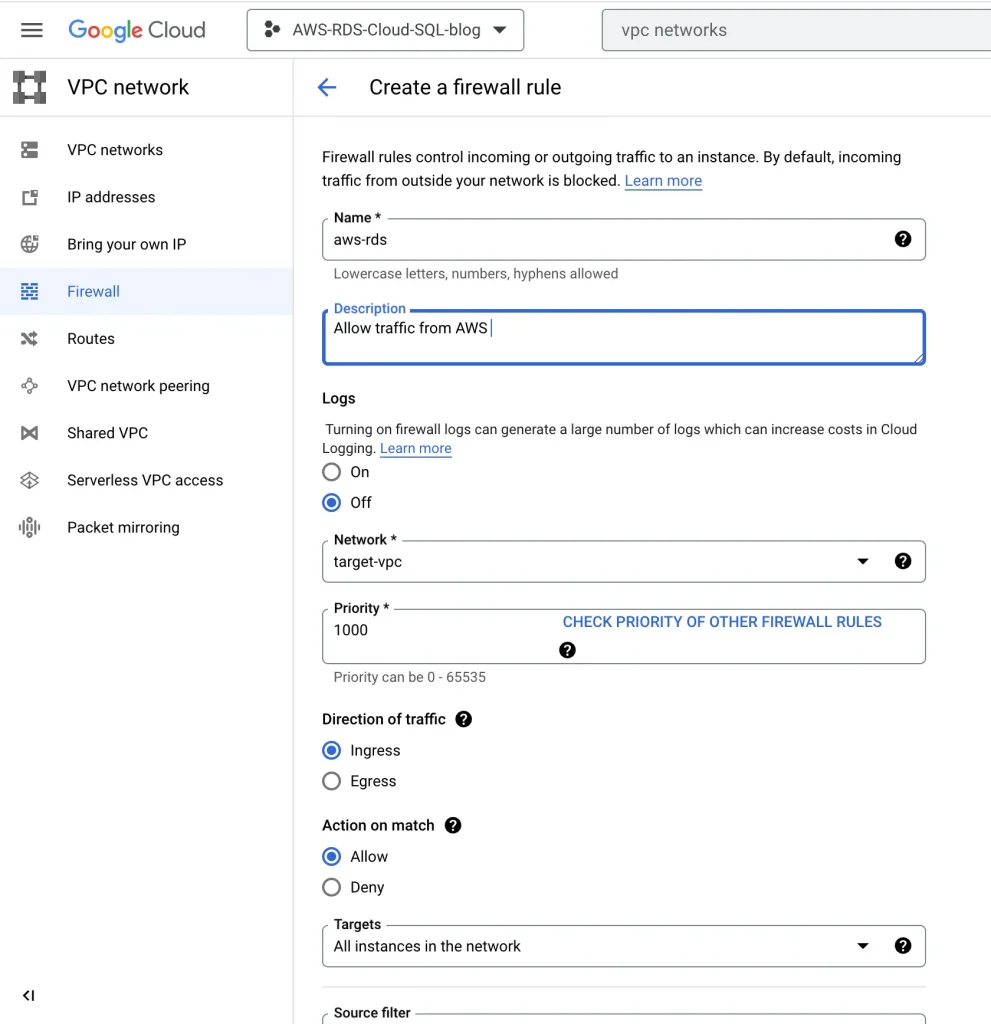
Update GCP firewall rules for AWS traffic:
VPC networks → Firewalls → Add a Firewall rule
Add firewall rule:
Validation:
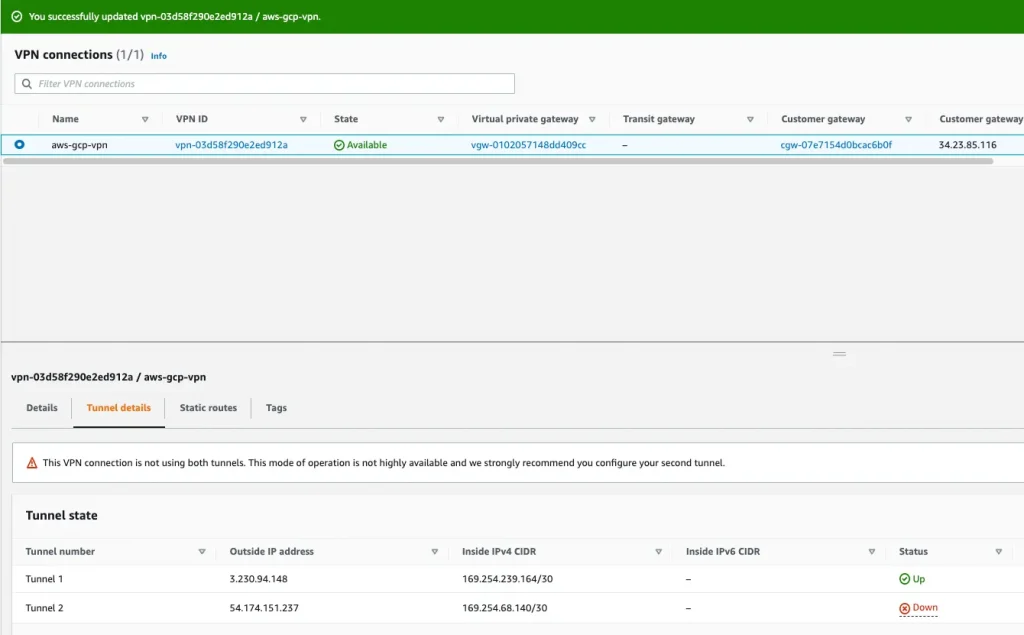
AWS side tunnel status should be up:
GCP VPN tunnel status should be established:
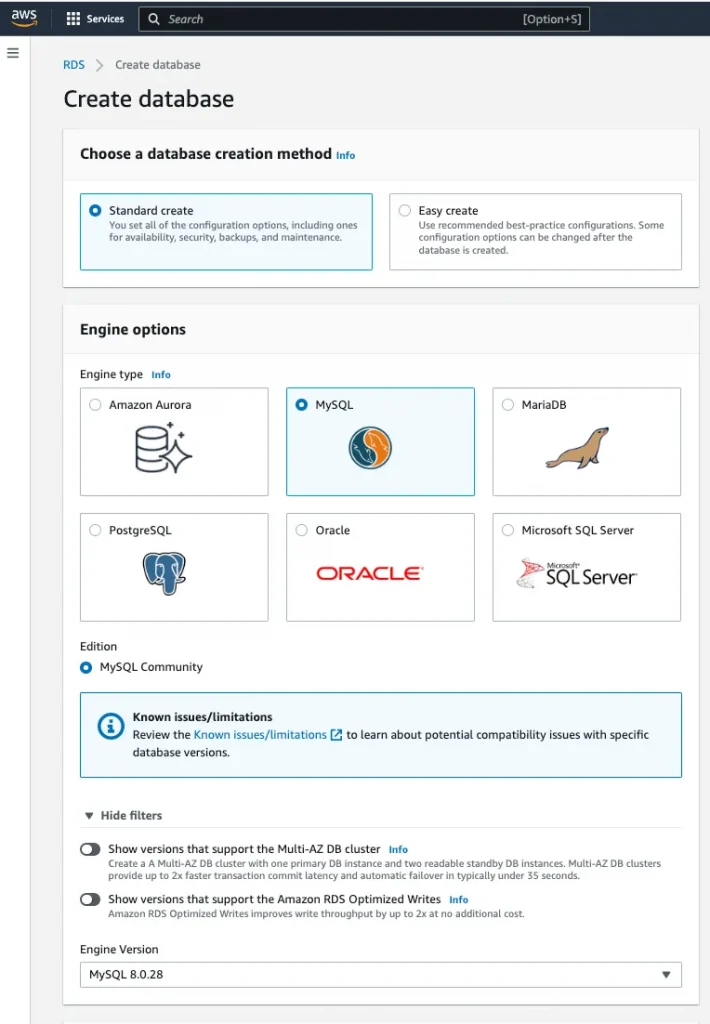
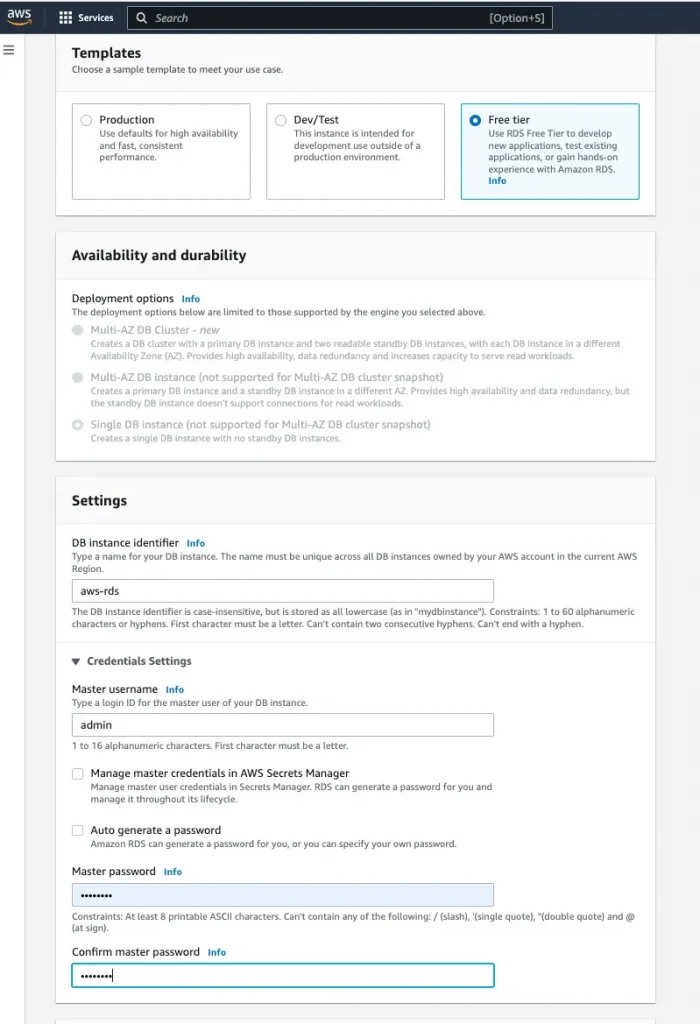
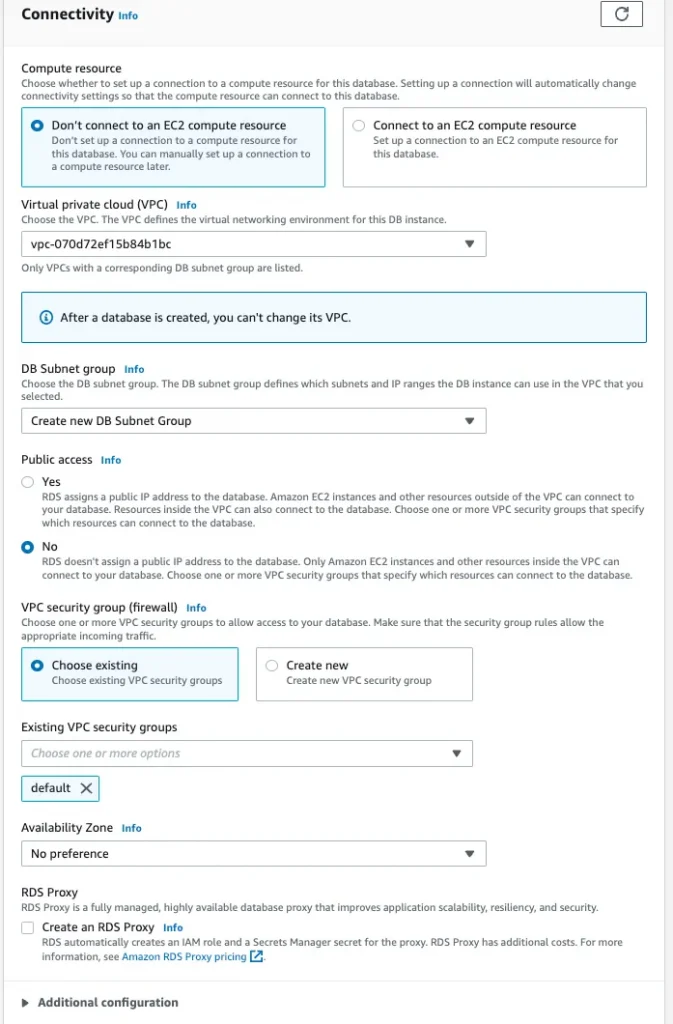
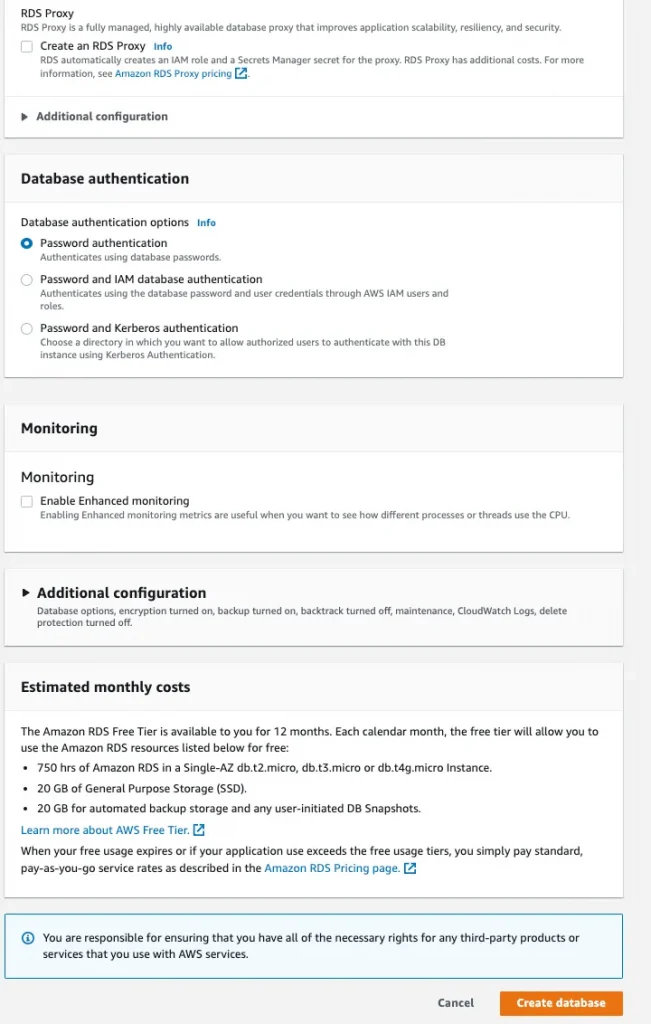
Follow the below Steps for creating an AWS RDS instance:
- Database creation method
2. Template
3. Connectivity:
4. Database Authentication:
5. Copy the RDS instance endpoint:
Endpoint: aws-rds.ciukybaxmgck.us-east-1.rds.amazonaws.com
6. Dump the data to RDS.
Follow the below Steps for setting up DMS & starting the migration Job:
- Log in to AWS and configure your source database.
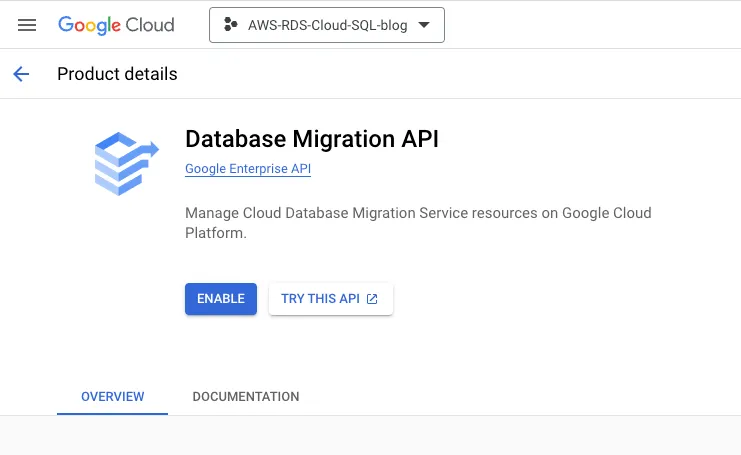
- Enable the Data Migration API:
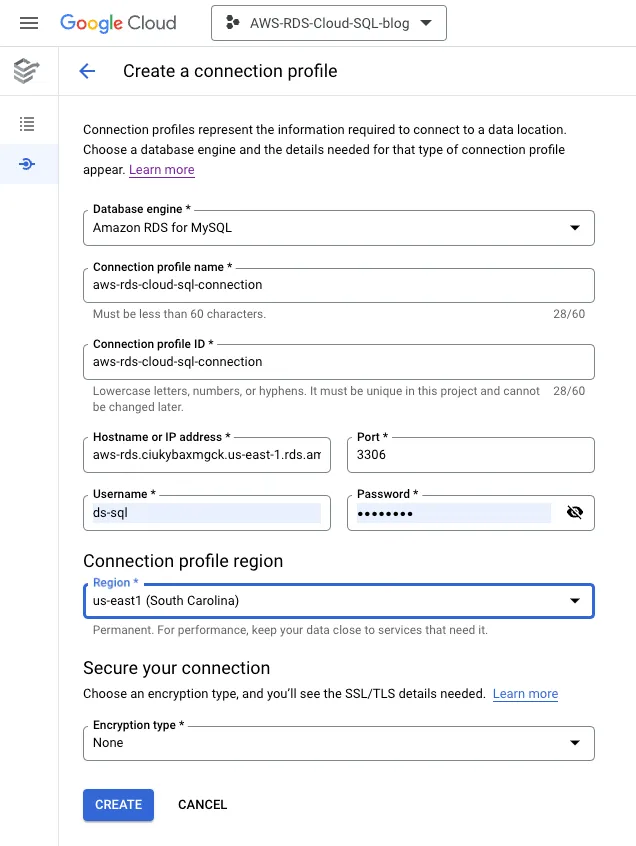
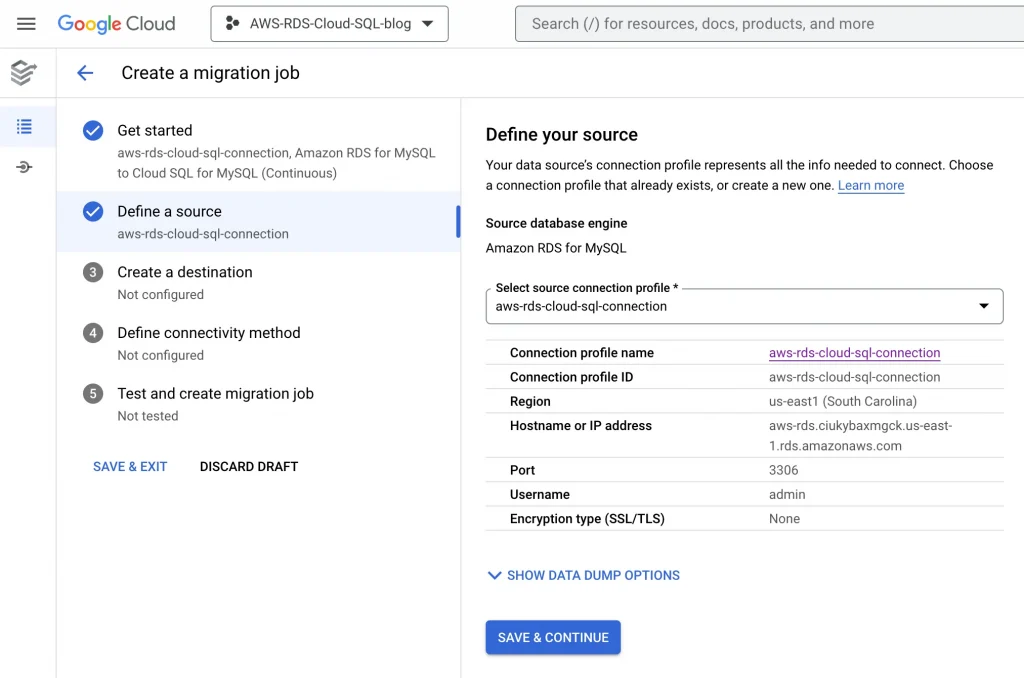
3. Create a connection profile in GCP: In the google cloud navigation menu, go to Data Migration Services. In DMS, click on connection profiles and create a new connection profile.
NOTE: Connection profile used to store the source database information. Using a connection profile, we will get connected to the source and create our migration jobs. Connection profiles reuse for multiple migration jobs.
- Source Database engine — Amazon RDS for MYSQL
- Hostname — Endpoint from Amazon RDS MYSQL instance
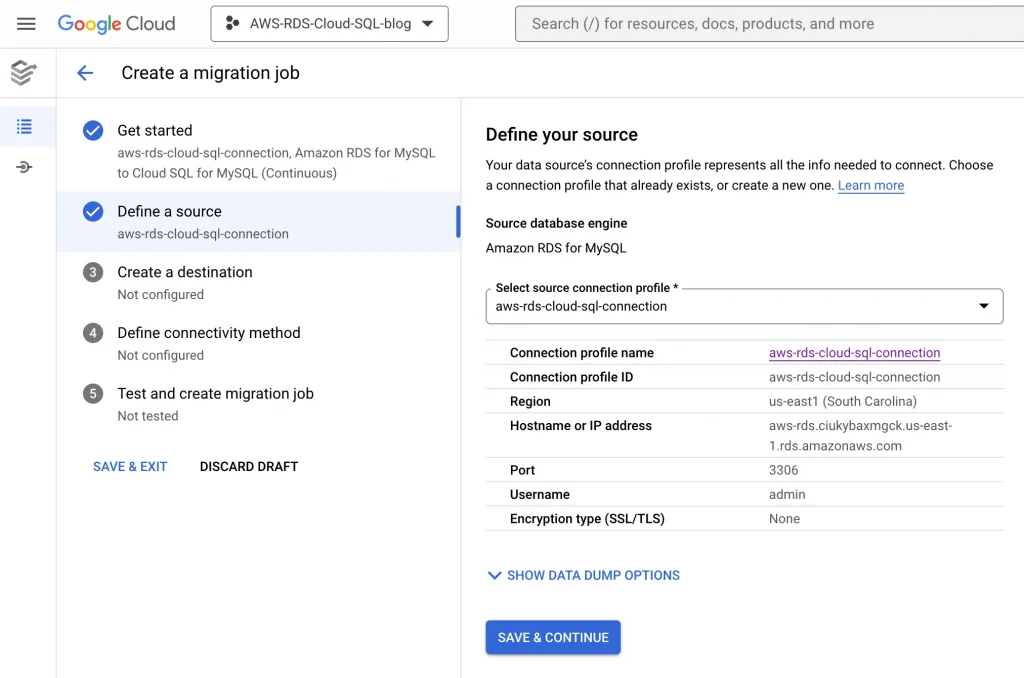
This menu will create a new connection profile named “aws-rds-cloud-sql-connection”
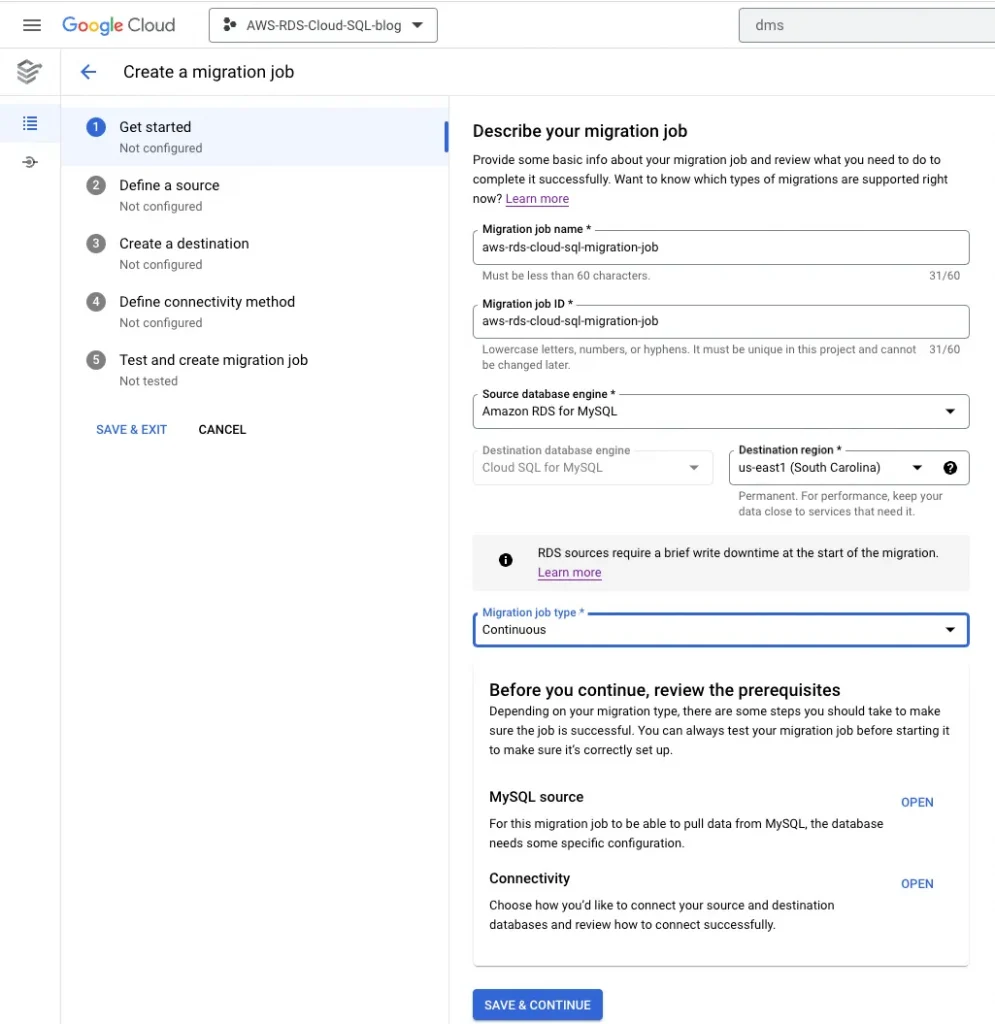
4. Creating a continuous/ one-time migration job
Create a new migration job →Define the Source Instance →Define the Destination → Define the Connection Method →
“aws-rds-cloud-sql-migration-job”
5. Define source:
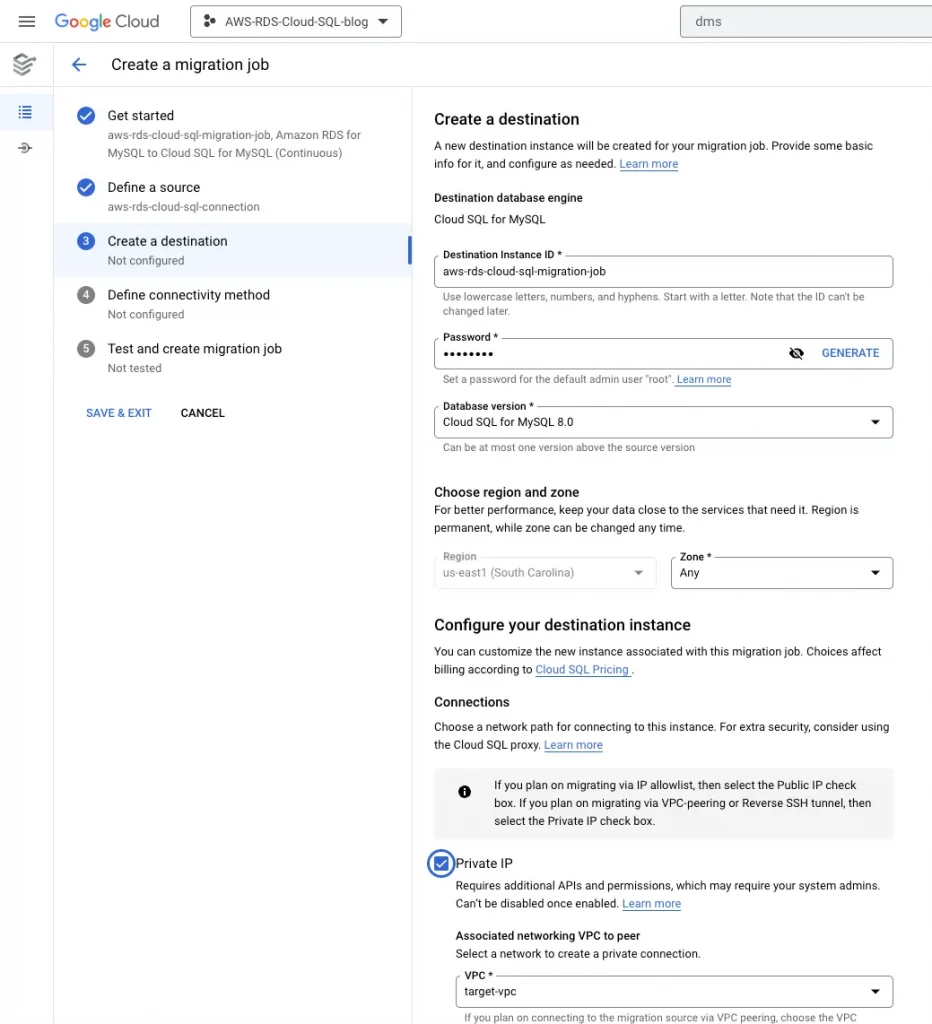
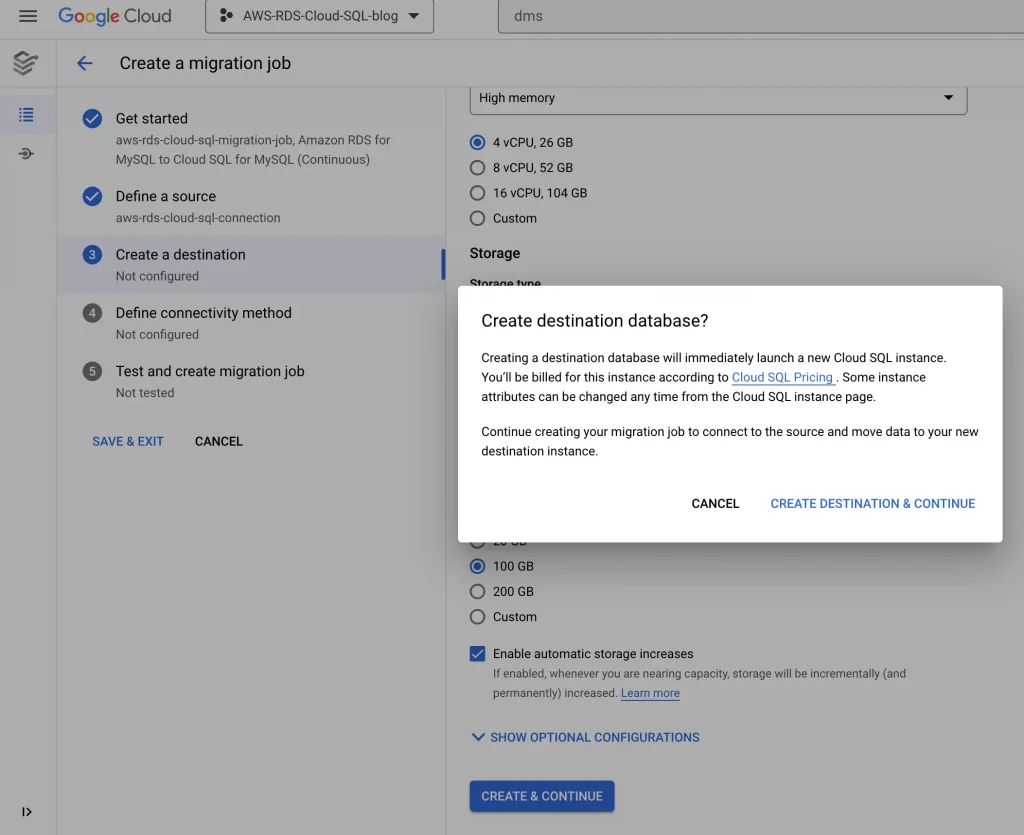
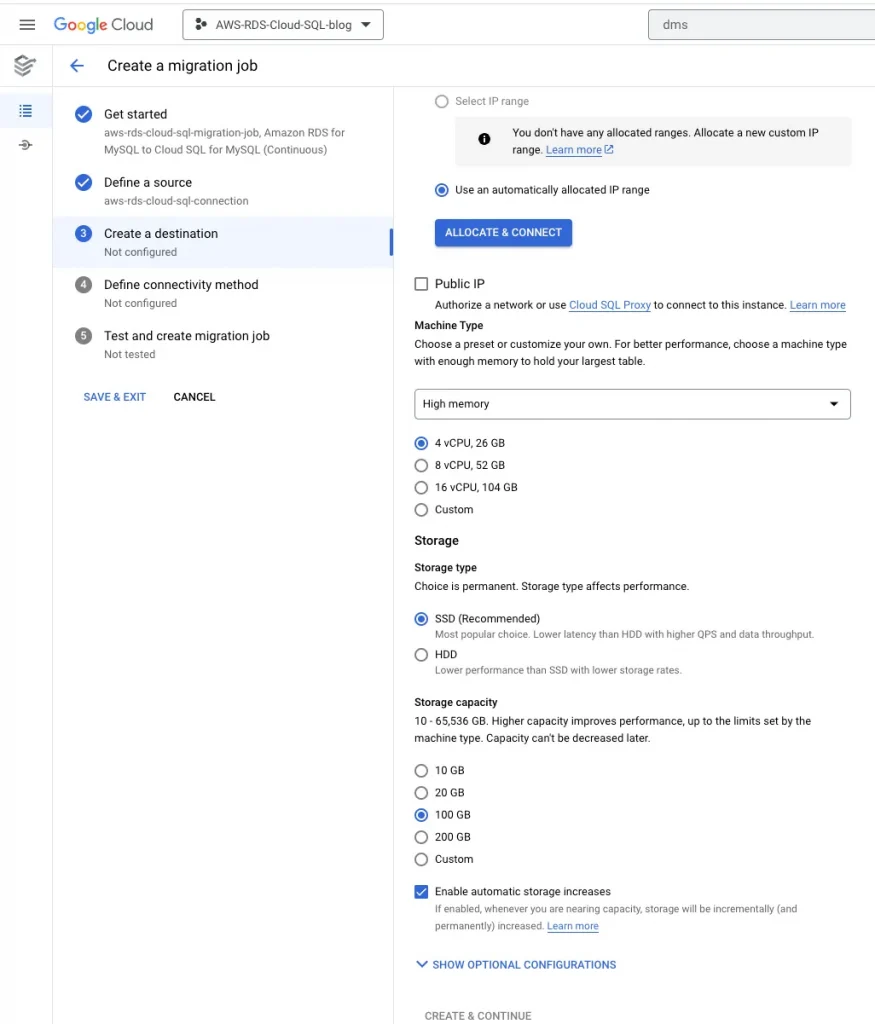
6. Create a destination:
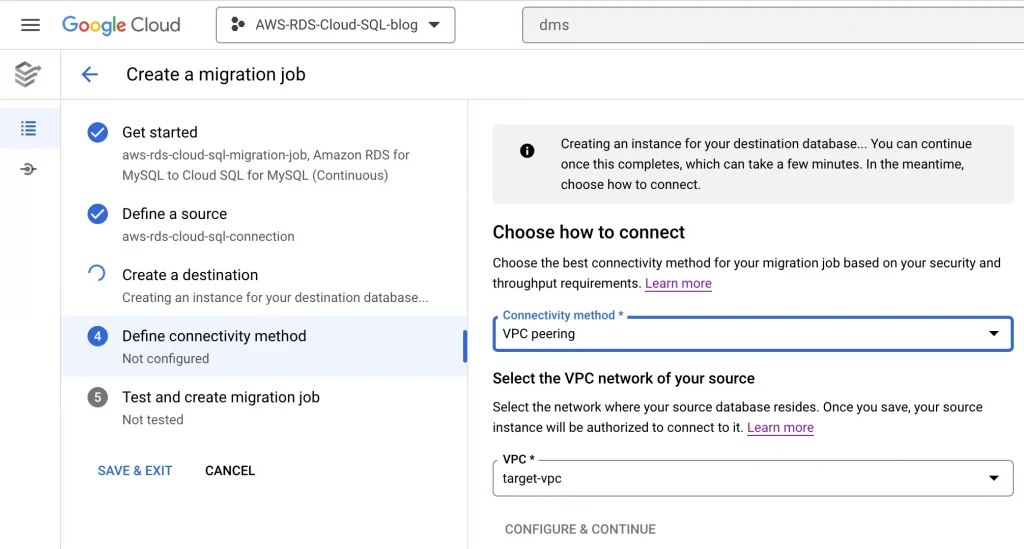
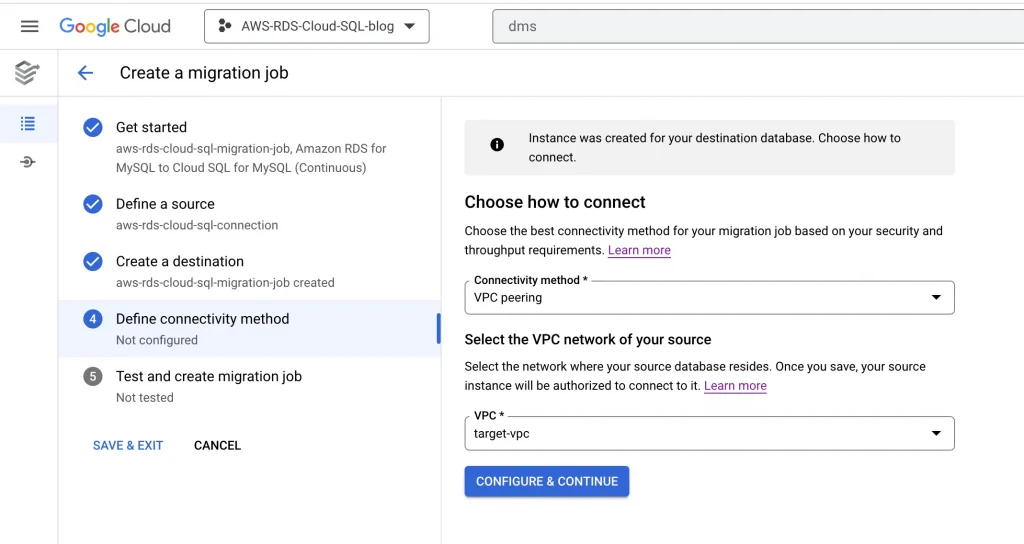
7. Define Connectivity Method:
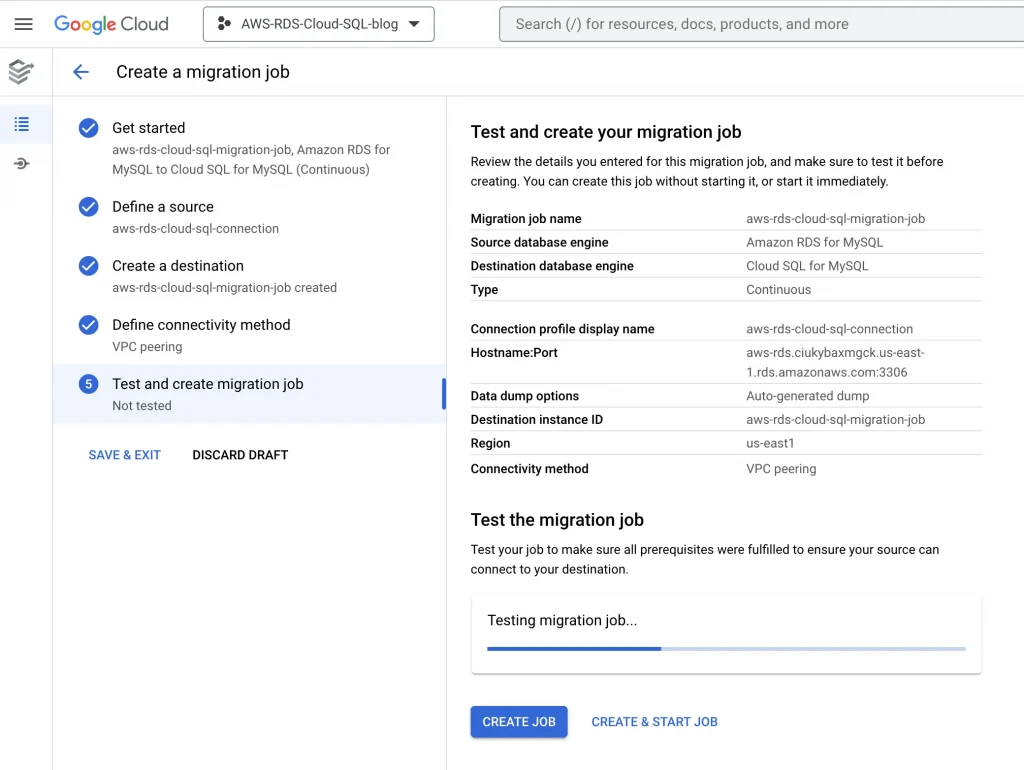
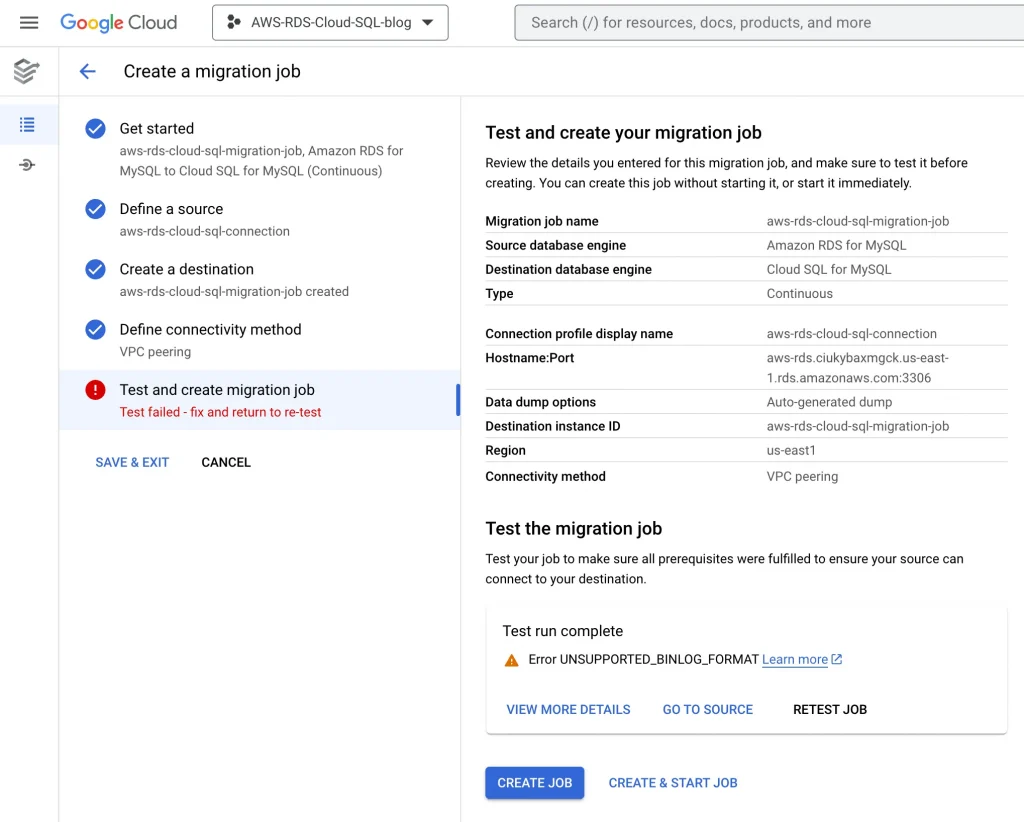
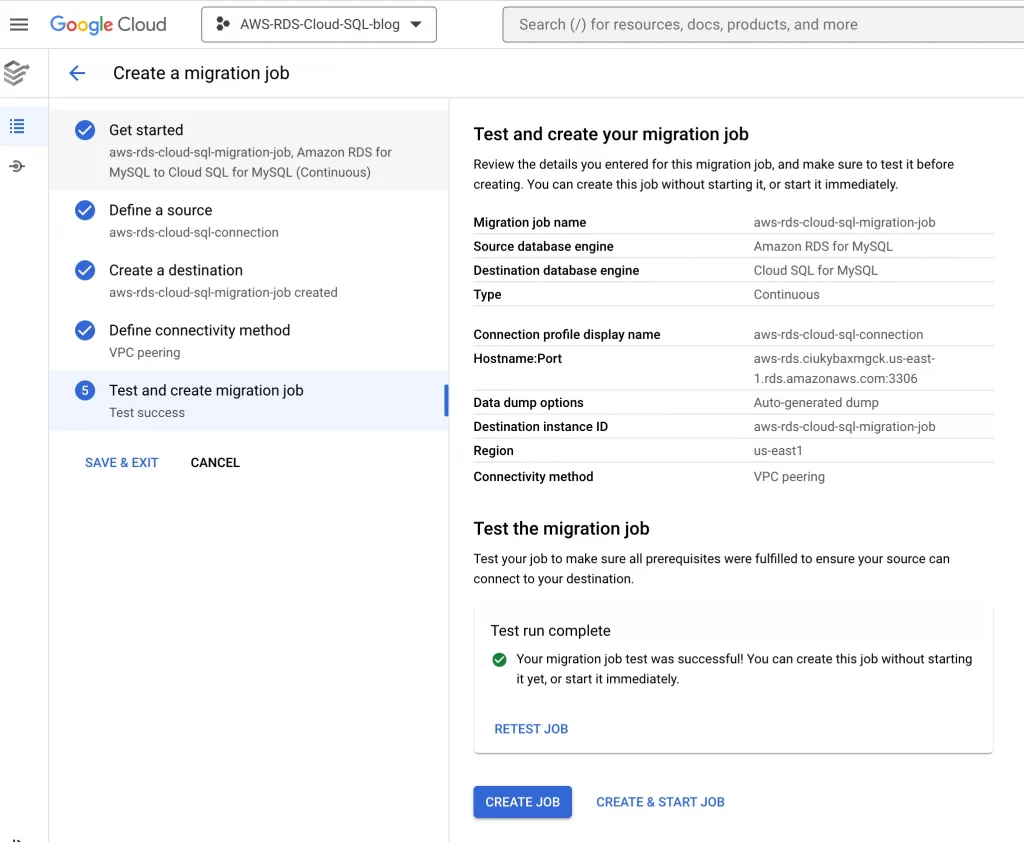
8. Test the migration job, it will get failed because we haven’t configured the firewall & route yet:
Allow Firewall from both the side AWS & GCP for Cloud SQL:
Perform the below steps on GCP side:
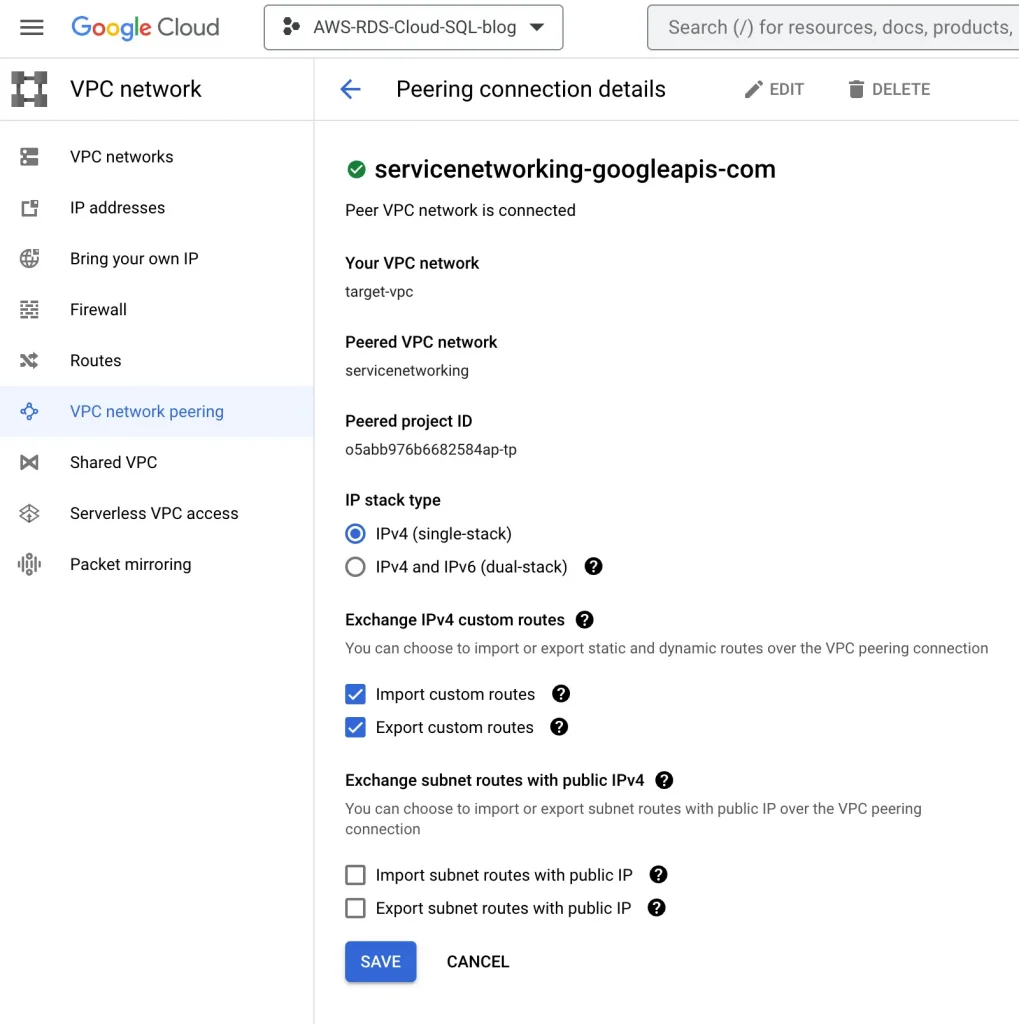
Edit this VPC peering and check Import Custom Routes and Export Custom Routes in the VPC Peering connection details, and click SAVE.
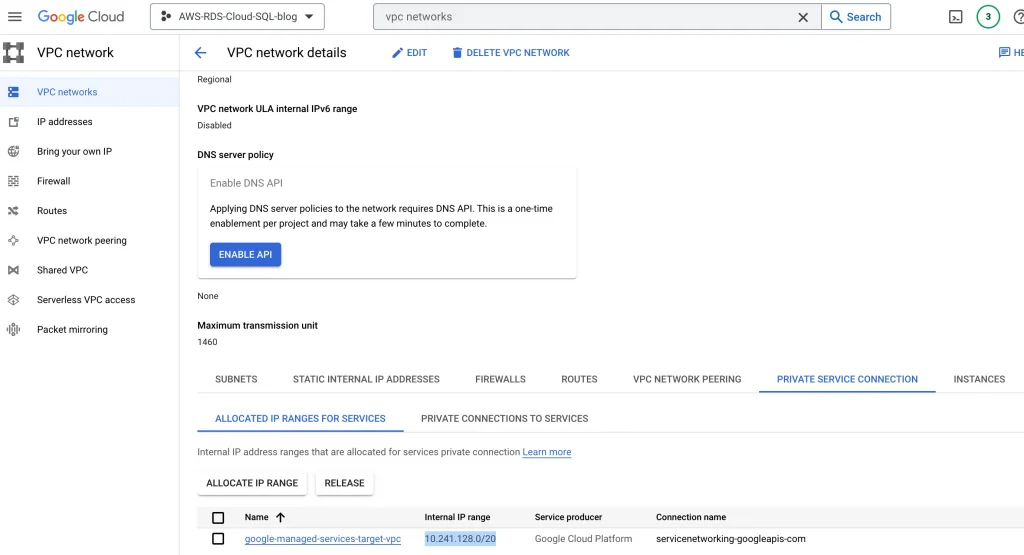
Copy internal ip ranges of google managed Cloud SQL:
Internal IP ranges for Cloud SQL: 10.241.128.0/20 (Need this ip ranges to allow in AWS security group)
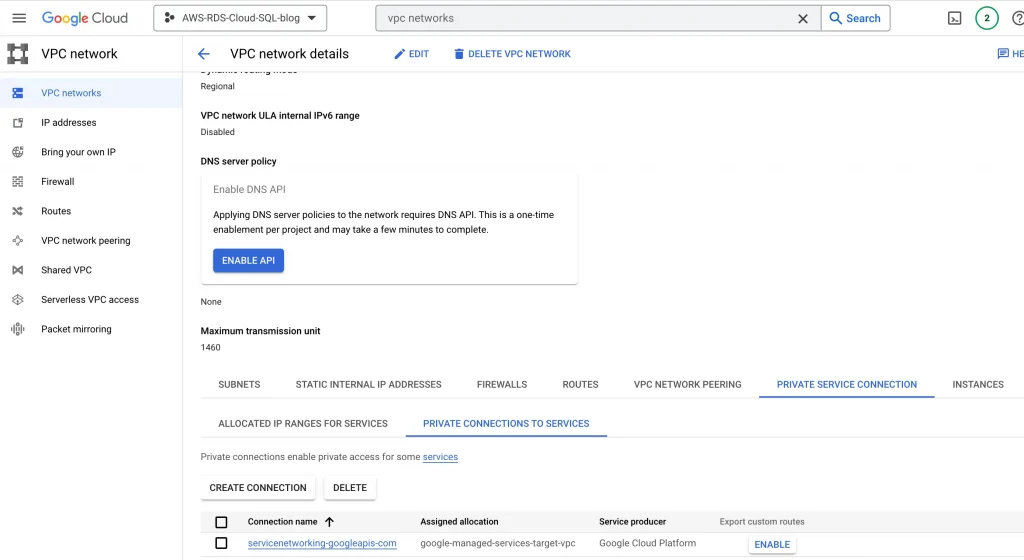
Enable custom routes for private connection:
Search for VPC in console → Private Service Connection → Private connection to Services → Export custom routes
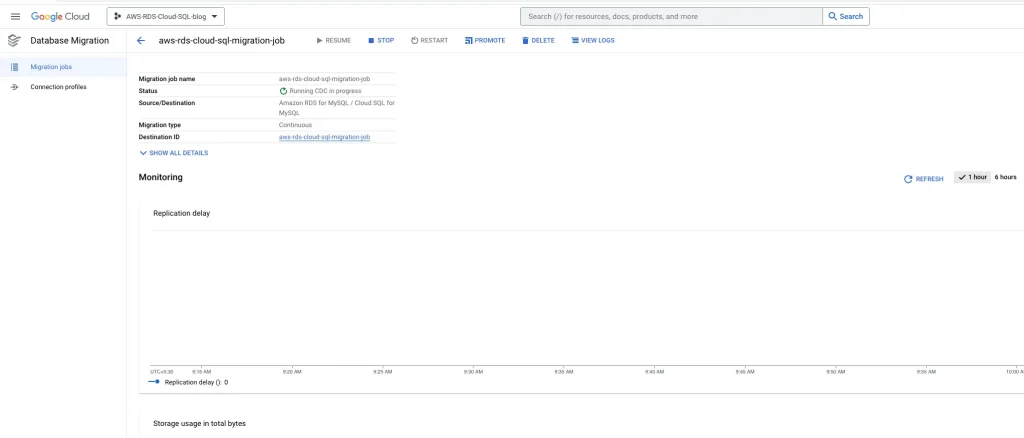
9. Create & Start Job
Perform the below steps on AWS side:
Verify the routes:
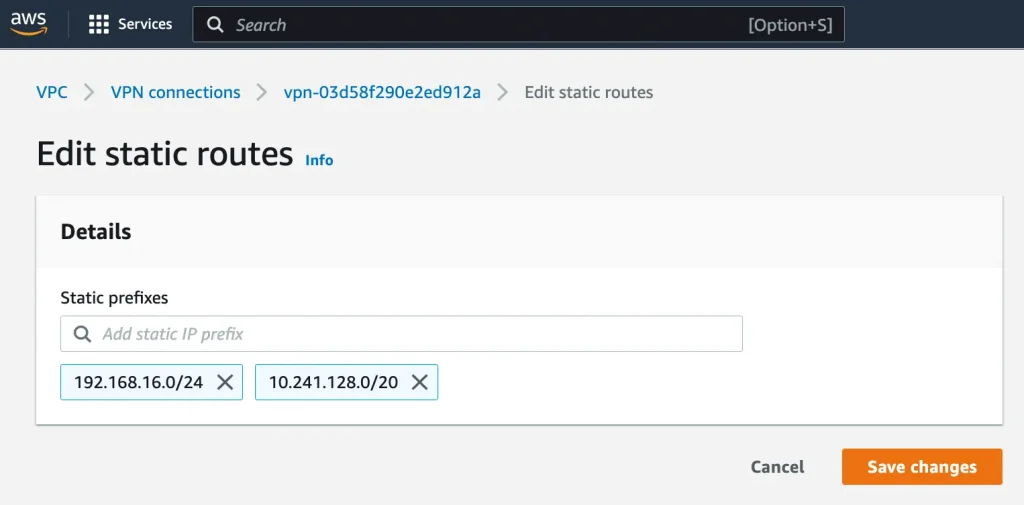
Update static route for Cloud SQL:
Site-to-Site VPN connections → Static routes → Edit routes
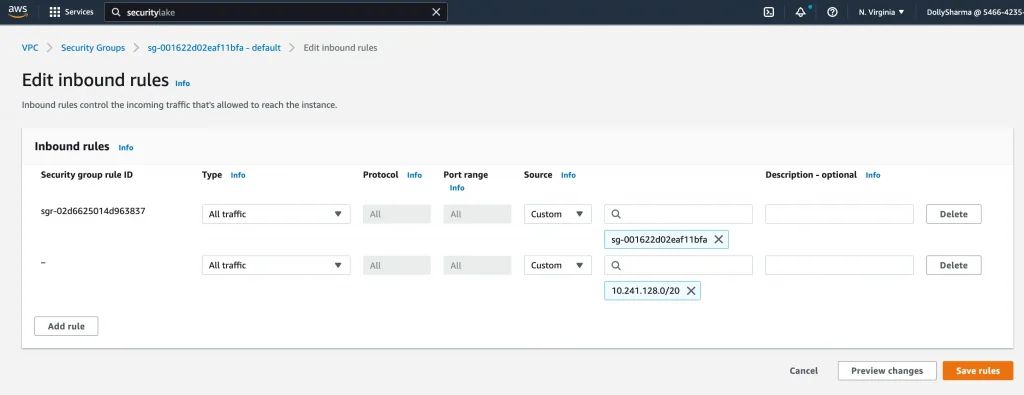
Update AWS Security group for Cloud SQL internal IP ranges(10.241.128.0/20):
VPC → Security Group → Edit inbound rules
8. Test the migration job once again after making changes to the firewall:
10. Change the BINLOG_FORMAT from Mixed to Row in source database(AWS RDS).
11. Test the migration job once again after making changes to source database:

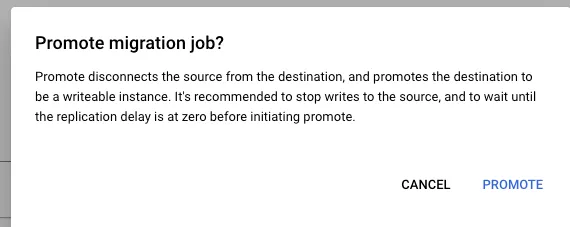
Promote the database:
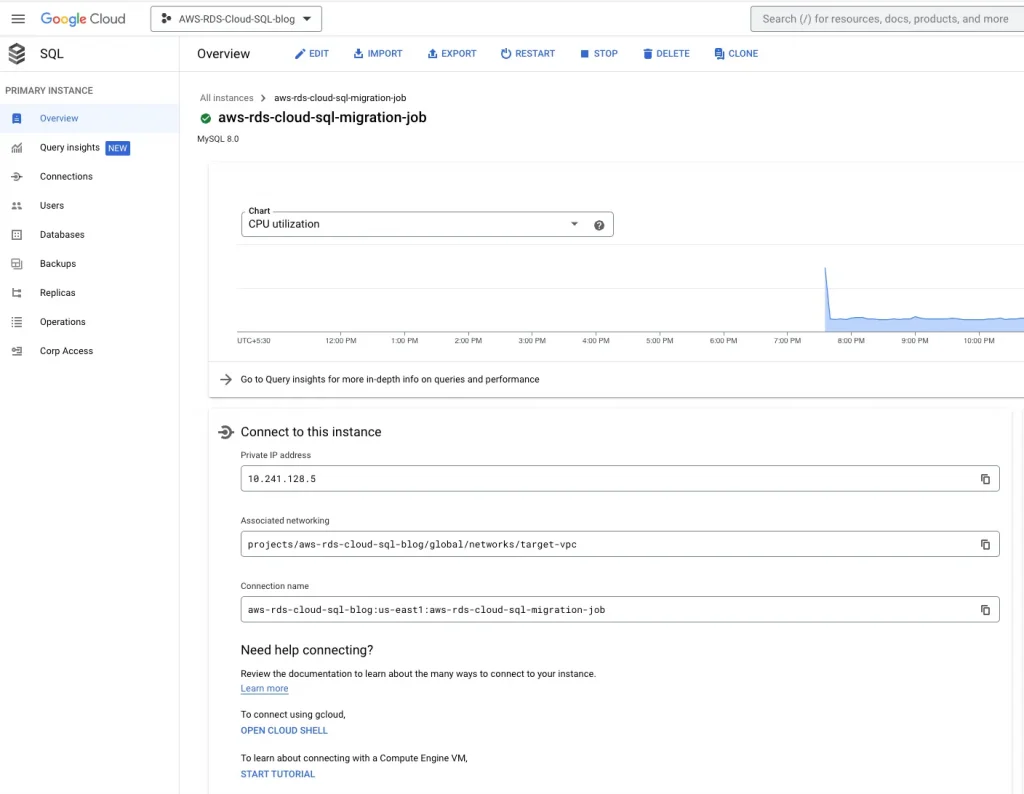
Validation:
Login to Cloud SQL & validate the data:
The original article published on Medium.


